April 28, 2011

For You...Mom - Tombow Guest Artist Tutorial (Day 4 of 4)

This is my final tutorial project for Tombow.  It has been a pleasure and honor "guesting" for them and using all their wonderful products.  Be sure to visit their blog.  Their design team has wonderful projects!


I thought this would be a cute tag to attach to flowers or a perennial plant given to mom on Mother's Day.  A little special twist with a vellum overlay on the skirt.


Stamp girl with flowers, “for you” and “mom” with black pigment ink and heat emboss with clear powder on white cardstock.  Working DTP (direct-to-paper) add a highlighted rectangle over the sentiment with Tombow Dual Brush Pen #090.  Add color to the remaining image, but do not worry about blending or highlights as there will be attachments added on top.  Set aside.  


Stamp the girl with flowers on watercolor paper with black pigment ink and heat emboss with clear powder.


Color and trim the image. 
Skin tones: 800, 723
Hair:  090, 912, 991
Flower Pot: 133, 158, 912
Roses:  133, 158, 725, 755
Dress:  443, 452


To create an overlay for the skirt, ink the dress portion of the image with black pigment ink and stamp on vellum.  Heat emboss with clear powder.  Color the reverse side of the stamped image with Tombow Dual Brush Pen #443.  Trim the skirt as shown.

Using the stamped image on the white cardstock as a guide, align and attach the trimmed watercolor images on top.  Use Tombow Mono Aqua Liquid Glue under all parts except the flower pot and roses.  Under these two portions place a Tombow 3D Foam Tab.  Hint:  For a slightly less elevated look, cut the thickness of one tab in half, attach to the image and then “stamp” adhesive on the exposed cut portion with the Tombow Permanent Adhesive Stamp Runner.  The vellum skirt was attached with a small portion of Tombow Mono Liquid Adhesive placed at the waist of the dress.


The fine-tip ends of Tombow’s Dual Brush Pens are great for adding tiny doodle dots.  To hide the raw ends of the ribbon, adhere the decorative loop with Tombow’s Permanent Adhesive Stamp Runner before attaching the remaining artwork.


Mat the artwork with colored cardstock and attach to the scalloped base with Tombow 3D Foam Tabs.

Thank you so much for visiting this week.  Tomorrow I am traveling to Montreal and will be teaching at Bonnidee over the weekend.  I am very excited to meet and create with other fellow rubber stamping enthusiasts.

I would also like to thank Jill Foster (Inspired By) for so generously sharing my artwork alongside her beautiful creations all this week.  You can view all her posts here: Monday, Tuesday, Wednesday, Thursday and Friday.

On Monday, I will have a Penny Black tutorial featuring "Nature's Day" from their new Touch of Whimsy catalog.

Have a great weekend,
Elizabeth

Supplies:
 
Penny Black Mix & Match Cardstock:  Sea Breeze 08-002, Rose Garden 14-002
Tombow Dual Brush Pens:  090, 133, 158, 452, 443, 723, 725, 755, 800, 912, 991, N15
Spellbinders Scalloped Rectangle Die
American Crafts Ribbon
Watercolor Paper
Black Pigment Ink
Clear Embossing Powder
Paintbrush
Heat Tool


April 27, 2011

Thinking of You - Tombow Guest Artist Tutorial (Day 3 of 4)

Today is day three of my guest artist tutorials for Tombow. 


This card has a fun and quick way to make your own "shadow" stamps.


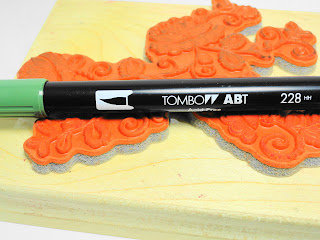
To create a background stamp, cut a piece of Fun Foam to the desired size and attach it to an acrylic block with Tombow Removable Adhesive.    


Color the foam with a Dual Tip Brush Marker and slightly blend the ink with your finger tip leaving a bit of the foam uncolored in the center.  “Huff” on the ink and stamp.  To blend the image, lightly smooth the impression with a damp paintbrush.


Stamp the flower and sentiment with black dye ink.  Color the flower with a combination of DTP (direct-to-paper) and Transfer methods.


For the background pattern, ink the image with Tombow Marker #228 and stamp on olive cardstock.  Repeat the same steps for a second impression.  If a slightly softer second impression is desired, do not re-apply the marker color, but simply “huff” on the stamp after the first impression has been completed to re-activate the remaining ink.


Trim the stamped cardstock with decorative scissors and adhere to a white, top-folded card with Tombow Dot Adhesive Stamp Runner.

Layer the stamped image with colored cardstocks and attach to the front of the prepared card with Tombow 3D Foam Tabs.


To create a fun embellishment, attach a Tombow Power Adhesive Tab to the card and remove the protective backing.  Dust the exposed “sticky” portion of the tab with crystal glitter.  Rub the glitter into the sides and top of the tab.  Tap off the excess glitter and dust with a soft brush.

My final project for the week will be posted tomorrow and it is a little something for Mother's Day.

Have a great day,
Elizabeth


Supplies:

Penny Black Mix & Match Cardstock:  Olive Grove 04-001, Periwinkle 11-003, Fuchsia Fantasies 13-003
Tombow Dual Brush Pens:  055, 133, 173, 228, 685, 703, 755
Other Materials:
Craft Fun Foam
Black Dye Ink
Crystal Glitter
Paintbrush
Decorative Trimming Scissors


April 26, 2011

Flower Magnet - Tombow Guest Artist Tutorial (Day 2 of 4)

Welcome back for my second Tombow Guest Artist tutorial.

Today I will be transforming Penny Black's "Sparkle" flower into a magnet.


Stamp flower twice with black pigment ink on watercolor paper and heat emboss with clear powder.  Trim one complete flower and the center of the second flower.


Color images by applying marker ink to a plastic palette and transferring with a damp paintbrush.  After the coloring has been completed, run a black (N15) dual brush pen along the cut edges.


Stamp the flower on the white side of the fuchsia cardstock and trim. 

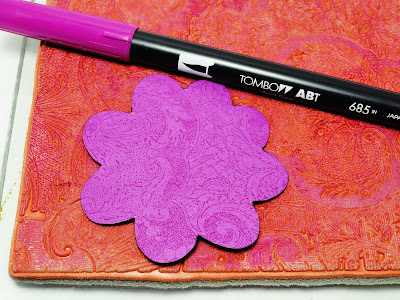
Turn the flower over and stamp the decorative background by applying ink from the marker (685) directly to the rubber stamp.  Lightly “huff” on the ink, stamp the image and trim.

Lay the trimmed flower fuchsia side down and use as a guide to align the water colored flower on top.  Apply adhesive from the Stamp Runner and adhere the two images together.

Apply 3D Foam Tabs to the center embellishment and attach to the flower.

Add dots of adhesive from the Tombow Glue Pen to the center of the flower and sprinkle with crystal glitter.  Tap off excess glitter.


Attach a Power Adhesive Tab to a magnet.


Attach the magnet to the back of the flower.


Create decorative note paper by inking the decorative background stamp with a Tombow Dual Brush Pen and stamp on light-weight cardstock.

Tomorrow I will have a "Thinking of You" greeting showing how to make your own shadow blocks in the third (of four) Tombow Guest Designer Tutorials.

Thank you for visiting,
Elizabeth

Supplies:

Penny Black "Mix & Match" Cardstock:  Fuchsia Fantasies 13-003

Tombow Dual Brush Pens:  026, 055, 685, 725, 835, 985, N15

Other Materials:
Watercolor Paper
Black Pigment Ink
Clear Embossing Powder
Crystal Glitter
Magnet
Heat Tool
Paintbrush
Scissors

April 25, 2011

Hello Friend - Tombow Guest ArtistTutorial (Day 1 of 4)

Hello Friends!

This week I am excited to share with you stepped-out projects that I created for my guest designing appearance at Tombow.


Since I have lots to share, let's jump right in......(I have a special announcement too!)


Stamp the image with black pigment ink on watercolor paper and heat emboss with clear powder.  Apply Tombow Dual Pen #912 using the direct-to-paper method.   


Scribble color from Tombow Dual Brush Pens 055, 947 and 985 on a plastic palette.  Lift the colors from the palette with a damp paintbrush and begin transferring the colors to the image.


When applying color, blend some areas and leave others uncolored.  This will allow room for future blending as well as additional contrast to the overall image.


Add dots of Tombow Dual Brush Penn #899 (DTP/direct-to-paper) to the perimeter of the cat’s fur and areas where dark contrast is desired.  Blend just enough to combine the color into the image, but do not blend and cover the softer, lighter colored areas.


Build the color of the image by using the plastic palette transfer method and add Tombow Dual Brush Pen colors 899 and 985.


When the image is dry, add Tombow Dual Brush Pen colors #703 and #743 to the cat’s ears, nose and cheeks.  If you find the cheeks appear too dark, you can soften the color by lightly transferring a small amount of Tombow Dual Brush Pen #712 over the top. 

Trim the image and set aside.

Stamp two additional sets of balloons on watercolor paper and heat emboss with clear powder.  For a subtle polka dot texture, apply Tombow Mono Aqua Liquid Glue to the balloons on the left and right of one full image and to the center balloon on the second image.


Let the glue dry.  Color the balloons with Tombow Dual Brush Pens 856, 055, 985 and 535.  When dry, cut around one full set of balloons and the middle balloon from the second stamped impression.


Stamp cat and sentiment on white cardstock with black pigment ink and heat emboss with clear powder.  To create a sky halo around the cat, use both DTP and Plastic Transfer methods to apply Tombow Dual Brush Pen #452.


Using the stamped image on the white cardstock as a guide, adhere the trimmed images with Tombow Mono Aqua Liquid Glue.


Cut a Tombow 3D Tab in half to decrease the thickness and apply to the back of the individual trimmed balloon.  Using the “tab” application feature on the Tombow Permanent Stamp Runner, “stamp” adhesive on the exposed cut sides of the 3D tabs.  Adhere the balloon as shown.  To enhance the dimensional dots on the balloons, apply a second coat of Tombow Mono Aqua Liquid Adhesive over the dots.


Layering the colored cardstocks is quick and easy with the Tombow Permanent Adhesive Stamp Runner.

Tomorrow I will be creating a decorative magnet.

For my special announcement - Recently I was asked by the extremely talented Jill Foster of Inspired By if she could feature some of my artwork as inspiration on her beautiful blog.  Not only am I extremely flattered and honored, but I'm so curious to see her "visions".  I hope you join me as I pop over all this week to take a peek.

Thank you so much for stopping by.

Elizabeth 


Supplies:
Penny Black Stamps:  Hello Friend 30-069
Penny Black “Mix & Match” Cardstock:  Fall Festival 16-003, Clear Skies 10-002
Tombow Dual Brush Pens:  055, 452, 535, 703, 743, 856, 899, 912, 947, 985  

Other Materials:
Watercolor Paper
Black Pigment Ink
Clear Embossing Powder
Paintbrush
Heat Tool
Scissors


April 21, 2011

Special Friends

To finish my design week on the Penny Black Blog, I have a colorful bouquet.  


Penny Black's Mix & Match cardstocks not only make coordinating colors and layers easy, but the one-sided color feature also gives you fantastic results for sanding techniques.

The base of this card was made from the darkest shade of Clear Skies and the lightest shade was used for the background paper stamped with Delicate Pattern in Majestic Blue VersaFine.


The bouquet from "To You" was colored with Copics and then trimmed.  Extra flowers from an additional stamped image were added on top for dimension.  Stickles and a sheer green ribbon were added for embellishment.  

To balance the design, a few horizontal dry-embossed lines were added to the sentiment frame before it was matted with purple cardstock.

It has been a wonderful week sharing my designs on the Penny Black Blog.  Don't forget to enter your designs for the "thank you" challenge for the chance to win Penny Black stamps! (Click here for details)

Beginning on Monday, I will be sharing my Tombow Guest Designer tutorial projects.

Thank you for your wonderful comments and visits.

Happy Easter,
Elizabeth
Penny Black “Mix & Match” Cardstock: Storm 01-001, Clear Skies 10-001, 10-003, Fuchsia Fantasies 13-003
Tsukineko: Onyx Black VersaFine, Majestic Blue VersaFine
Copic Markers
Ranger: Waterfall, Orange Peel, Stardust, Fruit Punch Stickles
Offray: Sheer Green Ribbon
3M Scotch: Dimensional Foam Tape
 

April 20, 2011

Proud As A Peacock

It's Day Three of my design week on the Penny Black Blog

When I first saw these two images, this design pairing them together instantly came to mind.  


For the base of the card, “Feathers” was stamped in silver ink and heat embossed with Sticky Stuff embossing powder.  While the powder was tacky, Angel Dust glitter was sprinkled on top and the excess tapped off.  I love the backdrop this provided for the focal image of the card.

The peacock is what I might call a “concoction” of color.  Luckily I kept notes as I went because I kept adding inks and pens until I hit the look I wanted.


To start, the stamp was randomly colored with the Tombow markers listed below and then I “huffed” on the ink before making the impression on the white cardstock.  Before playing with the image too much, I “fussy” cut it.  This made it easier to tap on Turquoise Gem ink here and there to get a mottled effect.   Random black and white dots helped with the illusion of feathers and then a “smear” of the Stardust gel pen added a slight iridescent sparkle.

So as to not overpower the colorful peacock, I only added a small strip of corresponding colors just below the elevated sentiment.


To make this narrow band, I started with a scrap piece of white cardstock and glued 1/8-inch strips of colored cardstock vertically along the length.  A small portion was cut away and glued to the back of the matted image.  I always keep the leftover pieces as they are great to add as accents to the inside of the card or an envelope.

Tomorrow I will have a "special friend" card for the last day of my Penny Black design week.

Thank you for visiting,
Elizabeth


Supplies:
Penny Black “Mix & Match” Cardstock:  Storm 01-001, 01-003, Blue Lagoon 09-001, 09-003, Fuchsia Fantasies 13-003
Penny Black Online Store
Tsukineko: Onyx Black VersaFine, Silver VersaColor, Turquoise Gem VersaMagic
Tombow: Dual Brush Pens:  443, 452, 555, 685
Sakura: White Gelly Pen, Stardust Gelly Pen, Black Micron Pen
Judi Kins: Sticky Stuff Embossing Powder
Art Glitter:  Angel Dust

April 19, 2011

Congratulations

Welcome to my second day of designing for the Penny Black Blog

This colorful congratulatory card requires no coloring!  I kept the colors and design clean and simple so it could be used for a variety of occasions.


These bright star bursts were made by stamping the image with black ink on various colors of Penny Black’s Mix & Match Cardstock.  A circle punch (used upside down for alignment) made cutting symmetrical circles quick and easy.

Spanish Moss VersaFine is a great match for the light shade of Spring Meadow cardstock used here with the Paisley Outline.  After matting it with dark green, it was elevated with dimensional foam on the front of the card.

A fun sentiment and crystal gems complete the card.

I will be back tomorrow with a card that I am proud to say uses feathers. (Hints in blue.)

Smiles,
Elizabeth

Supplies
Penny Black “Mix & Match” Cardstock: Storm 01-001, Spring Meadow 06-001, 06-003, Summer Sun 17-001, 17-003, Clear Skies 10-002, Fuchsia Fantasies 13-002
Tsukineko: Onyx Black VersaFine, Spanish Moss VersaFine
Ranger: Detail Clear Embossing Powder
¾” Circle Punch
3M Scotch: Dimensional Foam Tape
Crystal Gems

April 18, 2011

Thank You

Hello Everyone.  This week I am designing for the Penny Black Blog and I am starting out with a card for their challenge theme of "thank you".


“Floral Thank You” was stamped on watercolor paper with black ink and heat embossed with clear powder.  You can eliminate the “fussy” cutting by stamping directly onto the white cardstock, but I really liked the added thickness the letters had after they were trimmed. 

The technique for the small green strip is not really new, but it has been awhile since I used it and now I remember how much I like the effect.  After stamping the petals of the flowers in green ink and heat embossing with clear powder, they were colored with a white Prismacolor pencil.  Typically I reach for a darker color, but in this instance I wanted a pattern that didn’t detract from the colorful block letters.

There is dimensional foam between the dark blue base and the light  blue cardstock which "popped" it up and added a little extra room for the twine to be wrapped around the left edge.

A special "thank you" to you for stopping by.

I will have another new card tomorrow.  Hint:  No coloring required!

Elizabeth

Supplies: 
Penny Black “Mix & Match” Cardstock:  Clear Skies 10-001, 10-003, Fern Green 05-001
Penny Black Online Store
Canson: Watercolor Paper
Tsukineko: Onyx Black VersaFine, Spanish Moss VersaFine
Tombow: Dual Brush Pens
Prismacolor Pencil: White
3M Scotch: Dimensional Foam Tape
Sakura: Black Micron Pen
Twine

April 15, 2011

Spring Charm

Today’s crafting recipe is a couple parts rubber stamping with a dash of stickers and a pinch of distressing. 


(All stamps and stickers by Penny Black)


Below each photograph is the “recipe” for each card which includes how to create 3-D effects with stickers, make custom gold cardstock, “tapestry” stamping and altering brads.  At the end of the post, I have listed all the supplies for an at-a-glance reference. 


To You From Me 

  • Create a 3 x 5 card with a top fold from tan cardstock.  (Fold so the tan is on the inside/white on the outside.)
  • Stamp Letter Background diagonally across the top 2/3 rds. of the card with Peeled Paint Distress Ink.
  • Randomly add stamped postage marks with Vintage Sepia Ink.
  • Highlight with Peeled Paint and Worn Lipstick.
  • Spray the front of the card with Sparkle Sheer Shimmer Spritz and set aside.
  • This card uses two Spring Charm sticker sheets.  Peel one full daisy sticker from the sheet and place on white cardstock and trim on the green border.
  • Stamp sentiment with Black StazOn.
  • Mat image with rectangles of gold and brown cardstocks and adhere to the front of the prepared card with dimensional foam.  (The gold cardstock was created by rubbing Gold Metallic StazOn on the edges of white cardstock.)
  • Trim the daisy bloom from the second sheet of stickers.  Remove the backing and place dimensional foam on the back.  Dust the other exposed sticky areas with baby powder.  Remove the backing from the foam and attach to the card.
  • Accent the center of the daisy with black and yellow Glaze Pens and while wet, sprinkle with micro fine crystal glitter.
  • Accent the dragonfly wings with Crystal stickles.

Inside:  Distress edges with Vintage Photo.  Stamp a small portion of  “Words Like Flowers” along the edge with Vintage Sepia and heat emboss with clear powder.

Friends

  • Create a 3 ¼ x 4 ½ card with a top fold from cream cardstock.  Ink edges with Peeled Paint and Worn Lipstick.  Set aside.
  • Blend Peeled Paint, Dried Marigold and Worn Lipstick randomly across a 3 x 4 ¼-inch piece of white cardstock. 
  • Stamp leaf design with Vintage Sepia over the blended inks then spray the cardstock with Copper Sheer Shimmer Spritz.
  • Accent the leaves with black dots to create a “tapestry” design.
  • Add another layer of Peeled Paint, Worn Lipstick and Vintage Photo to create additional depth.
  • “Grunge” a piece of yellow ribbon with Vintage Photo ink and wrap around the left edge of the “tapestry” cardstock.
  • Attach to the front of the prepared card with dimensional foam.
  • Remove the sticker and place on white cardstock and trim even with the edges of the sticker.
  • Mat sticker with “grunged” white cardstock and black cardstock.
  • Stamp sentiment on a small “grunged” jewelry tag and attach to the matted artwork with a brad. (Color a silver brad with a Copic, pounce with VersaMark Watermark ink, sprinkle with Aged Mahogany embossing powder and heat set.)
  • Adhere the artwork to the front of the card on a slight angle using dimensional foam.
  • Lightly accent the flowers with Crystal Stickles.

Two of my favorite tips for working with stickers are:
1) Mount stickers to white cardstock and trim.  This gives the sticker a nice thickness which also makes it easier to center or mat onto other cardstocks. 
2) After removing a sticker image (or custom trimming one) placing dimensional foam on the back and then dusting the remaining exposed sticky area with baby powder or cornstarch.  This allows you to create dimensional embellishments.

Begining on Monday, I will be designing for the Penny Black Blog for four days!

Have a great weekend,
Elizabeth

Supplies:
Penny Black Stickers:  Spring Charm (10-210)
Penny Black "Mix & Match" Cardstock:  Storm 01-001, 01-003, Sticks & Stones 02-003
Tsukineko: Onyx Black VersaFine, Vintage Sepia VersaFine, Gold Metallic StazOn, Jet Black StazOn, VersaMark Watermark, Sparkle Sheer Shimmer Spritz, Copper Sheer Shimmer Spritz, Jumbo Sponge Daubers
Ranger: Worn Lipstick, Dried Marigold, Peeled Paint, Vintage Photo, Aged Mahogany Distress Embossing Powder, Crystal Stickles
American Crafts:  Yellow/White Checked Ribbon
Tombow:  Stamp Runner Permanent Adhesive
Sakura:  Yellow & Black Glaze Pens, Black Micron Pen
3M Scotch:  Dimensional Foam
Art Glitter:  Micro Fine Crystal
Avery:  Jewelry Tag
Silver Brad