Showing posts with label Autumn. Show all posts

October 11, 2013

Nature's Gift

I have always been enthralled with the beauty of fall leaves.  No two are alike and the color combinations are nothing short of spectacular.


Nature's Gift

As a child, I used to collect leaves, layer them between wax paper and newsprint, and then iron them to give them a waxy finish. This card is reminiscent of those times. 


Close Up

A maple leaf from Penny Black's Fancy Foliage was stamped in black pigment ink and heat embossed with clear powder.  Alternate layers of Dr. Ph Martin's watercolors and matte gel medium were applied to mimic a waxy finish. Additional highlighting was added with Faber-Castell PITT Artist Big Brush Pens.  


Gold Stitching

A small area was masked off on the front of the card and a soft background was created with Wheat VersaMagic ink and stamped with Letter Background.  For an added accent, metallic gold thread was stitched along the side.

Enjoy the colors of autumn,
Elizabeth 


Supplies:
Penny Black Stamps: Fancy Foliage 30-138 , Letter Background 1999L
Penny Black Mix & Match Cardstock: Storm 01-001
3M Scotch Dimensional Foam Tape
Dr. Ph. Martin's Hydrus Watercolors
Faber-Castell: PITT Artist Big Brush Pens
Imagine Crafts/Tsukineko:  Onyx Black VersaFine, Wheat VersaMagic, Clear Embossing Powder
Liquitex Matte Gel

September 20, 2013

The Colors of Fall

Welcoming the arrival of fall with autumnal colors.

The Colors of Fall
From masculine to autumnal to Halloween, there are endless card designs that you can create with this fabulously mysterious image. 


The glowing backdrop was created by masking off the edges of a rectangular piece of white cardstock and applying various Memento inks with sponge daubers.  Tip/Hint: Stamping the image after the removal of the masks allows the image to extend beyond the color block and adds visual interest.

Some simple matting and an antique button finish the design. 

Happy Fall,
Elizabeth

Supplies:
Penny Black:  It's Halloween 40-245
3M Scotch Dimensional Foam Tape
Imagine Crafts/Tsukineko: Memento Inks, Onyx Black VersaFine, Sponge Daubers
Other: Antique Button

May 24, 2013

Flower Conversion

"Re-bloom" your favorite flowers to make appearances throughout the year.

Bouquet of Good Wishes
Published in Scrap & Stamp Arts, June 2013.
Step-by-step instructions and a complete supply list are located on pages 36 & 37.

These summery flowers from Flowers Sweet were altered to create an autumn wreath.

Flowers Sweet
Image used in the project is circled in red.
Color adaptation and artful arrangement of your favorite florals will "bloom" designs for any season.  

Have a wonderful weekend,

Elizabeth

Supplies:
Penny Black Mix & Match Cardstock: Storm 01-001; Sticks & Stones 02-001, 02-002; Grand Canyon 03-002
Penny Black Vellum: Scroll White Embossed EP501


November 2, 2012

Decorative Napkin Ring (Tutorial)

A little touch of autumn flair for the holiday table with this decorative napkin ring using Penny Black's Foliage Fancy and Imagine Crafts/Tsukineko Sheet Metal.


Create this project in 8 quick steps!


Step 1:  Apply a thin coat of Matte GlazOn with a chisel tip
Brushstix to the metal sheet.  Let dry.


Step 2:  Stamp the solid leaf in Copper StazOn Metallic over the area of metal
that has been brushed with the Matte GlazOn.  Let dry.


Step 3:  Apply a thin coat of Matte GlazOn with the Brushstix
over the stamped image.  Let dry.


Step 4:  Stamp the detailed leaf in Forest Green StazOn
        directly on top of the solid leaf.  Let dry. 


Step 5:  Apply a thin coat of Creative Medium Vintage
          over the image with a Brushstix.  Let dry.


Step 6:  Trim the image with tin snips and peel away
the protective backing.


Step 7:  Create a ring with green florist wire.  Wrap copper wire around the ring
       to add a decorative touch as well as to secure the leaf to the ring.


Step 8:  Add soft bends to the design for visual interest.

Design Variations:  Autumn Wreath, Charms, Jewelry

A SPECIAL THANK YOU to Imagine Crafts/Tsukineko for providing INKd project sheets for this week’s autumn designs.  Enjoy these free downloadable and printable links: 

Decorative Napkin Ring (posted today) can be accessed “here
Thanks A Bunch (as seen “here”) can be accessed “here
Autumn Kindness (as seen “here”) can be accessed “here


Have a great weekend,
Elizabeth

Supplies:
Penny Black Stamps: Foliage Fancy (30-138)
Imagine Crafts/Tsukineko: Sheet Metal Postcard, Brushstix Chisel Tip, GlazOn Matte, Copper StazOn Metallic, Forest Green StazOn, Creative Medium Vintage
Other: Green Florist Wire, Copper Wire, Tin Snips


October 31, 2012

Autumn Kindness (Tutorial)

Another autumn design to share today combining Penny Black’s Foliage Fancy with Imagine Crafts/Tsukineko inks.


Here is how this card came to life...

Create a 3 3/8 x 5-inch card base from Sticks & Stones cardstock and accent the edges by running a Delicata Golden Glitz ink pad along the sides.  Set aside.

Cut a 2 7/8 x 4 ¼-inch piece of Storm cardstock and dry emboss a border around the outside edge.  Stamp the sentiment toward the bottom (leaving room for the leaf) in Onyx Black VersaFine and heat emboss with clear powder.

Add three brads below the sentiment and edge the sides of the cardstock with Delicata Golden Glitz. 

Mat with a 3 x 4 3/8-inch piece of Grand Canyon cardstock and adhere to the front of the prepared card with dimensional foam.

On a separate piece of Storm cardstock, stamp the leaf with Onyx Black VersaFine and heat emboss with Clear Embossing Powder.


Using Brushstixs, pull color from the individual segments of the Kaleidacolor Ink Pad and color the image.

Continue coloring, using a separate Brushstix for each color, until the desired shading has been achieved.

Trim the leaf and place on a protected surface.  Thoroughly shake to mix Copper Psst Sheer Shimmer Spritz.  Apply a few drops to an InkBlusher and lightly pounce onto the leaf.


Attach the leaf to the front of the prepared card above the sentiment with dimensional foam.

Design Variation:  Change the sentiment to a birthday greeting for a masculine card.
 
Coming soon….Penny Black’s Foliage Fancy combined with Imagine Crafts/Tsukineko Sheet Metal!

Thank you for stopping by,
Elizabeth

Supplies:
Penny Black Stamps: Foliage Fancy (30-138)
Penny Black Mix & Match Cardstock: Storm (01-001), Sticks & Stones (02-002), Grand Canyon (03-002)
Imagine Crafts/Tsukineko: Onyx Black VersaFine, Autumn Leaves Kaleidacolor, Delicata Golden Glitz, Copper Psst Sheer Shimmer Spritz, Brushstix Brush Tip #2, InkBlushers, Clear Embossing Powder
Other: Antique Mini Brads by Making Memories, Adhesives: Dimensional Foam & Double-Sided Tape, Heat Tool, Scissors, Scoring Tool

October 29, 2012

Thanks A Bunch (Tutorial)

Today’s card is inspired by the colorful leaves of the autumn season.


Incorporating a little coloring with a VersaMarker and heat embossing with clear powder, colors can be protected when shading occurs and also add textural sheen.


Step-By-Step Instructions
(This INKd Imagine Crafts project can also be downloaded or printed “here”)

Stamp Autumn Tree on white cardstock in Onyx Black VersaFine. 
While the ink is wet, sprinkle the image with clear embossing powder. 
Tap off the excess powder and heat set.


Color the image with Memento Markers.


Color the image with a VersaMarker.
While wet, sprinkle with clear embossing powder,
 tap off the excess powder and heat set.


Mask off a small rectangle over the tree with Eclipse Tape (or sticky notes).
Apply Bahama Blue Memento ink with a sponge dauber to the exposed window.


Remove the Eclipse Tape and stamp the sentiment in Onyx Black VersaFine.


Trim the stamped image to measure 3 ¼ x 4 ¾.
Stamp a ¼ x 4 ¾ piece of Grand Canyon cardstock
with the grass from Sweet Home in Espresso Truffle Memento ink.
Attach the strip to the back of the stamped panel on the right side so 1/8 of an inch
of the design overhangs the edge and the total piece measures 3 3/8 x 4 ¾.
Attach the artwork to the front of a Les Petites card base.
Use one of the leaves trimmed from the side for an embellishing accent.
 

May brightly colored leaves dance across your path today,
Elizabeth

Supplies:
Penny Black Mix & Match Cardstock: Storm (01-001), Grand Canyon (03-002)
Imagine Crafts/Tsukineko: Onyx Black VersaFine, Bahama Blue Memento, Espresso Truffle Memento, Memento Dual Tip Markers (PM: 100, 103, 200, 301, 302, 703, 704, 706, 800, 802), VersaMarker, Clear Embossing Powder, Sponge Dauber
Other: Judi Kins Eclipse Tape, Adhesive, Dimensional Foam, Heat Tool, Scissors

September 20, 2011

Autumn Kindness & 1st Blog-iversary

I would like to thank YOU for YOUR kindness!  Today marks my one-year blog-iversay!  It has been a wonderful and fun experience sharing my art and meeting so many fantastic artists through blogging.  I appreciate all your comments as you supported my artwork and the time you spent visiting with me in my studio. 
 

For this autumn thank you, Reverse Wonky Rectangles were used for the card base and layers.  Before removing the die from the water color paper, a variety of distress inks were applied to the exposed center frame.  Leaving the die frame in place, Paisley Outline was stamped on top with Vintage Sepia ink.  Don’t worry that the metal die is elevated and the stamped design does not fully reach the edges.  This creates a great fade-in for the pattern and another visual “level” within the inked space.  For highlights, random gel pen markings were added to the Paisley design.


Hand-pierced holes allowed the spacing and alignment for the sewing to be tailored to the shape.  Inked heavy-weight thread was then sewn around the design.  Laying the piece face up on a foam mat provided a soft surface to de-emboss around the stitching.  An embossing stylus or bone folder are great tools to use for tracing.


The sentiment is stamped on vellum with black pigment ink and heat embossed with clear powder.  The edges were torn before attaching the band across the rectangle.  (Hint:  Before wrapping vellum around a curved edge, trace the curve on the vellum with a stylus giving the paper a scored, curved line.  Then, as in sewing, from the end of the band cut one or two slits up to the scored line.  The slits will relieve the tension of the paper as it is wrapped around the curve and result in smoother wrap on the edge.)


The pot from Amaryllis was stamped twice on watercolor paper in black pigment ink and heat embossed with clear powder.  Color was added with Faber-Castell Pitt Pens.  While constructing the pot, the base image was curved and shaped creating side surfaces that would be flat for gluing.  A small piece of dimensional foam in the center of the pot (when attached to the card) helps maintain the shape.  The top of the pot was paper pieced for added dimension.  The flowers from Sun Days were created in the same manner and then “fussy” cut with scissors and a craft knife.

With sincere appreciation for all your kindness, smiles and hugs this past year....

Elizabeth

Supplies:
Penny Black Mix & Match Cardstock: Blue Lagoon 09-003
3M Scotch: Dimensional Foam Tape
Canson: 140 lb. Watercolor Paper
Faber-Castell: Pitt Artist Pen Big Brush (Orange Glaze #113, Deep Scarlet Red #219, Cobalt Turquoise #153, Light Cobalt Turquoise #154) 
Mark Richards: Amber Gemstones
Ranger: Antique Linen Distress, Vintage Photo Distress, Shabby Shutters Distress, Fired Brick Distress
Sakura: White Gel Pen
Spellbinders: Reverse Wonky Rectangle Nestabilities (S4-307)
Tsukineko: Vintage Sepia VersaFine, Onyx Black VersaFine, Delicata Golden Glitz Ink, Sponge Daubers, Clear Embossing Powder
Other: Heavy Carpet Thread, Needle, Vellum

September 5, 2011

BIG HUGS! (And An Alignment Tutorial)

Hugs are great!  I love giving them, getting them, and sending them in the mail……


Finished Size: 3 x 4

The background pattern was inked in both Crimson Red and Vintage Sepia VersaFine inks and stamped on a piece of coral reef cardstock that had been distressed with Crimson Red VersaFine.  By multi-inking the image, the stamped design appears less “flat” and has an interesting hue variance.  A bit of faux stitching around the perimeter coordinates with the sewing on the scarecrow.

Creating banners for a project usually means customizing the size of the flags to fit not only the design space, but also the size/font of the alphabet.

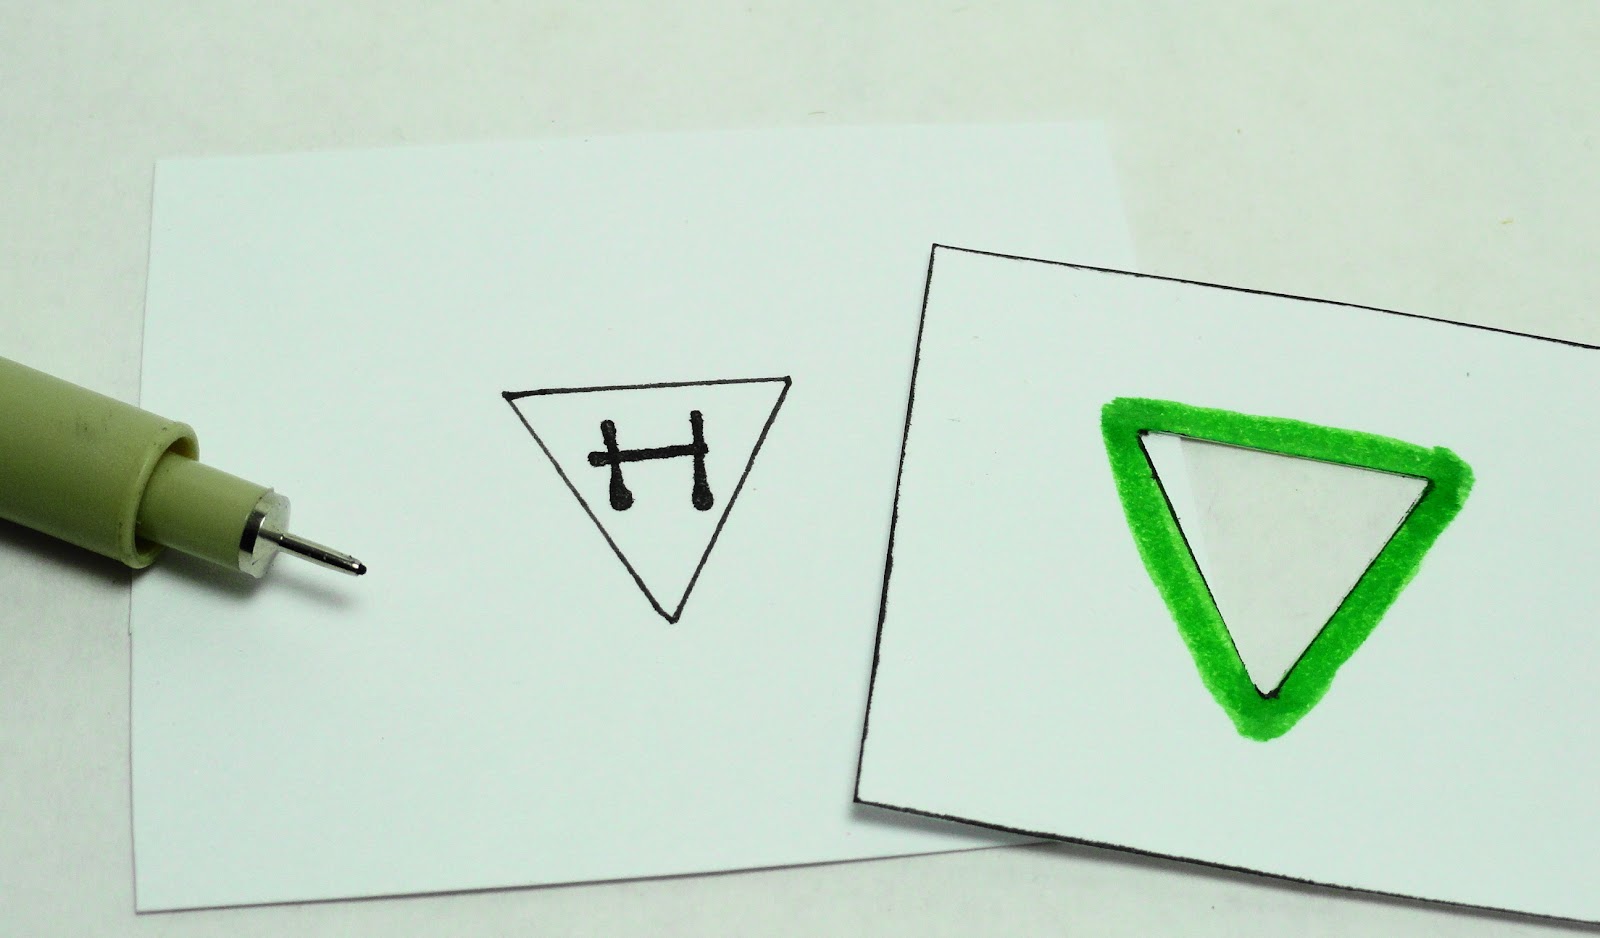
This is a little trick I use to quickly center and stamp images within small, unique shapes.


1) Once the shape and size of the geometric pattern has been developed, trace it on to a piece of cardstock and trim away the design.  A craft knife and metal-edged ruler were used for cutting this piece.


2) Color the surrounding area (or use a piece of colored cardstock in Step 1).  This helps the eye quickly focus and center the “window” when working on white cardstock.


3) Stamp the alphabet letter on a separate piece of cardstock.


4)  Position the custom-made shaped window on top of the stamped image, center and trace.


5) Remove the template.  Now the design can be colored and trimmed. 

Additionally, if you have banner with a phrase and do not have enough room to accommodate additional spaces between the words, try using embellishments.  These help the eye pause for a moment and distinguish the words separately.  I used a small heart between “big” and “hugs” on my banner.

Have a great day!

Hugs,
Elizabeth

Supplies:
Penny Black Mix & Match Cardstock:  Coral Reef 15-003, Blue Lagoon 09-002
Tsukineko: Onyx Black VersaFine, Vintage Sepia VersaFine, Clear Embossing Powder, Sponge Daubers
Copic Markers
3M Scotch:  Dimensional Foam Tape
Sakura:  .01 Black Micron Pen

November 19, 2010

Thankful!

I wanted to end this week with a quick idea that could either be a Thanksgiving greeting or a thank you card.    

This is a Penny Black favorite of mine - Earth’s Bounty - stamped in Vintage Sepia VersaFine ink with a quick touch of water coloring. 


After the water colors dried (just a minute or so), I added Sparkle Gold Watercolor Paint (USArtQuest).


The sentiment was created using the Kate Text Lowercase Alphabet set and I converted three gold brads to copper with Ranger's Adirondack Copper Mixative.  The ribbon was a great find at my local craft store.

I am currently working on Valentine projects for Penny Black and I am looking forward to sharing the new designs with you soon. 

Have a great weekend,
Elizabeth