
Hugs are great! I love giving them, getting them, and sending them in the mail……
 |
| Finished Size: 3 x 4 |
The background pattern was inked in both Crimson Red and Vintage Sepia VersaFine inks and stamped on a piece of coral reef cardstock that had been distressed with Crimson Red VersaFine. By multi-inking the image, the stamped design appears less “flat” and has an interesting hue variance. A bit of faux stitching around the perimeter coordinates with the sewing on the scarecrow.
Creating banners for a project usually means customizing the size of the flags to fit not only the design space, but also the size/font of the alphabet.
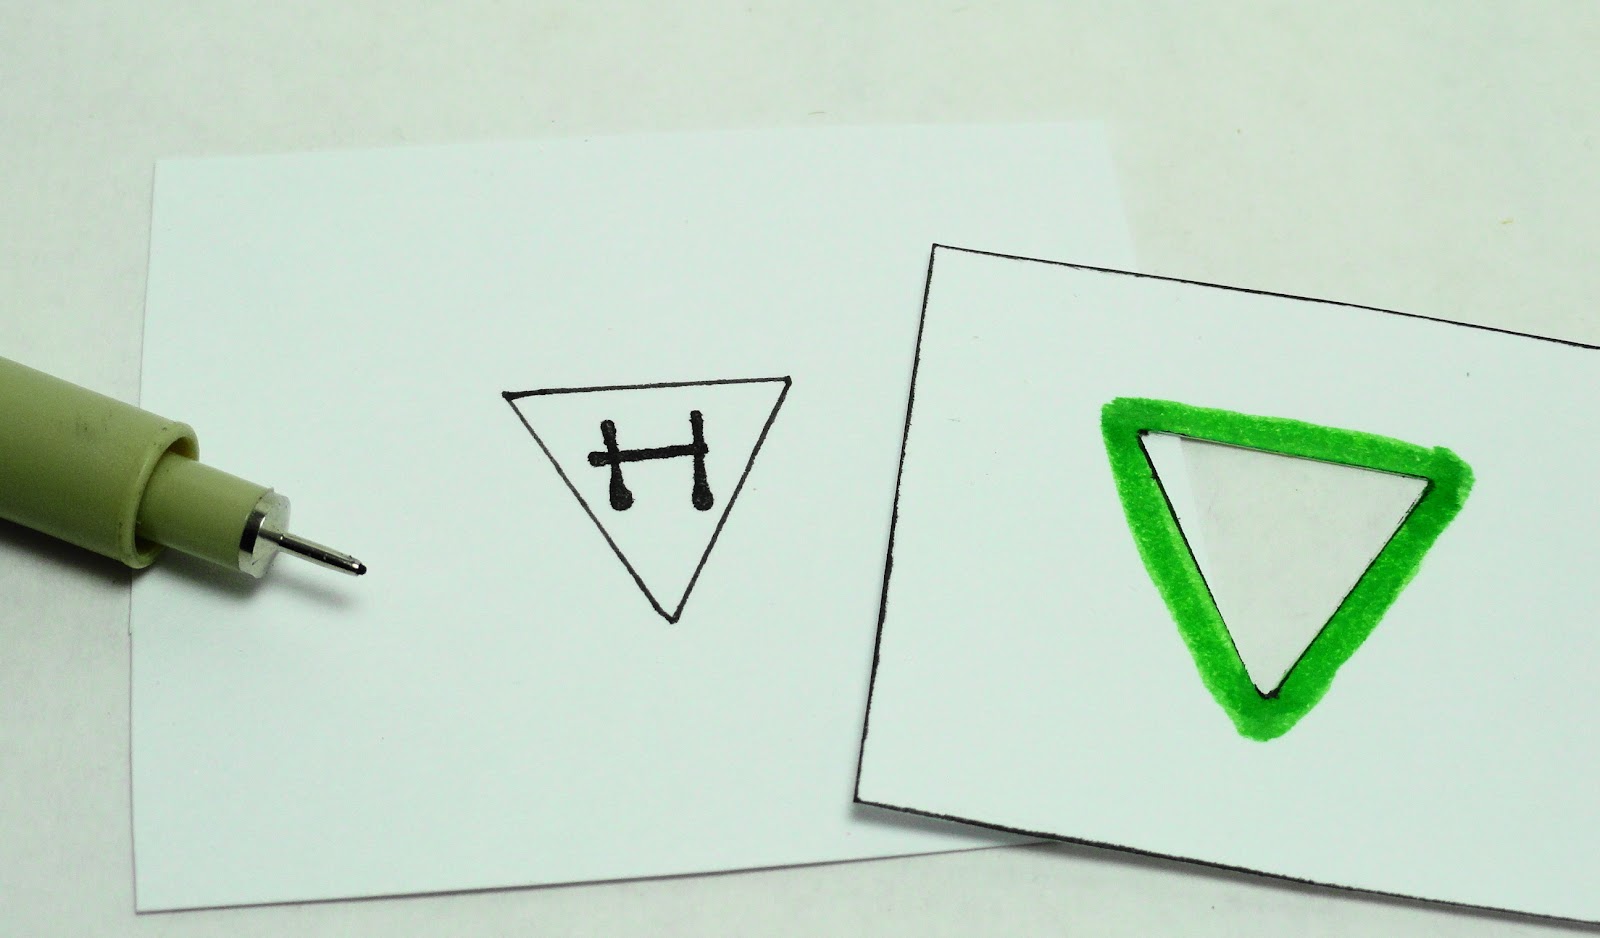
This is a little trick I use to quickly center and stamp images within small, unique shapes.

1) Once the shape and size of the geometric pattern has been developed, trace it on to a piece of cardstock and trim away the design. A craft knife and metal-edged ruler were used for cutting this piece.

2) Color the surrounding area (or use a piece of colored cardstock in Step 1). This helps the eye quickly focus and center the “window” when working on white cardstock.

3) Stamp the alphabet letter on a separate piece of cardstock.

4) Position the custom-made shaped window on top of the stamped image, center and trace.
5) Remove the template. Now the design can be colored and trimmed.
Additionally, if you have banner with a phrase and do not have enough room to accommodate additional spaces between the words, try using embellishments. These help the eye pause for a moment and distinguish the words separately. I used a small heart between “big” and “hugs” on my banner.
Have a great day!
Hugs,
Elizabeth
Supplies:
Penny Black Stamps: Trick-or-Treatin’ 40-071, Warm Wishes 40-074, Kate Uppercase Text 20-005
Penny Black Mix & Match Cardstock: Coral Reef 15-003, Blue Lagoon 09-002
Tsukineko: Onyx Black VersaFine, Vintage Sepia VersaFine, Clear Embossing Powder, Sponge Daubers
Copic Markers
3M Scotch: Dimensional Foam Tape
Sakura: .01 Black Micron Pen