This past weekend I was admiring a scrapbook layout created by Lisa Storms in which she had created a really neat Christmas tree using patterned paper and the wave border punch from Fiskars.
Her tree inspired me to create a few of my own with a twist and incorporate some rubber stamping. All the stamps used in this project are from Penny Black and I have inserted links for each image if you would like to view the product.
The first piece I created is a place setting card for the holiday table.
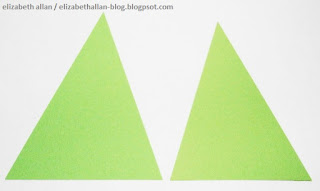
First I cut two triangles from green cardstock that measured 3 ¼ x 4 ¾ and 3 x 4 ½.
Then I punched the two long sides of each triangle with the wave border punch and added Bamboo Leaves Memento ink to the edges with a jumbo sponge dauber. Using the same ink, I stamped Starlit over both pieces to add those fun dots. The snowy accents are just quick flicks of a white gel pen.
To assemble, I layered the smaller triangle on top of the larger one and punched a small row of holes down the center so I could hand stitch them together. I elected to hand stitch them so I could use a heavy piece of cotton thread that I custom colored to match the project. To eliminate the chance of the thread cutting a slice into the ink pad, I applied the ink to a sponge dauber and used that to color the thread. You could also run this piece through your sewing machine. Once sewn together, gently bend the smaller panels up.
The star was created from Sparkle which was stamped with VersaMark Watermark ink on white cardstock and heat embossed with gold powder. The star was then trimmed and colored with Dandelion and Cantaloupe Memento markers. For extra sparkle, I applied Golden Rod Stickles over the gold embossing and Lime Green Stickles to the dots on the trees.
Here is another tree used on a card.
The patterned background paper started off as a piece of tan cardstock which was stamped with Snow Scroll in Rich Cocoa Memento ink. The swirls were accented with red water coloring and the whole piece was highlighted with a combination of Dandelion, Bamboo Leaves and Rich Cocoa Memento inks. The sentiment is from the In A Pear Tree transparent set.
Here is a closer view of the tree with red crystals for ornaments.
As I was working on these projects I thought of some other design variations that would be fun ideas-----
Add a piece of mat board to the back
of an assembled tree (for stability) and
a small magnet for festive fridge art.
OR
Create two sets of trees and adhere
them back to back with fishing
line for a dimensional ornament.
Be careful, these are addictive to make and before you know it you will be surrounded by a whole forest of art!
Thank you for visiting.
Elizabeth


