December 24, 2013

MERRY CHRISTMAS


Merry Christmas

A holiday wish created with Penny Black's Creative Die "Dancing Leaves".

I am looking forward to more artful happiness in my studio and will return in the new year.

Enjoy the love, joy and peace of the season.

Merry Christmas and Happy New Year!

Elizabeth

Supplies:
Penny Black Stamps: City Lights 40-270 (sentiment)
Penny Black Creative Dies: Dancing Leaves 51-016
Penny Black Mix & Match Cardstock: Fuchsia Fantasies 13-002
3M Scotch Dimensional Foam Tape
American Crafts: Ribbon
Copic Markers
Imagine Crafts/Tsukineko: Onyx Black VersaFine

December 23, 2013

Happy Holidays

Go ahead, tuck some snowy wishes in an envelope.  They're guaranteed not to melt!

Happy Holidays
Envelope seals always catch my eye.  I love how the little decal sits so proudly on the pointy flap as it beckons you to "Open Me, Open Me".  That happy thought was the inspiration for this little card.

Two pieces of cardstock were fashioned to resemble an envelope and were mounted to a card prepared with embossed dots.  All shading was done in Bahama Blue Memento to coordinate with the card base.

A snowflake (Penny Black) die cut from white cardstock, colored with Memento Luxe Rhubarb Stalk and embellished with a small pearl represents the envelope seal.

Have a wonderful day,
Elizabeth

Supplies:
Penny Black Stamps: City Lights 40-270 (sentiment)
Penny Black Creative Dies:  Snowflake Trio 51-015
Penny Black Mix & Match Cardstock: Blue Lagoon 09-003
3M Scotch Dimensional Foam Tape
Cuttlebug: Swiss Dots Embossing Folder
Imagine Crafts/Tsukineko: Onyx Black VersaFine, Bahama Blue Memento, Luxe Memento Rhubarb Stalk, Jumbo Sponge Dauber


December 20, 2013

Studio Sessions: Memento Luxe Ink, 4 of 4

Studio Sessions

Studio Sessions Featuring Memento Luxe
Imagine Crafts / Tsukineko Memento Luxe Ink
Additional Imagine Crafts / Tsukineko Inspiration on their FACEBOOK PAGE

Memento Luxe inks are fabulous for both mixed media and wood projects.  In today's Studio Session, I converted a plain wood carton into a keepsake box.

Keepsake Box
First the sides of the box were covered with painter's tape and then Gesso was applied to the top.  A jumbo sponge dauber was used to randomly apply Memento Luxe: Cantaloupe, Rose Bud, Pistachio and Lilac Posies.

DSC05462
Using the same colors of Memento Luxe inks, a small budded branch (Penny Black - Tweet Tweet) was randomly stamped across the mottled background.  I started with the lightest color, Cantaloupe, then increased the darkness by moving to Rose Bud, then Pistachio and finally Lilac Posies.  Even though it is hard to see at first glance, it is a great way to build depth in a design.  The last stamping was done in Memento Luxe Wedding Dress.  

DSC05410
Here the blonde wood sides were colored/sponged with Peanut Brittle Memento Luxe.  Looks just like wood varnish.     


DSC05409
Copper Psst Sheer Shimmer Spritz was lightly sprayed on top of the box.  It's perfect for adding a glint of sparkle.

Have you seen all the colorful projects Jill has been creating?  She has another Luxe-rious project today for our Friday finale.


Jill's Studio Artwork

If you are just stopping by, here is our "Luxe" week in review:

Thank you for visiting.

Happy stamping,
Elizabeth

Supplies:
Penny Black Stamps: Tweet Tweet 30-156
Imagine Crafts/Tsukineko:
  Memento Luxe Inks:  Peanut Brittle, Rose Bud, Pistachio, Cantaloupe, Lilac Posies, Wedding Dress
  Psst Sheer Shimmer Spritz (Copper)
  Jumbo Sponge Daubers
Other: Wood Box, Painter’s Tape

December 19, 2013

Studio Sessions: Memento Luxe Ink, 3 of 4

Welcome to another day of inky fun with me and Jill!
Studio Sessions

Studio Sessions Featuring Memento Luxe
Imagine Crafts / Tsukineko Memento Luxe Ink
Additional Imagine Crafts / Tsukineko Inspiration on their FACEBOOK PAGE

For Day 3, I am using the Memento Luxe inks to color die cuts. The pigment ink is easy to blend and allows you to build color depth quickly.

Happiness Is Tag

Tag-Happines  Is..
Several components of the tag were die cut in multiples so elements could be elevated.  Two tags (Penny Black - Tagged) and two butterflies (Penny Black - Flutters) were die cut from white cardstock.

The main tag was left as is and had a festive ribbon attached and was stamped with a sentiment (Penny Black - Gratitude) in Onyx Black Versafine which was heat embossed with clear powder.  The second tag was trimmed and the lower portion was distressed with Pear Tart Memento Luxe and stamped with dots (Penny Black - Pointille) in Pistachio Memento Luxe.  Jumbo sponge daubers were used as ink applicators.

Both butterflies were colored/sponged with Memento Luxe in Dandelion, Love Letter and Lilac Posies.


Psst Sheer Shimmer Spritz
Before the dimensional butterfly was attached to the tag, it was sprayed with sparkle Psst Sheer Shimmer Spritz. 

I don't want to ruin Jill's surprise, but a little birdie told me that she has another ATC to share today.  

Jill's Studio Artwork


See you tomorrow with our inky finale.
Elizabeth

Supplies:
Penny Black Stamps: Gratitude 30-105, Pointille 3860J
Penny Black Creative Dies:  Flutters 51-006, Tagged 51-007
Imagine Crafts/Tsukineko:
  Memento Luxe Inks:  Dandelion, Love Letter, Lilac Posies, Pear Tart, Pistachio
  Onyx Black VersaFine
  Psst Shimmer Spritz – Sparkle
  Clear Embossing Powder
  Jumbo Sponge Daubers

December 18, 2013

Studio Sessions: Memento Luxe Ink, 2 of 4


Studio Sessions

Studio Sessions Featuring Memento Luxe
Imagine Crafts / Tsukineko Memento Luxe Ink
Additional Imagine Crafts / Tsukineko Inspiration on their FACEBOOK PAGE

Memento Luxe Inks are wonderful for fabric designs.  The rich color provides a great impression and maintains the fine details of the stamped image.  I used the inks today to decorate pillowcases.

Decorative Pillocases
It was so much fun working on these and to see them transform from blank white canvases into custom one-of-a-kind linens.

DSC05436
Sweet Plum Memento Luxe was used to accentuate the bold, graphic design of these concentric circles (Penny Black - Wow).

DSC05437
A combination of Cantaloupe, Lilac Posies and Pear Tart Memento Luxe inks added graceful color to these wispy flowers (Penny Black - Fanciful).

TIP/HINT:  When stamping on fabrics, heat set the inks with an iron for permanency.

TIP/HINT:  A cotton swab is a great tool for removing ink from tight areas that have been over inked by a neighboring color.  After removing the ink, a miniature ink applicator can be created by using the tip of an InkBlusher moistened with the desired color from an inker.  This process was used for applying the green to fanciful flower stems.  


DSC05420
You can also make custom ribbons to coordinate with your projects.  This white seam binding was altered in a matter of minutes.  Pistachio Memento Luxe converted the color and Olive Memento Luxe was used for the stamped design.

Join me as I head over to Jill's part of the Studio to see what she has created for Day 2.    


Jill's Studio Artwork


Inky Wishes,
Elizabeth

Supplies:
Penny Black Stamps: Wow 40-112, Fanciful 40-100
Imagine Crafts/Tsukineko:
  Memento Luxe Inks: Cantaloupe, Lilac Posies, Pear Tart, Sweet Plum, Pistachio, Olive Grove
  Memento Luxe Inker:  Pear Tart
  InkBlushers
Other: White Pillowcases

December 17, 2013

Studio Sessions: Memento Luxe Ink, 1 of 4

Studio Sessions

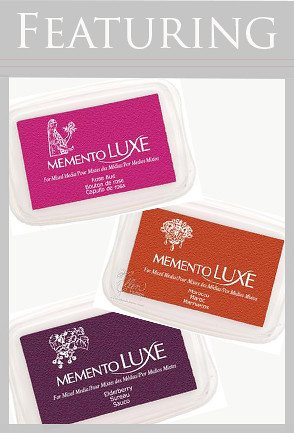
This week Jill and I are are creating with Memento Luxe inks.
Studio Sessions Featuring Memento Luxe
Imagine Crafts / Tsukineko Memento Luxe Ink
Additional Imagine Crafts / Tsukineko Inspiration on their FACEBOOK PAGE

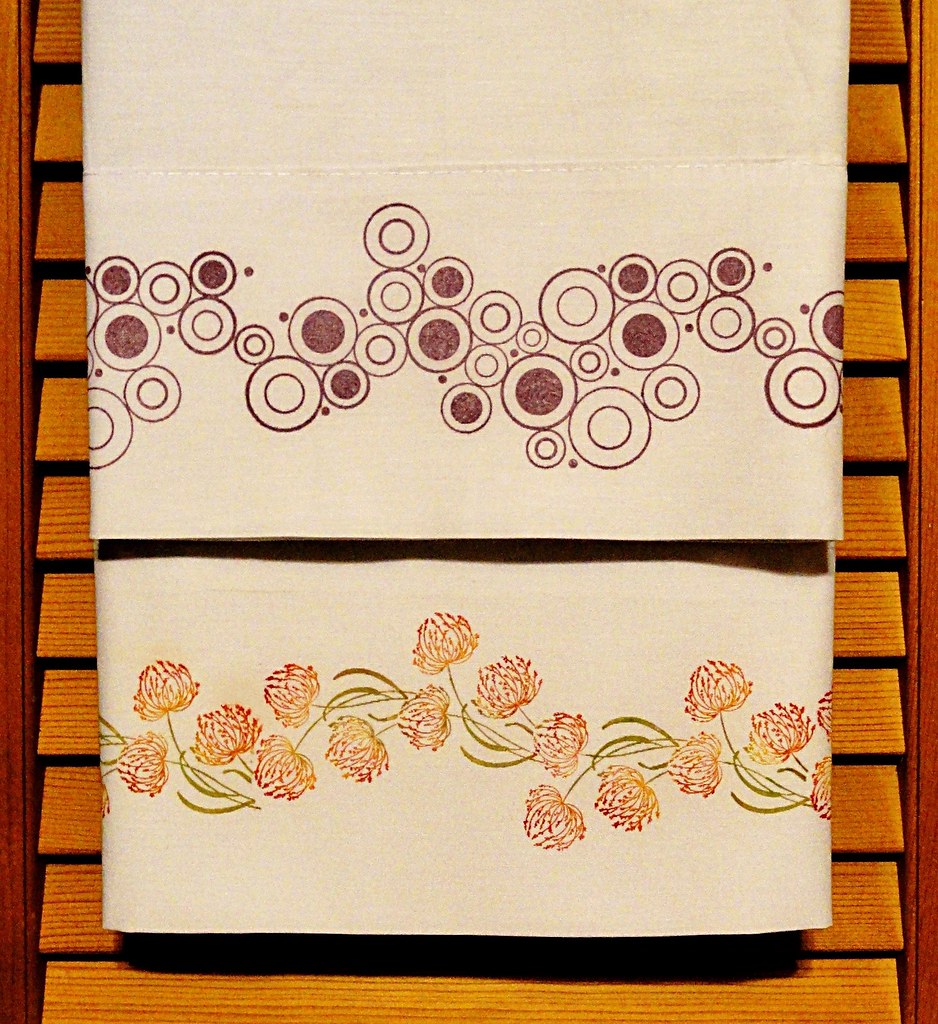
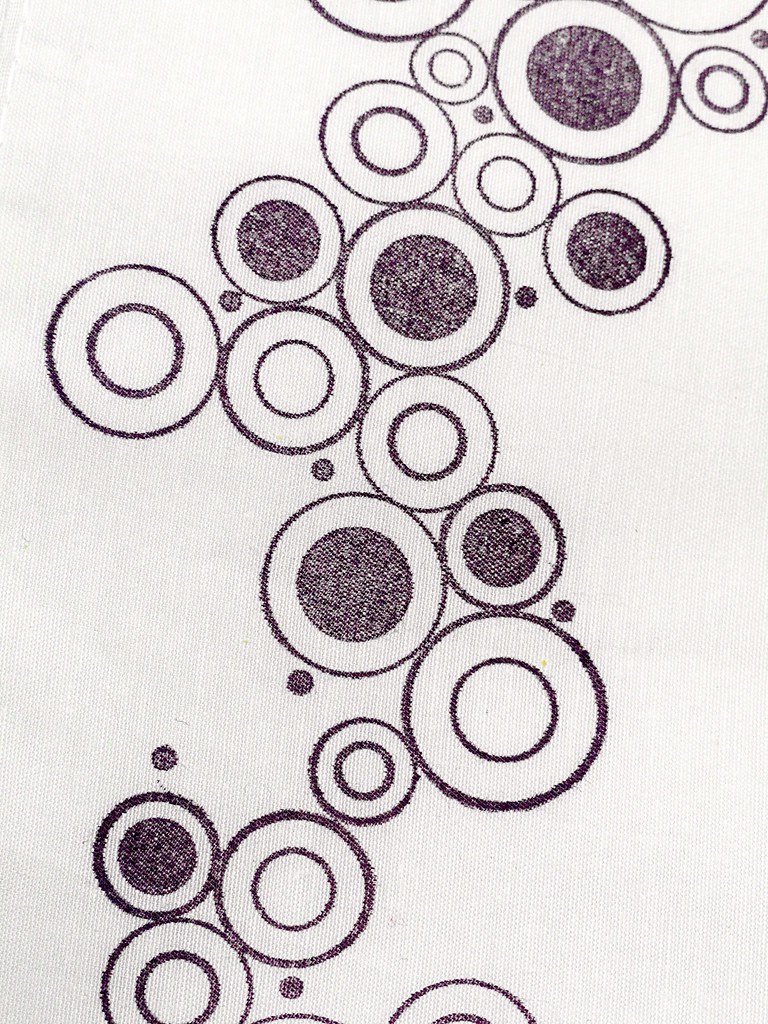
These pigment inks are currently available in 24 colors and are complementary to the Memento dye ink line.  The ink formulation allows you to use them on paper, fabric, wood and more.  Plus, they are permanent when heat set.

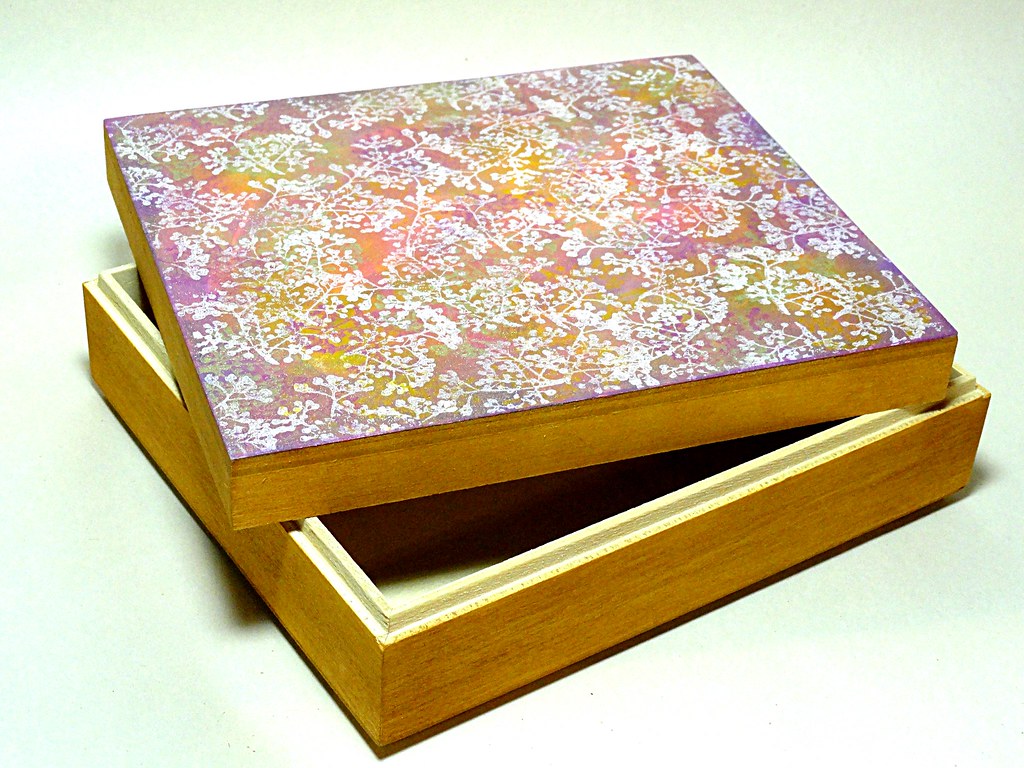
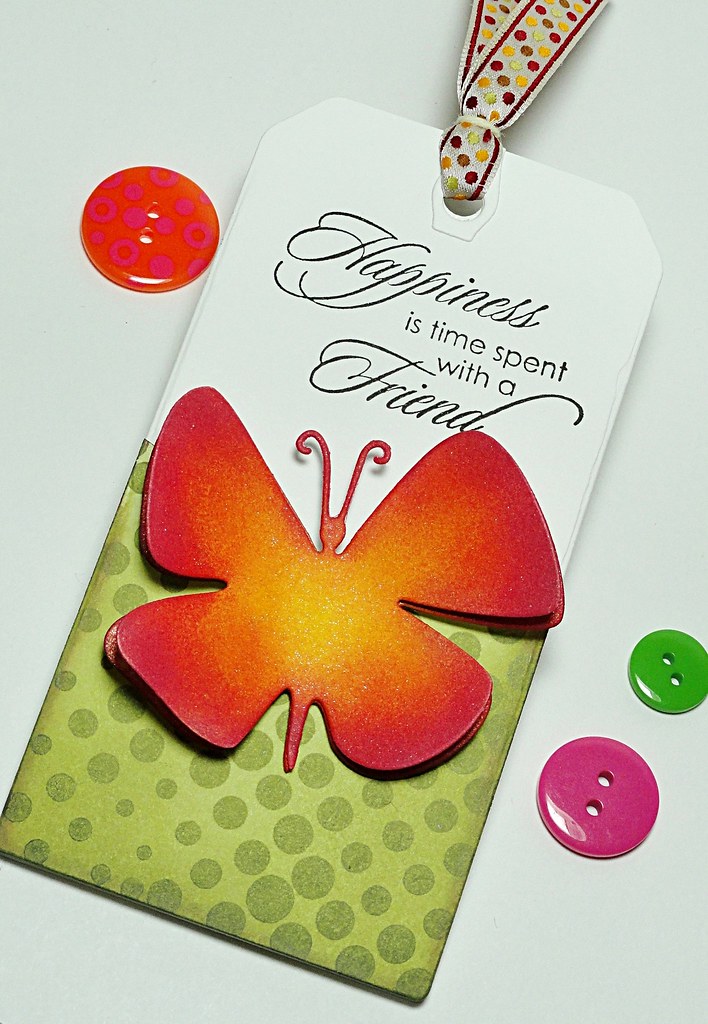
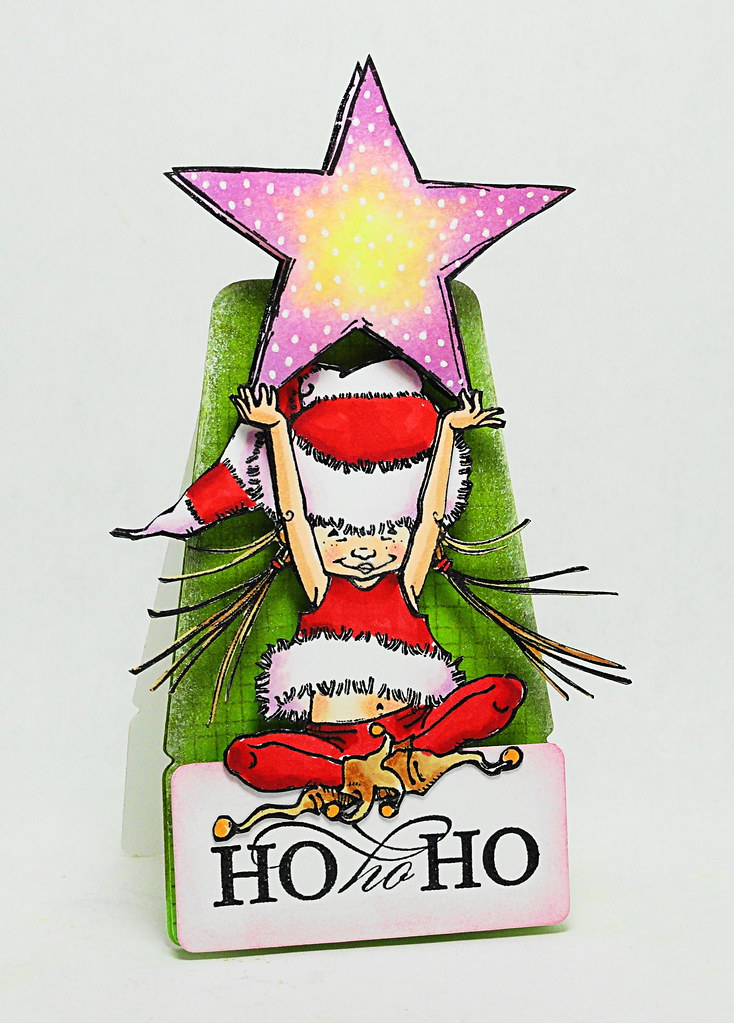
Today I am using the inks on glossy cardstock.


Love Is...
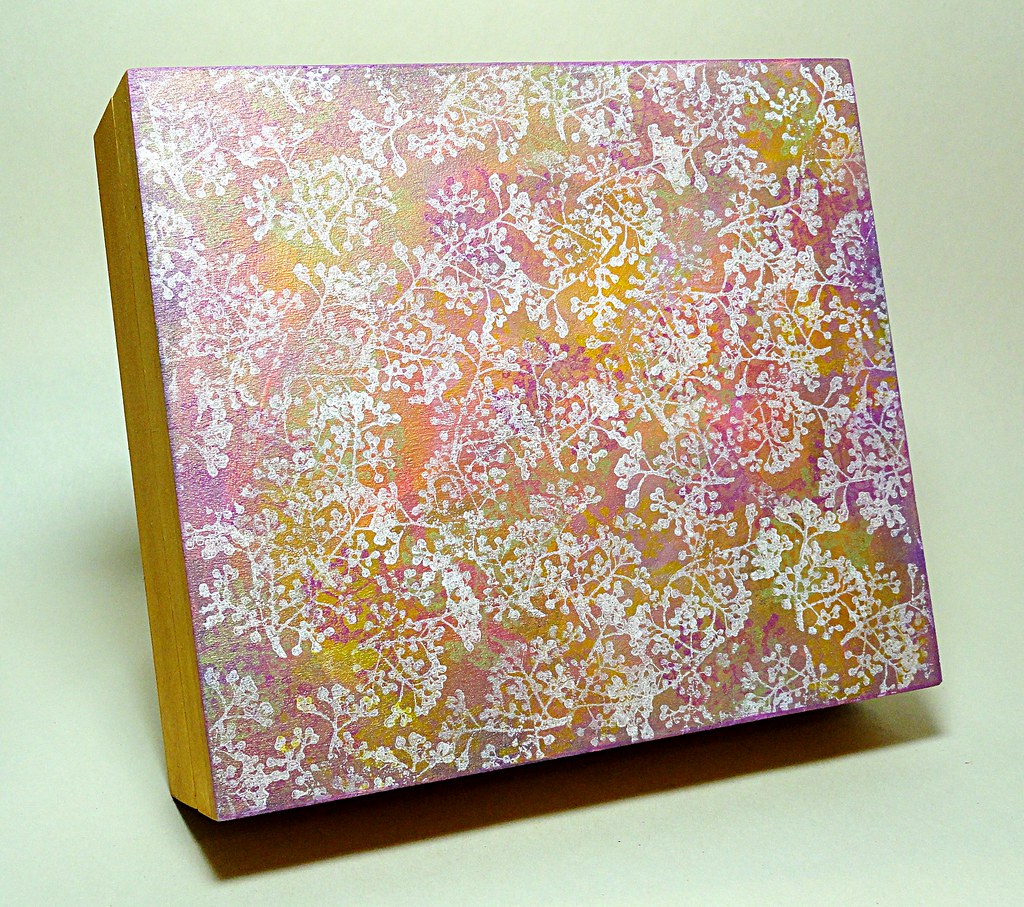
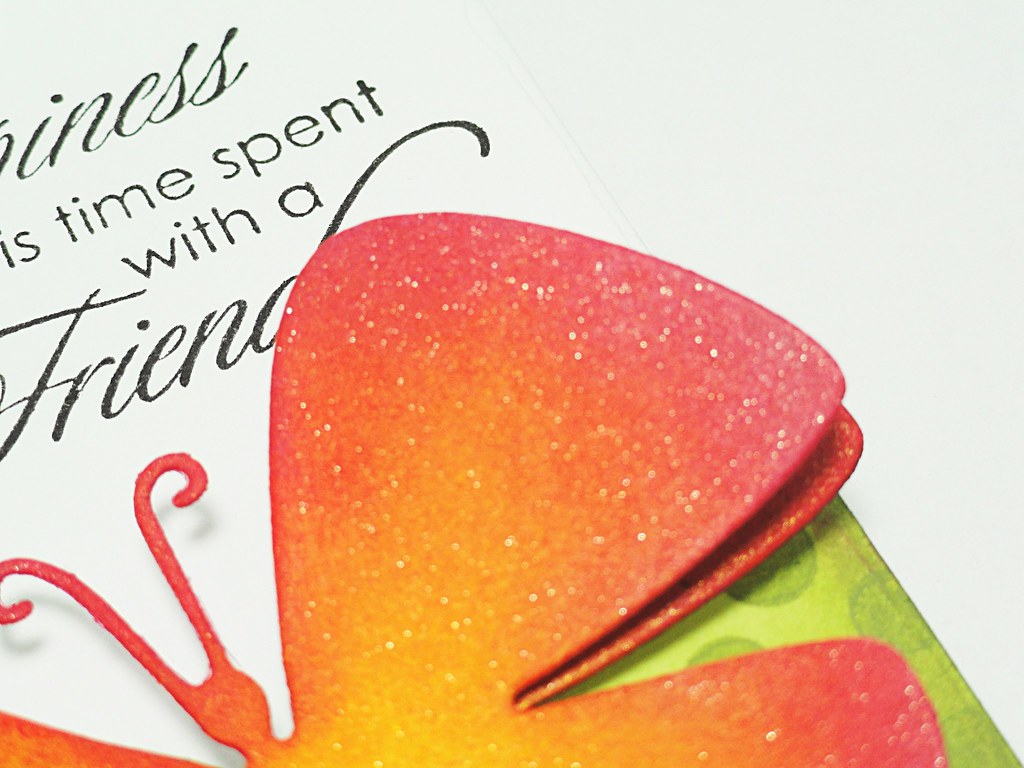
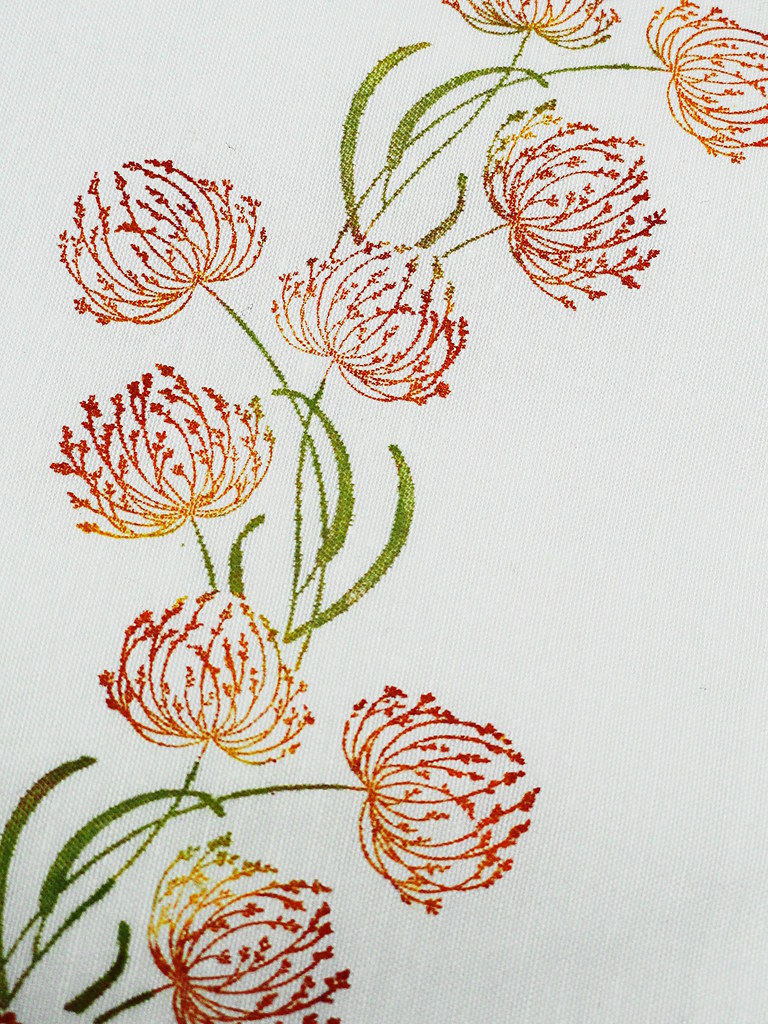
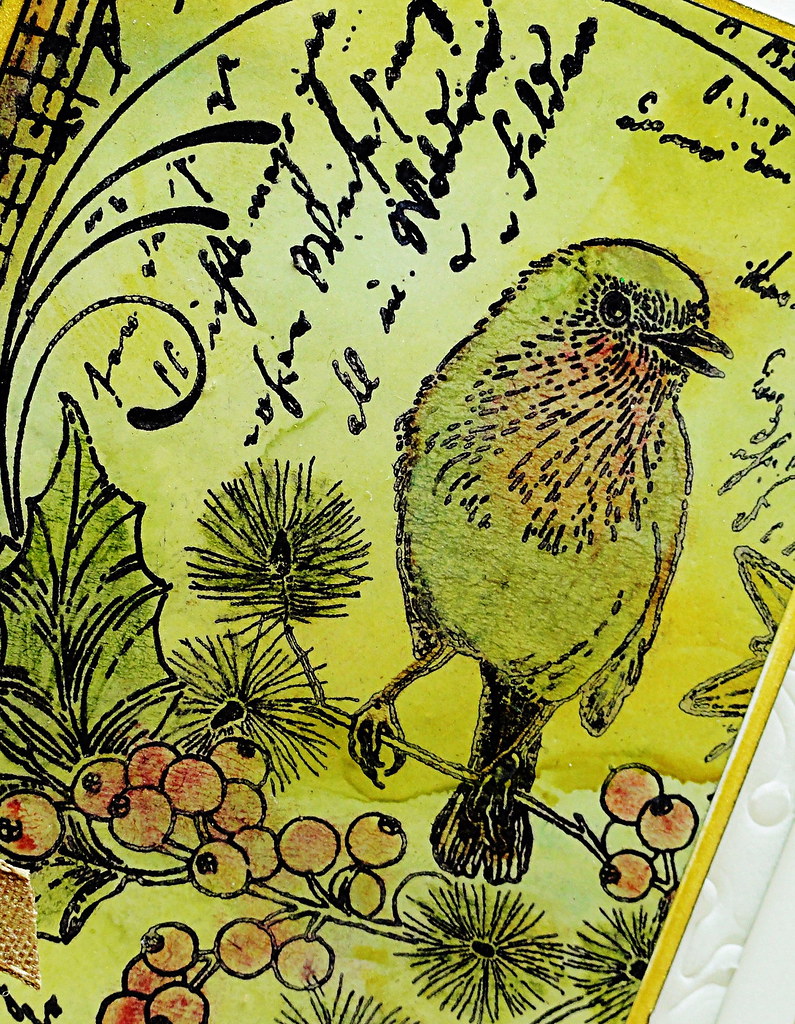
The blending capabilities of the Memento Luxe inks are terrific which makes it easy to create smooth marbled effects on glossy papers.  

DSC05403
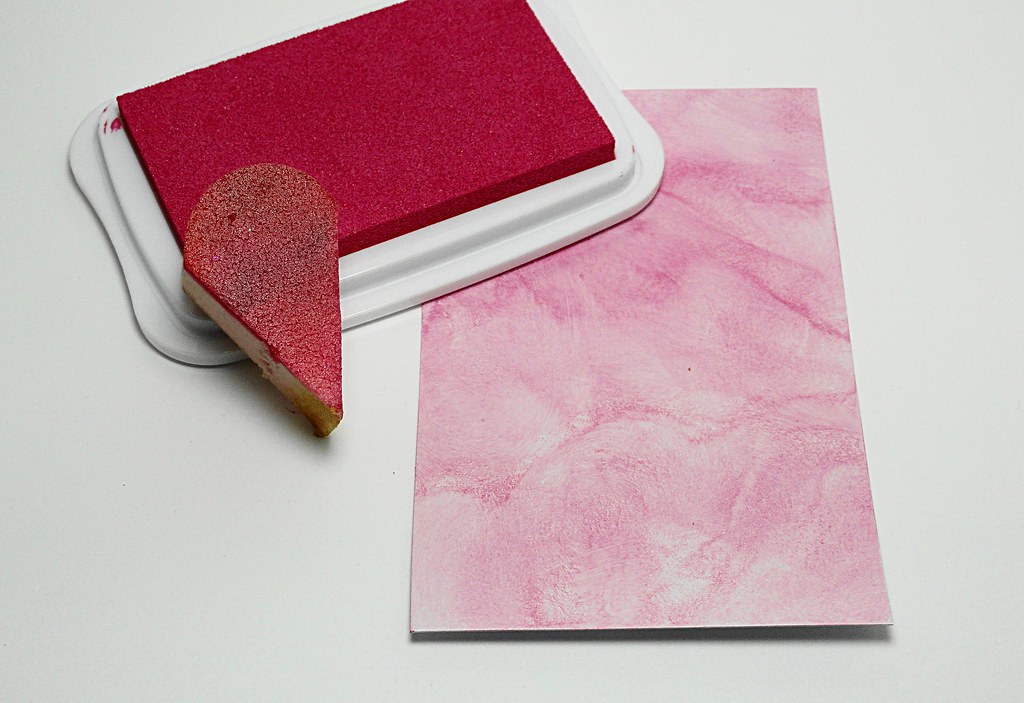
To begin, an InkBlusher was used to apply Rose Bud Memento Luxe to a piece of glossy cardstock.  A dabbing and scrunching motion of the applicator yields a marbled effect.  The same process was used to apply Dandelion and Morocco Memento Luxe next.

TIP/HINT:  Depending how much you would like the application of colors to blend, you will want to experiment with adding inks while wet and/or drying between color additions.  You will find that you have many different ways to manipulate your colors.

DSC05430
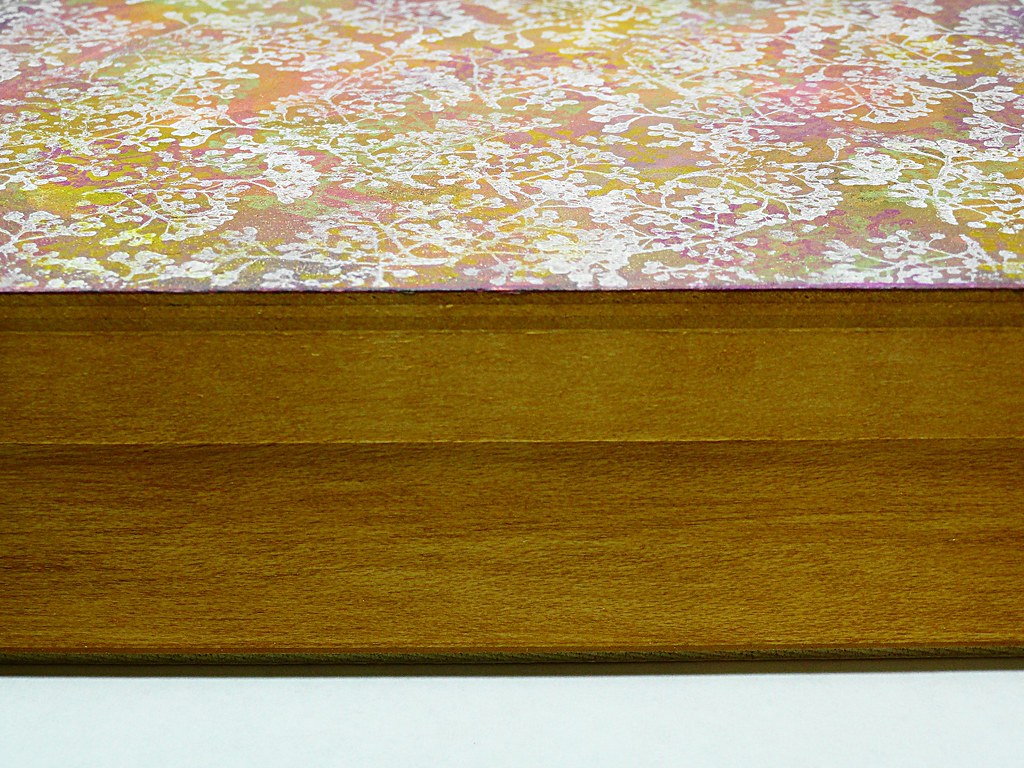
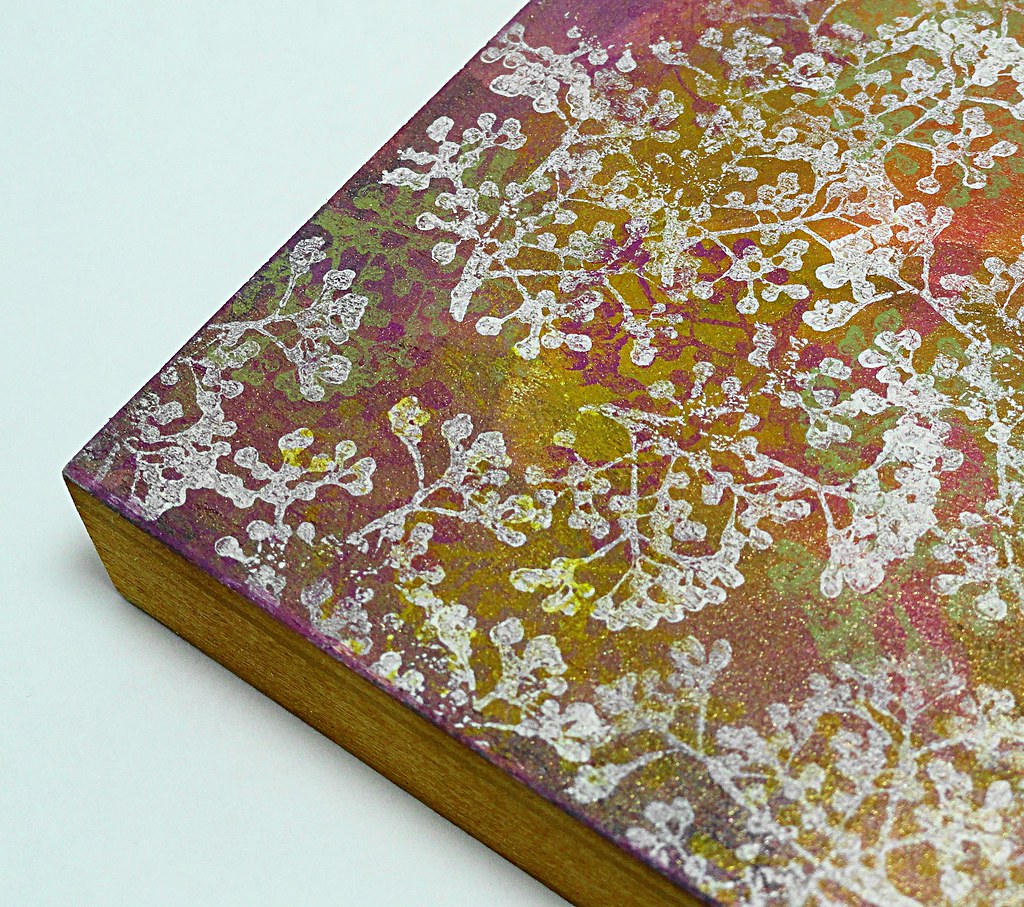
You will notice there are some hair line crackles in the mottled background.  After the ink dried (I used a heat tool), a dry crumpled paper towel was softly wiped across the color.  This removed an ever-so-slightly bit of ink.

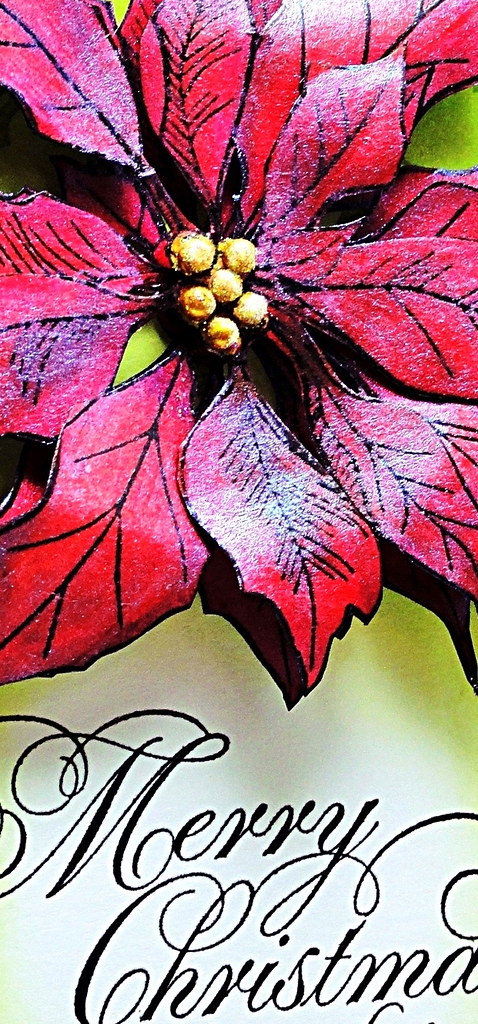
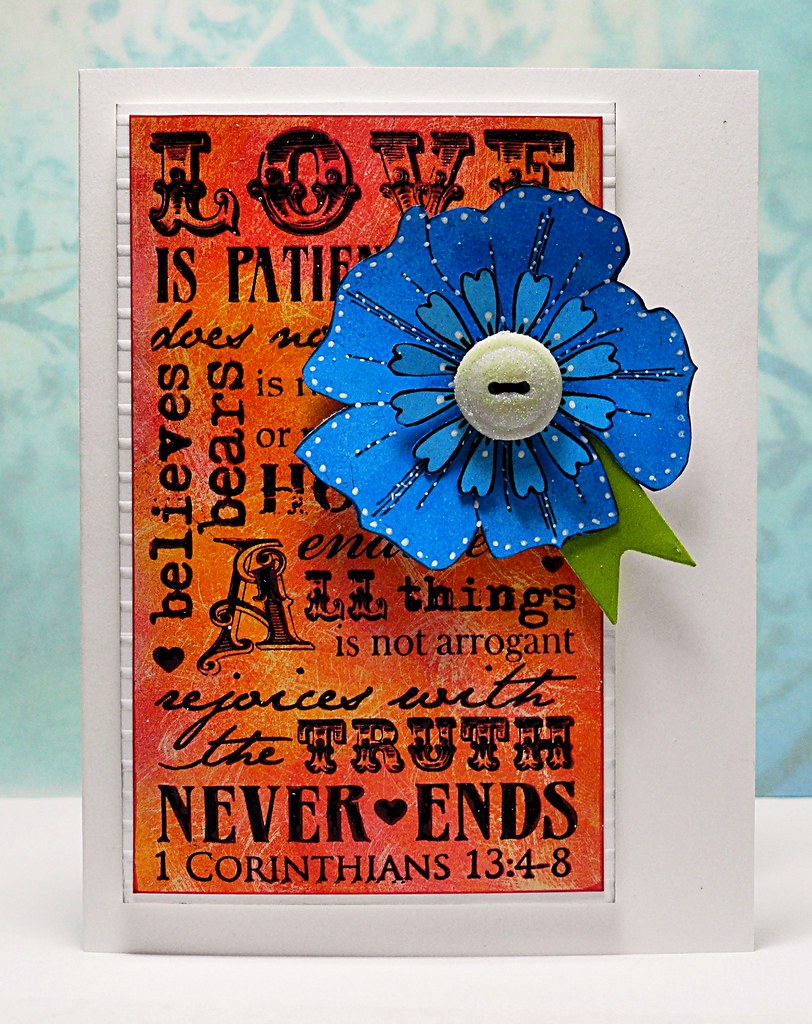
The background verbiage (Love Chapter) was stamped in a two-part process.  First with Lilac Posies Luxe Memento, then over stamped a second time with Jet Black StazOn.  Don't worry if they are not perfectly aligned.  A slight offset gives a wonderful "echo" effect and adds even more depth to the wording.

DSC05431
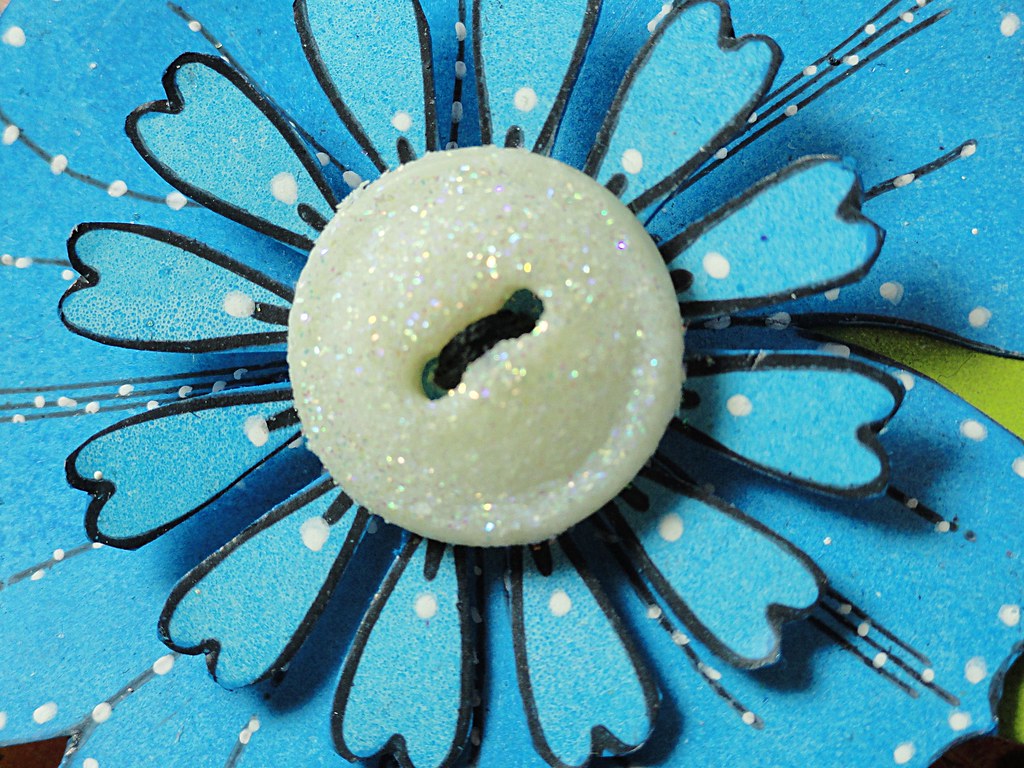
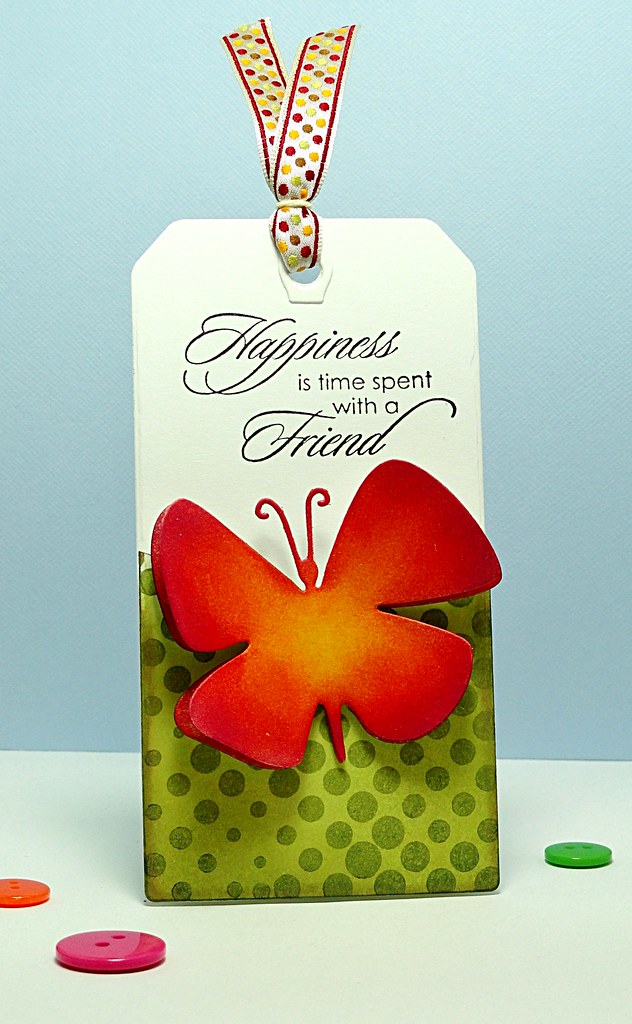
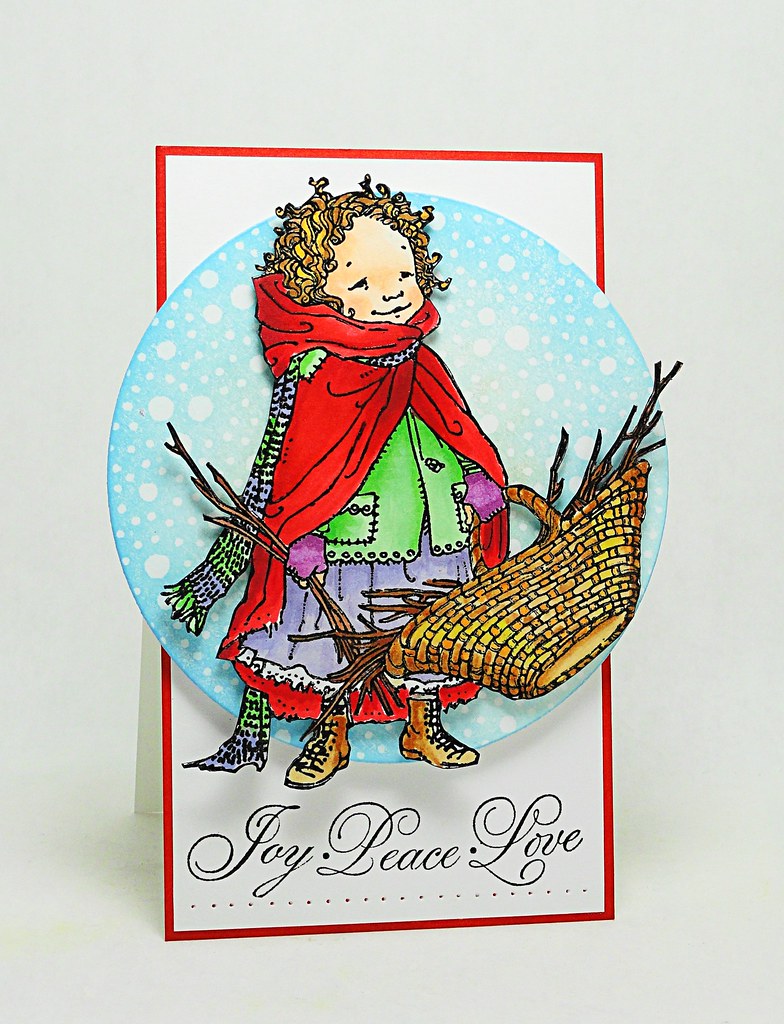
For the flowers (To You and Round & Round), I first applied the Danube Blue Memento Luxe to a piece of glossy cardstock with an InkBlusher then stamped the flowers with Jet Black StazOn.  In this instance, coloring first helped maintain the rich intensity of the stamped image.  Otherwise, in reverse order, the opaque ink would have muted the black detailing.  A heat tool helped quicken the drying process so the flowers could be handled for trimming without being smudged.

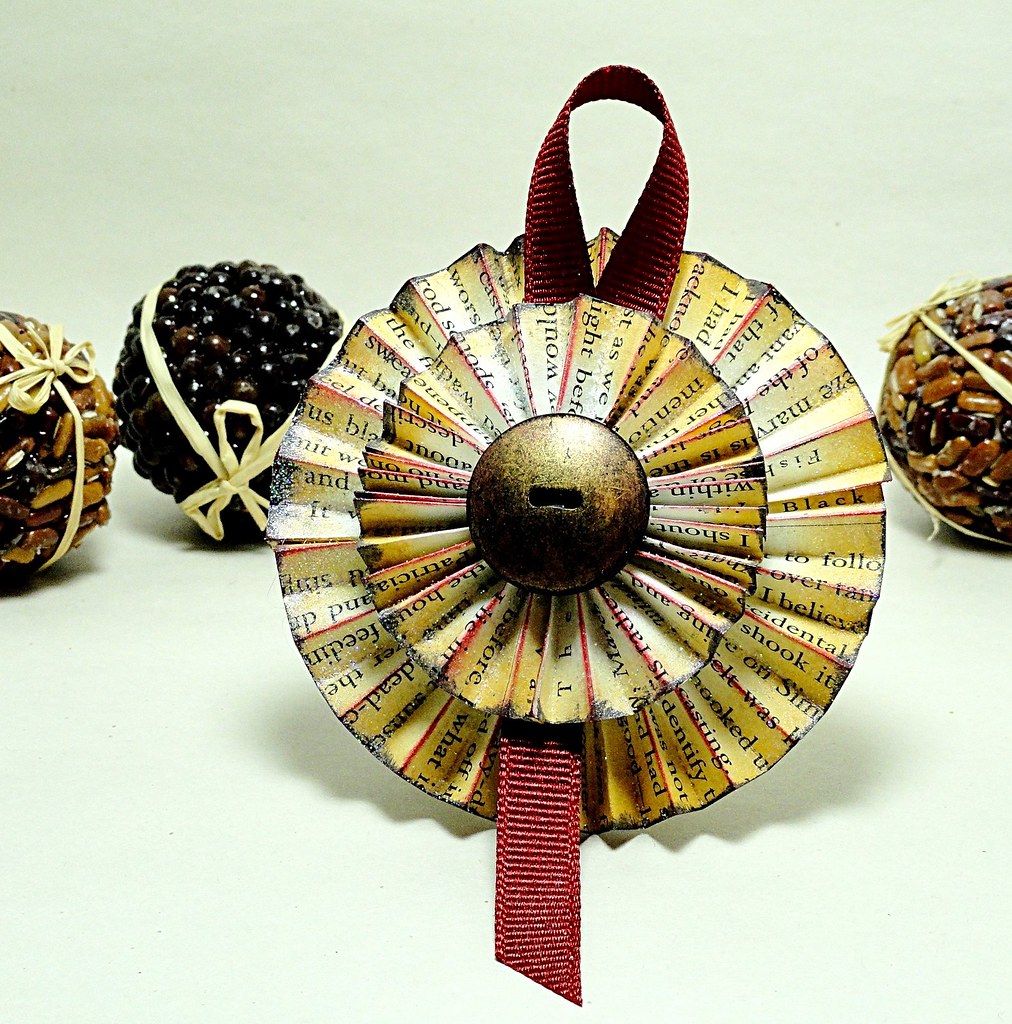
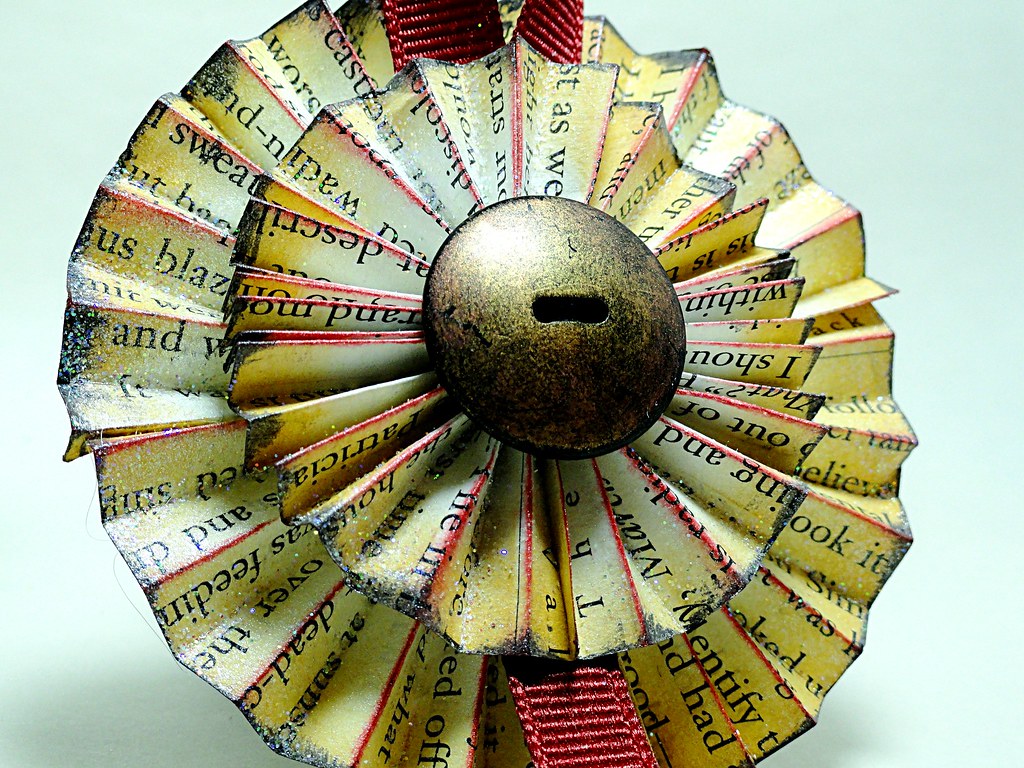
Finishing touches were a tag (Tagged) die cut from glossy cardstock inked with Pear Tart Memento Luxe and a sparkly button.  

Tip/Hint:  To add a little bling to plain buttons, pounce them with VersaMark Watermark ink, sprinkle with sparkle embossing powder and heat set. 

For another infusion of color, don't miss what Jill has created!


Jill's Studio Artwork


Colorfully,
Elizabeth

Supplies:
Penny Black Creative Dies:  Tagged 51-007
Imagine Crafts/Tsukineko:
  Memento Lux Inks: Dandelion, Morocco, Rose Bud, Lilac Posies, Pear Tart, Danube Blue
  Jet Black StazOn
  VersaMark Watermark Ink
  Sparkle Embossing Powder
  InkBlushers
  Memento Markers: Bahama Blue
 Other: Clear Embossing Stamp Pad, Clear Embossing Powder, Blending Stump

December 16, 2013

Studio Sessions: Memento Luxe Ink - Introduction

Welcome to another series of Studio Sessions.

Studio Sessions

This week we will be featuring Memento Luxe Inks.
Studio Sessions Featuring Memento Luxe

The colorful fun starts tomorrow with the first of four projects!  


December 12, 2013

Ink, Fold, Embellish

This project is a classic that never loses it charm.


Accordion Button

From vintage antique to colorfully bold, these accordion buttons are wonderful to make for ornaments, present toppers and card embellishments.

Close Up

This one was made in 3 steps from recycled book text and an altered button!


STEP 1 - INK
For a double tier, cut 1 piece of text paper approximately 3 x 8 and a second 2 x 7.5. Ink the long edges with Memento Luxe Peanut Brittle and Memento Luxe Espresso Truffle.

STEP 2 - FOLD 
Fold the pieces, accordion style, using 1/4-inch folds.  Tie the folded pieces (separately) in the middle with fishing line.  Bring the ends on each side together and glue.  Add highlighting ink on the folds if desired (Love Letter Memento).  After gluing, spray with Frost Psst Sheer Shimmer Spritz.

Optional:  In this design, the individual pieces were also sprayed with Glossy Clear Acrylic Coating and dusted with crystal micro fine glitter.

STEP 3 - EMBELLISH
Add gold, copper and red metallic rub-ons to an old black button.  To seal the button, spray with Matte Clear Acrylic Coating.  Layer and affix all elements with a hot glue gun.  

Enjoy,
Elizabeth

Supplies:
Craft-T Products: Metallic Rub-Ons
Imagine Crafts/Tsukineko: Memento Luxe Peanut Brittle, Memento Luxe Espresso Truffle, Love Letter Memento, Jumbo Sponge Dauber, Frost Psst Sheer Shimmer Spray
Offray: Cranberry Grosgrain Ribbon
Other: Old Book Pages, Black Button, Crystal Glitter, Matte Acrylic Spray, Glossy Acrylic Spray, Glue Gun


December 9, 2013

Peace on Earth

A joyful moment in the manger.....

Peace on Earth

I just love the little angel peering over and keeping watch over baby Jesus.  

A very short post as the card says it all.

Peaceful wishes,
Elizabeth

Supplies:
Penny Black Stamps: In the Manger 40-266 (illustrated by Mo Manning), Peace On Earth 40-256
Penny Black Mix & Match Cardstock: Blue Lagoon 09-002
3M Scotch Dimensional Foam Tape
Colorfin: Gold Metallic PanPastel, Turquoise, Phthalo Blue Tint (background shading)
Copic Markers
Imagine Crafts/Tsukineko: Onyx Black VersaFine, Clear Embossing Powder 


December 5, 2013

O' Little Town

O' Little Town of Bethlehem....

Little Town of Bethlehem

For this design I wanted to keep the focus on Mary, Joseph and Jesus (Penny Black's "From Bethlehem" illustrated by Mo Manning) and kept the surrounding elements very simple.  The background shading done in Danube Blue Memento was highlighted toward the top of the card with Gold PanPastel.  The sentiment is from Silent Night.  

You will notice if you link to the stamp image that I re-positioned the placement of the star.  In this instance, it helped add to the perspective of the distance between the travelers and the small town and maintained the balance among the elements.

Have a wonder-filled day,
Elizabeth

Supplies:
Penny Black:  From Bethlehem 40-268, Silent Night 30-135
3M Scotch Dimensional Foam Tape
Colorfin: Gold PanPastel
Copic Markers
Imagine Crafts/Tsukineko: Onyx Black VersaFine, Danube Blue Memento, Jumbo Sponge Dauber, Clear Embossing Powder

December 2, 2013

Angel Mouse

A little card packed with a lot of joy...

Joy to the World

This tiny tent card measures 2.25 by 3.5.  A circular window was die cut from the elevated panel with a small piece of fuchsia cardstock placed behind to give an illumination of color.  


DSC05555

The angel mouse was stamped twice on a separate piece of white cardstock in Onyx Black VersaFine and heat embossed with clear powder.  After softly coloring with Copic markers, selected pieces were fussy cut and layered for a dimensional embellishment.

Joyfully,
Elizabeth

Supplies:
Penny Black Stamps: Christmas Joy 30-188, Joy to the World 30-143 (sentiment)
Penny Black Mix & Match Cardstock: Fuchsia Fantasies 13-002, Coral Reef 15-003
3M Scotch Dimensional Foam Tape
Copic Markers
Imagine Crafts/Tsukineko: Onyx Black VersaFine, Clear Embossing Powder
Other: White Seed Beads

November 29, 2013

Be Jolly

More sprightly fun with the elves in the workshop...

Be Jolly

Today Little Elf Kit (illustrated by Mo Manning/Penny Black) is visiting.  An elevated frame was created with Jolly Chant stamped in Niagara Mist.  Underneath, on the card base, is a small piece of purple cardstock to fill the window.  Elf Kit was stamped on a separate piece of white cardstock in Onyx Black VersaFine, colored with Copics, and then fussy cut.  A portion of a longer sentiment (Christmas Wishes) was used to accent the star.

Have a holly-jolly day,
Elizabeth

Supplies:
Penny Black Stamps: Little Elf Kit 40-263, Jolly Chant 40-250, Christmas Wishes 30-196
Penny Black Mix & Match Cardstock: Fuchsia Fantasies 13-002
3M Dimensional Foam Tape
Copic Markers
Imagine Crafts/Tsukineko: Onyx Black VersaFine, Niagara Mist VersaMagic, Clear Embossing Powder
Sakura: White Gel Pen

November 25, 2013

HO HO HO!

With the holidays approaching, the elves are busy creating happy smiles.

Ho Ho Ho

I use my Spellbinders Flower Pot die cut upside down more than right side up.  It is a great shape for images that format into a triangular configuration.

Little Elf Ava (illustrated by Mo Manning) was stamped on a separate piece of white cardstock in Onyx Black VersaFine and heat embossed with clear powder.  After coloring with Copics and trimming, she was layered onto the shaped card.  A second layer of the arms holding the star were doubled up on top for additional dimension.  The background is Warm Wishes stamped in Bamboo Leaves Memento. A soft sponging of white gesso softened the edges.

Have a happy day, 
Elizabeth

Supplies:
Penny Black Stamps: Little Elf Ava 40-265, Warm Wishes 40-074, Whooo's Wishing 30-190 (sentiment)
Penny Black Mix & Match Cardstock:  Spring Meadow 06-001
3M Scotch Dimensional Foam Tape
Copics
Imagine Crafts/Tsukineko: Onyx Black VersaFine, Bamboo Leaves Memento, Clear Embossing Powder
Sakura: White Gel Pen
Spellbinders: Flower Pots (S5-060)
Other: Gesso

November 22, 2013

Joy * Peace * Love

Holiday joy with Penny Black's "Gathering" illustrated by Mo Manning.

Joy Peace Love

Chalks and pastels are fun alternatives for backgrounds.  This soft, snowy sky was created by stamping Crystal Pattern in VersaMark Watermark ink and lightly pouncing on Phthalo Blue Tint PanPastel with a Sofft Art Sponge.  Firmer dabbing pressure around the outside edge will yield darker tones and enhance the highlighting effect.

More ideas and techniques for using PanPastels can also be found on their Facebook Page.

Have a great day,
Elizabeth

Supplies:
Penny Black Stamps: Gathering 40-264, Crystal Pattern 40-162A Better World 4349E
Penny Black Mix & Match Cardstock: Fall Festival 16-003
3M Scotch Dimensional Foam Tape
Copics
Colorfin:  Phthalo Blue Tint PanPastel, Sofft Art Sponge
Imagine Crafts/Tsukineko: Onyx Black VersaFine, VersaMark Watermark Ink, Clear Embossing Powder

November 19, 2013

Igloo Snuggle

Snowflakes are starting to dance about ...time to snuggle.
Merry & Bright
This is a fun image to color and layer. (Penny Black: Igloo illustrated by Mo Manning)  The little flag was created by painting a toothpick black.

Have a warm and cozy day,
Elizabeth

Supplies:
Penny Black Stamps: Igloo 40-267 (illustrated by Mo Manning), Love At Christmas 30-187 (sentiment), Christmas Harmony 30-194 (snowflakes)
Penny Black Mix & Match Cardstock: Fall Festival 16-003
3M Dimensional Foam Tape
Copic Markers
Imagine Crafts/Tsukineko: Onyx Black VersaFine, Love Letter Memento, VersaMark Watermark, Clear Embossing Powder, White Embossing Powder, Jumbo Sponge Dauber.

November 15, 2013

Holiday Hints with Penny Black: Day 5

It was an honor to design on the Penny Black Blog all this week!  

Before I go, one last project for the special "Holiday Hints" feature.  
Holiday Hints with Elizabeth


A sneak peek for Day 5....

Sneak Peek Day 5
Click HERE for the full reveal.

Previous full reveal "Holiday Hints" posts can be viewed by clicking on the corresponding day below:


Thank you for all your visits!
Elizabeth


November 14, 2013

Holiday Hints with Penny Black: Day 4

So excited to be designing all this week on the Penny Black Blog with a special "Holiday Hints" feature.


Holiday Hints with Elizabeth


Here's a sneak peek at Day 4....

Sneak Peek Day 4
Click HERE for the full reveal.

"All throughout the year",
Elizabeth


November 13, 2013

Holiday Hints with Penny Black: Day 3

So excited to be designing all this week on the Penny Black Blog with a special "Holiday Hints" feature.

Holiday Hints with Elizabeth


Here's a sneak peek for Day 3....

Sneak Peek Day 3
Click HERE for the full reveal.

"Sweet" wishes,

Elizabeth


November 12, 2013

Holiday Hints with Penny Black: Day 2

So excited to be designing all this week on the Penny Black Blog with a special "Holiday Hints" feature.

Holiday Hints with Elizabeth


Here's a sneak peek for Day 2 .....

Sneak Peek Day 1
Click HERE for the full reveal.

Wishing you a "luminescent" day...
Elizabeth

November 11, 2013

Holiday Hints with Penny Black: Day 1

So excited to be designing all this week on the Penny Black Blog with a special "Holiday Hints" feature.


Holiday Hints with Elizabeth


Here's a sneak peek for today's project....
Sneak Peek Day 2
Click HERE for the full reveal.

Wishing you a day of "sheer" happiness,
Elizabeth