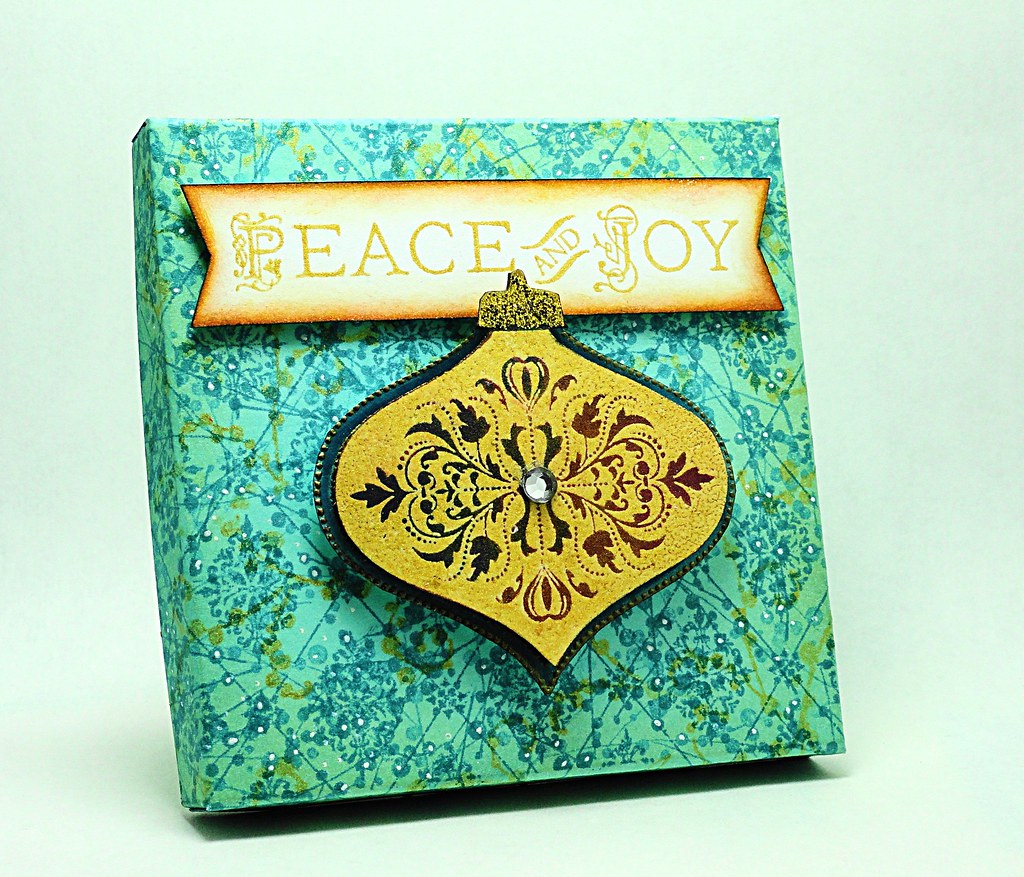
November 30, 2012

Peace and Joy (Gift Box: Same Pattern With New Design)

Using the same box pattern/instructions (slightly enlarged) from the previous post “here”, a whole new design was created!

Peace and Joy Gift Box

While the previous box design captured all the elements of a one-layer concept, today’s feature shows an alternative with added dimension.
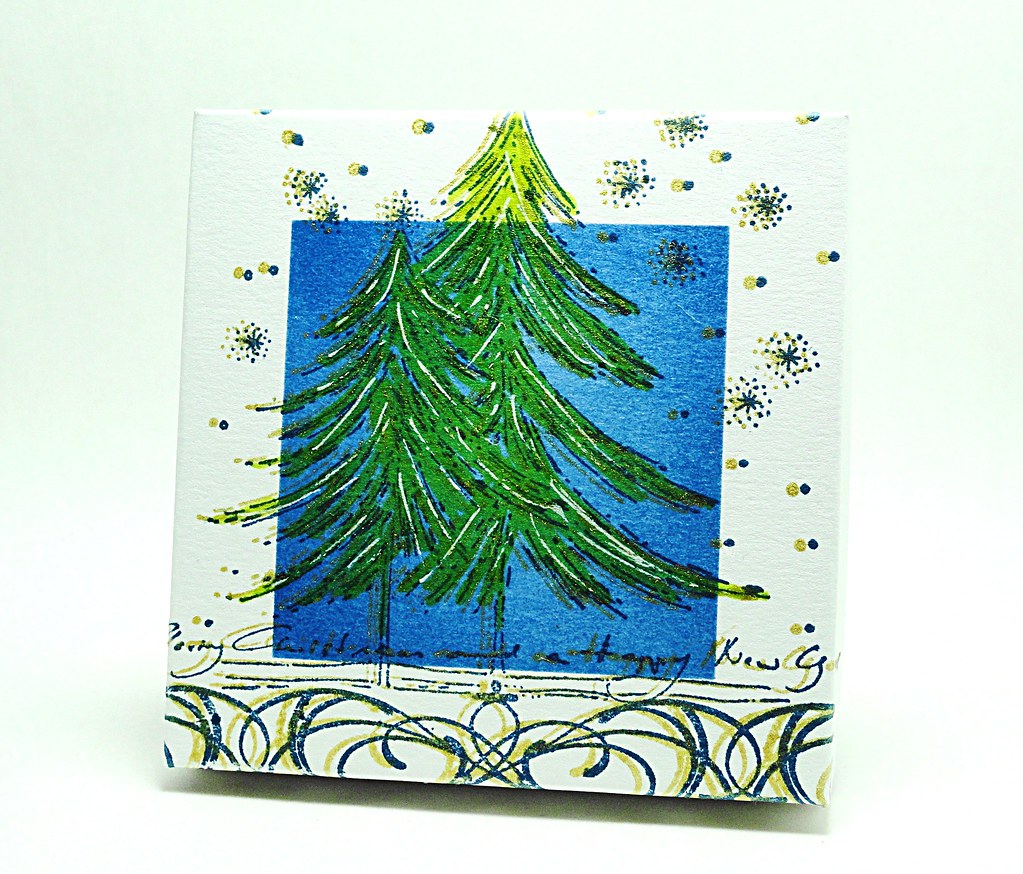

Box Opened 

To 
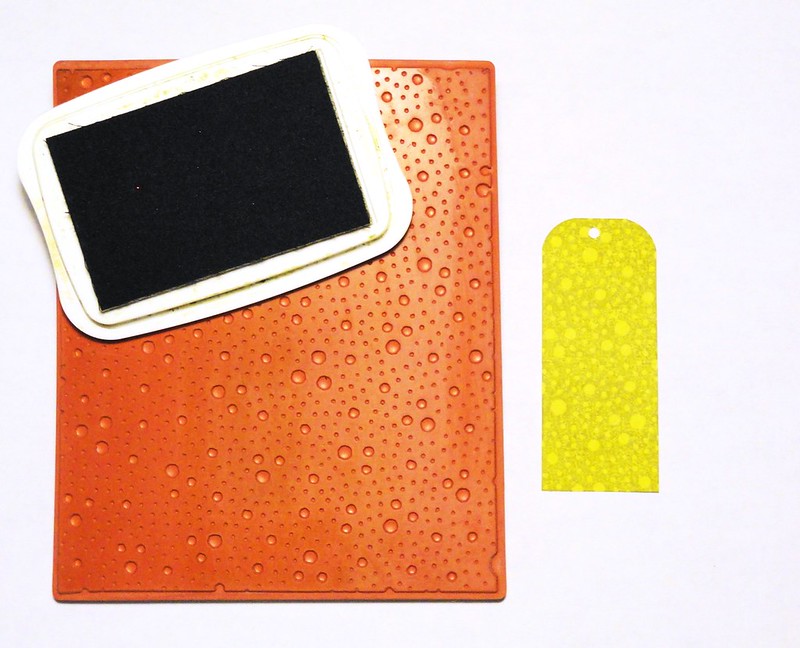
keep the banner and ornament as focal points, a randomly designed background was created for the box top.  A piece of Sea Breeze (08-001) cardstock was stamped with Diamond Pattern and Winter Berries in Teal Zeal Memento ink with golden highlights added with the dotted scroll from A Wish for Peace stamped in Delicata Golden Glitz.
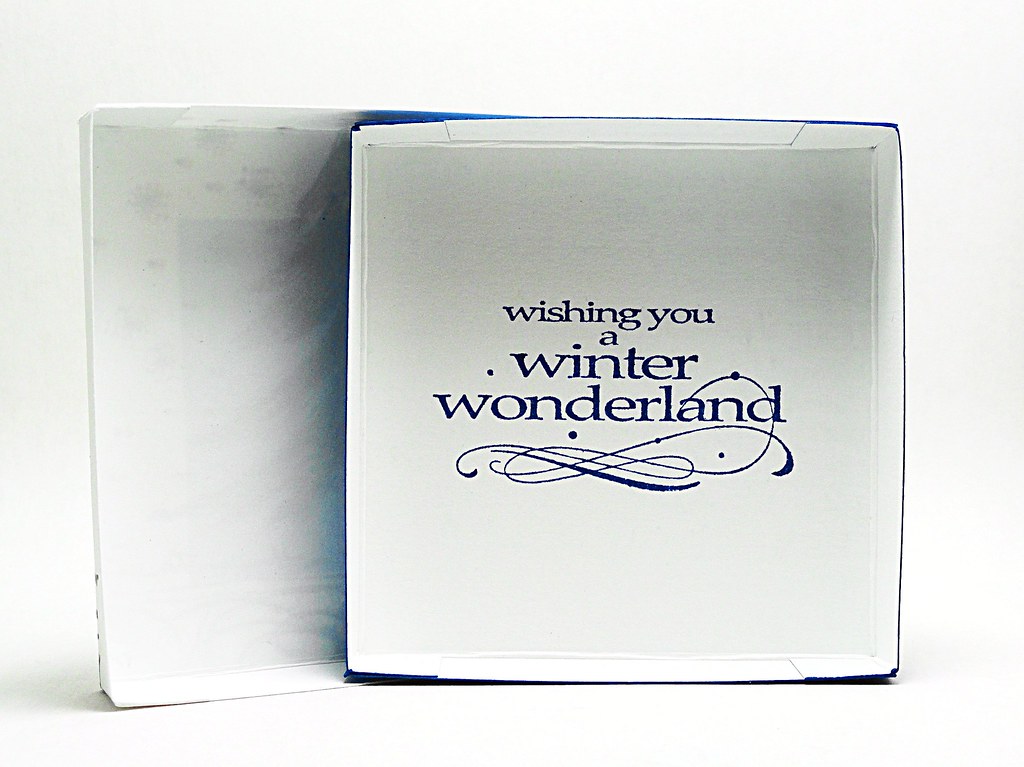
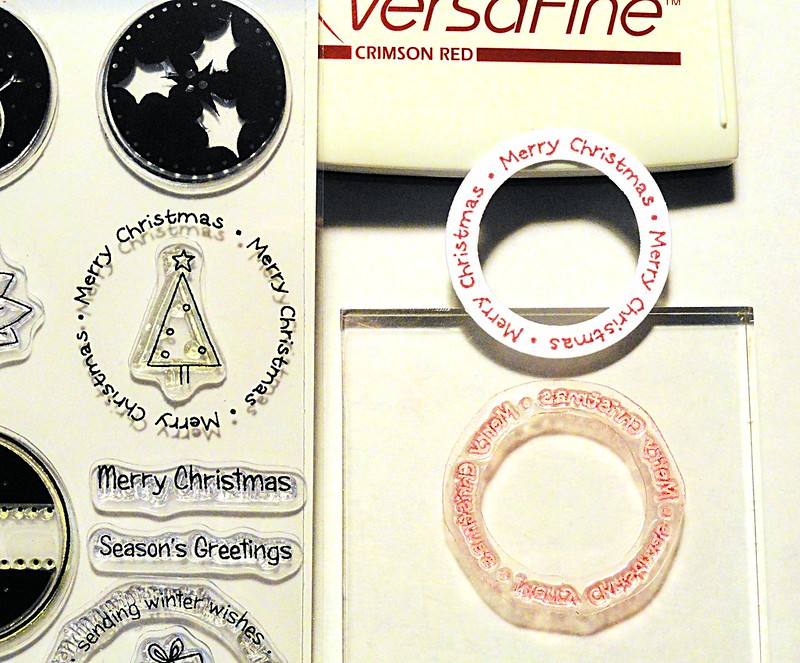
The sentiment for the banner was stamped in Delicata Golden Glitz and highlighted with Peanut Brittle and Toffee Crunch Memento inks.
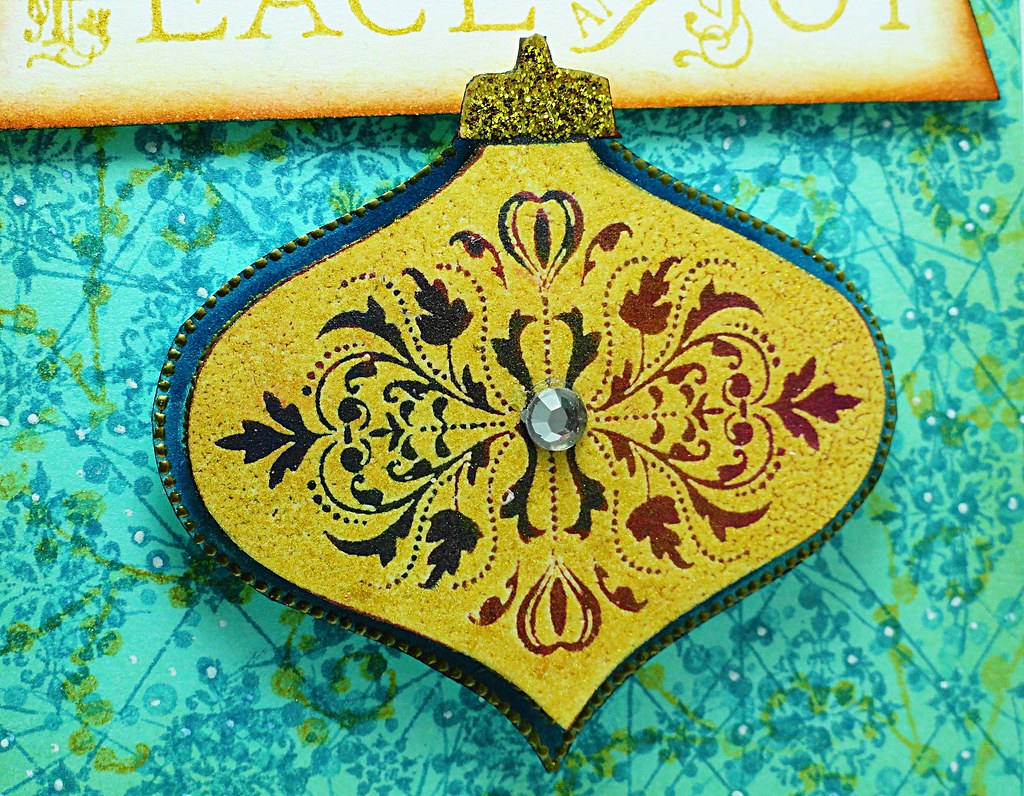
Ornament Close Up 

Two impressions of the ornament (Hanging Treasures) were made with Delicata Golden Glitz on white cardstock and heat embossed with clear powder.  After trimming the ornaments, for layering purposes, the elements were colored with Grape Jelly and Teal Zeal Memento markers.  All the layers and attachments to the box were made with dimensional foam.  A small crystal gem and gold glitter were added for sparkly embellishments.

Enjoy letting your favorite box pattern be the platform for endless design possibilities!

Have a beautiful weekend,
Elizabeth

Supplies:
Penny Black Mix and Match Cardstock: Sea Breeze 08-001
Dimensional Foam
Imagine Crafts/Tsukineko: Delicata Golden Glitz, Teal Zeal Memento, Peanut Brittle Memento, Toffee Crunch Memento, Memento Markers (Grape Jelly, Teal Zeal), Clear Embossing Powder, Sponge Daubers
Mark Richards: Crystal Gem

November 28, 2012

Crystal Drops...A Card & A Box

One great “recipe/technique” can lead to multiple creative variations!  

Today “Crystal Drops”, Penny Black’s elegant collage stamp, is used with the same masking/stamping technique along with Imagine Crafts/Tsukineko's inks to create a card and a box.

The Most Wonderful Time
Echo/Shadow Stamping:  First Impression - Pistachio Memento; Second Impression - Delicata Golden Glitz
For the card, a small area was masked, inked and stamped.  

TIP/HINT:  For shadow/echo stamping, stamp the image once, clean the stamp, re-ink with a second color, and then stamp over the previous impression.

Circular Close Up

Dimensional embellishing accents were created from the sentiments from Hello Winter.

Using the same techniques, a box was designed to match the card.

Crystal Drops Holiday Box
Echo/Shadow Stamping:  First Impression - Nautical Blue Memento; Second Impression - Delicata Golden Glitz

The top of the box contains the same shading and “echo” stamping.    This time the masks were removed before the collage was stamped so the design could extend beyond the "inked window".

Box (Inside)1 
Here, tucked on the inside, a wintry sentiment was added from Christmas Cheer.

 Box (Bottom)1
To finish, the bottom of the box was stamped with Christmas Story.

TIP/HINT:  Penny Black’s Cardstock is wonderful for creating boxes.  Great weight and the one-sided color makes it easy to create two-tone pieces.  In this sample, Clear Skies cardstock offers a fabulous option for the interior to be white while the outside portion is a beautiful blue.

This box was a make-n-take project I taught at CHA and welcome you enjoy these instructions for creative inspiration. 


Box Instructions

·    Mask the sides of a 4 x 4 piece of white cardstock with 1” strips 
of Eclipse Tape.  Highlight the center with Danube Blue Memento Ink.

·   Remove the masks and stamp Crystal Drops in 
Nautical Blue then again with Delicata Golden Glitz.  
Optional:  Add snowy highlights to the trees with a white gel pen or pencil.
    
·   Stamp the background (Christmas Story) on a slightly smaller 
square (3 15/16 x 3 15/16) of Clear Skies cardstock with Nautical Blue 
and the sentiment on the reserve side with Majestic Blue. 

·   Add ½” score lines on the sides of the cardstocks. 
Add slits then fold and assemble the box. 

There is a fabulous week-long holiday event underway on the Penny Black Blog.  You can click "here" to see the inspiration, videos and giveaways!

Enjoy,
Elizabeth

Supplies:
Penny Black Cardstock: Storm 01-001, Clear Skies 10-003, Rose Garden 14-003
Dimensional Foam
Judi Kins: Eclipse Tape
Imagine Crafts/Tsukineko: Danube Blue Memento, Nautical Blue Memento, Majestic Blue VersaFine, Crimson Red VersaFine, Peanut Brittle, Pistachio Memento, Delicata Golden Glitz, Memento Markers (Pear Tart, Danube Blue), Clear Embossing Powder, Jumbo Sponge Dauber

November 26, 2012

"Tagged" (Tutorial)

With the holiday spirit growing and snowflakes falling, tags are wonderful accents to add festive greetings to gifts.

Holiday Penguin Tags
  
These tiny tags made with Penny Black stamps and Imagine Crafts/Tsukineko's inks were created in 6 holly-jolly steps.  

This was also a make-n-take project I taught at the last CHA convention.


 Step 1
Step 1
Cut a 1 ¼ x 3-inch rectangle from Olive Grove Cardstock.  
Round the top corners and punch a small hole at the top.  
Measure 1 5/8 inches down from the top of the tag and make a 1/8” slit on each side.


Step 2
Step 2
Stamp Crystal Pattern on the tag with Pistachio Memento ink.


Step 3


Step 3
Stamp the circular sentiment from Winter Wishes with Crimson Red VersaFine 
on a circular ring created with Spellbinders Standard Circles.


Step 4

Step 4
Stamp the penguin from A Cool Christmas on white cardstock with Onyx Black VersaFine 
and heat emboss with clear powder.  Color the image with Memento markers and trim.


Step 5

Step 5
Thread the tag through the ring and secure in the side notches.  
Place a small amount of adhesive under the ring on the back of the tag 
and insert a piece of dimensional foam under the front of the ring.


Holiday Penguin Tag
Step 6
Adhere the trimmed penguin to the tag with dimensional foam and add twine.


Smiles,
Elizabeth

Supplies:
Penny Black Stamps: A Cool Christmas 30-128, Winter Magic 30-134, Crystal Pattern 40-162
Penny Black Mix & Match Cardstock: Olive Grove 04-001
Imagine Crafts/Tsukineko: Onyx Black VersaFine, Crimson Red VersaFine, Clear Embossing Powder, Pistachio Memento, Memento Markers (Dandelion, Cantaloupe, Tangelo, Summer Sky, Lulu Lavender)
Spellbinders: Standard Circles Small

November 23, 2012

Holiday Stamp Collision - Finale

Time for the holiday stamp collision finale….

It's the Most Wonderful


It was so much fun “colliding” these Penny Black stamps to create this card which can also be a tag.


Winter Berries 4273K
Santa's Hat 4283K
Hello Winter 30-141

Thank you for visiting this week.  Have a wonderful weekend...
Elizabeth


Supplies:
Penny Black Stamps: 4283K Santa’s Hat,  Winter Berries 4273K, Hello Winter 30-141   
Penny Black Mix & Match Cardstock: Fern Green 05-003, Sea Breeze 08-001, Rose Garden 13-003
American Crafts: Ribbon
Copic Markers
Dimensional Foam
Imagine Crafts/Tsukineko: Onyx Black VersaFine, Peanut Brittle Memento, Teal Zeal Memento, Northern Pine, Delicata Golden Glitz, Sponge Daubers, InkBlushers, Clear Embossing Powder
Judi Kins – Eclipse Tape

November 21, 2012

Holiday Stamp Collision - Continued

Welcome back for another holiday stamp collision…..


These are the Penny Black stamps that “collided” for today’s card….


Christmas View 4274K
 
Hello Winter 30-141
 
Joy to the World 30-143
 
One-Scoop! 4285J

 
TIP/HINT:  Alter holiday stamps for year-round versatility as seen “here” with Christmas View.

See you on Friday with the finale collision!

Elizabeth

Supplies:
Penny Black Stamps: One-Scoop 4285J, Christmas View 4274K, Joy to the World 30-143, Hello Winter 30-141   
Penny Black Mix & Match Cardstock: Purple Mountain 12-001
Copic Markers
Dimensional Foam
Imagine Crafts/Tsukineko: Onyx Black VersaFine, Peanut Brittle Memento, Toffee Crunch Memento, Grape Jelly Memento, Spring Pansy VersaMagic, Sponge Daubers, InkBlushers, Clear Embossing Powder
Spellbinders: Standard Circles


November 19, 2012

Holiday Stamp Collision

One of the many things I enjoy about Penny Black's rubber stamps is that so many different styles can be used together. 


From elegant to whimsical, they all work together to create colorful little scenes.

These are the stamps used in this design:


Chill Day 4284K


Joy to the World 30-143


Hanging Treasures 40-165


A Bright Tomorrow 30-130


More holiday stamp “collision” to come in my next post!

Have a great day,
Elizabeth  

Supplies:
Penny Black Stamps: Chill Day 4284K, Hanging Treasures 40-165, Joy to the World 30-143, A Bright Tomorrow 30-130  
Penny Black Mix & Match Cardstock: Rose Garden 14-003
Copic Markers
Dimensional Foam
Imagine Crafts/Tsukineko: Onyx Black VersaFine, Dandelion Memento, Morocco Memento, Love Letter, Teal Zeal Memento, Pistachio Memento, Espresso Truffle Memento, Sea Breeze VersaMagic, Sponge Daubers, InkBlushers, Clear Embossing Powder
Offray: Ribbon
Sakura: White Gel Pen
Spellbinders: Labels Twenty-Two (S4-346)

November 15, 2012

Metal Tag Bracelet


Continuing with the theme of jewelry, I have a second bracelet made for the “Artist in Residence” Imagine Crafts/Tsukineko Design Team using their new metal dog tags.


Enjoy following along with this step-by-step picture tutorial.


Instructions


Apply droplets of ink from StazOn Wide Mouth Bottles
(Blazing Red, Vibrant Violet and Teal Blue)
to a metal dog tag using Ink Droppers. 
Mottle the ink by pouncing it with
a small piece of an InkBlusher.  Let dry.
Punch a hole on the opposite end to match the pre-fabricated hole.


 Apply a few drops of Matte GlazOn to an
InkBlusher and gently dab the surface of the colored tag.
Let dry.


Stamp Paisley Swirls (Penny Black) on the dog tag in Cotton White StazOn Opaque.
Let dry.


Remove the blue protective backing from back of the tag.
Bend the piece to add a slight curve.


Finish the bracelet by adding assorted beads with elastic cording.


Thank you for sharing your time with me!

Smiles,
Elizabeth

Supplies:
Penny Black Stamps: Paisley Swirls 40-011
Imagine Crafts/Tsukineko:  Cotton White Opaque StazOn, Vibrant Violet StazOn Wide Mouth Bottle Ink, Blazing Red StazOn Wide Mouth Bottle Ink, Teal Blue StazOn Wide Mouth Bottle Ink, GlazOn Matte, Ink Droppers, InkBlushers, Sheet Metal Dog Tags
Other:  Assorted Beads, Elastic Beading Cord

November 12, 2012

Flower Charm Bracelet

Recently I created a few pieces of jewelry as “Artist in Residence” projects for Imagine Crafts/Tsukineko and I am excited to share them with you this week. 

Today’s piece uses shrink plastic stamped with flowers in StazOn Ink to make the charms for this bracelet.


 Here is how to create this wrist adornment:
  1. Follow manufacturer’s instructions for preparing shrink plastic. 
  2. Stamp circular flower elements (Wishes by Penny Black) on the prepared shrink plastic using Ultramarine StazOn ink.  Immediately clean stamps after use. 
  3. Let the stamped impressions dry for approximately 5 minutes.
  4. Die cut the stamped circles using Spellbinders Standard Circles.
  5. Punch a 1/8” hole on each side of the plastic circle.
  6. Heat the shrink plastic circles according to the manufacturer’s directions.
  7. Link the circles with jump rings, beads and finish with a clasp.

I will have a second piece later this week that has Imagine Crafts/Tsukineko’s new metal dog tags!

Thank you for visiting,

Elizabeth

Supplies:
Penny Black Stamps: Wishes (30-103)
Imagine Crafts/Tsukineko: Ultramarine StazOn, StazOn All Purpose Cleaner
Spellbinders: Standard Circles Large (S4-114)
Other: Shrink Plastic, 1/8” Hole Punch, Jump Rings, Silver Beads, Lobster Claw Clasp

November 8, 2012

So Lucky!

There is nothing better than sharing a hug!  Polar Mimi is one of my favorite holiday stamps by Penny Black.  The polar bear is so cuddly cute!
A small “snow” platform was created to “pop” Mimi and her friend up from the wintry background.


Holiday Friend - 4290E
 Tip/Hint:  Inking portions of sentiments gives more stamping variations.  In this sample, the sentiment was inked and stamped in two separate steps for this narrow design.  This sentiment can also be used year round by eliminating the application of ink to the “for the holiday and all the year through” portion.

These were two other sentiment variation adjustments that were also implemented:    

1) Another image stamped in red was made on a separate piece of white cardstock.  The “friend” banner was then trimmed and placed over the original banner stamped in black.
2) A glue pen was used to trace the word “holiday” and red glitter was applied for an embellishing accent.

Thank you for visiting and share a “squeeze” with someone today….
Elizabeth

Supplies:
Penny Black Mix & Match Cardstock: Spring Meadow 06-001, Fuchsia Fantasies 13-003
Copic Markers
Corner Rounder
Dimensional Foam
Imagine Crafts/Tsukineko: Onyx Black VersaFine, Crimson Red VersaFine, Spanish Moss VersaFine, Teal Zeal Memento, Grape Jelly Memento, Sponge Daubers, Clear Embossing Powder
Sakura: White Gel Pen
Other:  Glue Pen, Red Glitter

November 5, 2012

Holiday Greetings from Mimi & Miles

This week Mimi is getting ready for the holidays.


Here she is sharing a starry stroll with her friend Miles.

These are the stamps that were used from Penny Black’s Christmas 2012 Collection.


Star Gazing 4282J

Hello Winter 30-141

Mimi will be returning soon with a furry friend!

Thank you for visiting,
Elizabeth

Supplies:
Copic Markers
Imagine Crafts/Tsukineko: Onyx Black VersaFine, Cantaloupe Memento, Tangelo Memento, Lady Bug Memento, Teal Zeal Memento, Lilac Posies Memento, Grape Jelly Memento, Sponge Daubers, InkBlushers, Clear Embossing Powder
Sakura: White Gel Pen
Spellbinders: Standard Circles Large (S4-114), Classic Scallop Circles (S4-124)

November 2, 2012

Decorative Napkin Ring (Tutorial)

A little touch of autumn flair for the holiday table with this decorative napkin ring using Penny Black's Foliage Fancy and Imagine Crafts/Tsukineko Sheet Metal.


Create this project in 8 quick steps!


Step 1:  Apply a thin coat of Matte GlazOn with a chisel tip
Brushstix to the metal sheet.  Let dry.


Step 2:  Stamp the solid leaf in Copper StazOn Metallic over the area of metal
that has been brushed with the Matte GlazOn.  Let dry.


Step 3:  Apply a thin coat of Matte GlazOn with the Brushstix
over the stamped image.  Let dry.


Step 4:  Stamp the detailed leaf in Forest Green StazOn
        directly on top of the solid leaf.  Let dry. 


Step 5:  Apply a thin coat of Creative Medium Vintage
          over the image with a Brushstix.  Let dry.


Step 6:  Trim the image with tin snips and peel away
the protective backing.


Step 7:  Create a ring with green florist wire.  Wrap copper wire around the ring
       to add a decorative touch as well as to secure the leaf to the ring.


Step 8:  Add soft bends to the design for visual interest.

Design Variations:  Autumn Wreath, Charms, Jewelry

A SPECIAL THANK YOU to Imagine Crafts/Tsukineko for providing INKd project sheets for this week’s autumn designs.  Enjoy these free downloadable and printable links: 

Decorative Napkin Ring (posted today) can be accessed “here
Thanks A Bunch (as seen “here”) can be accessed “here
Autumn Kindness (as seen “here”) can be accessed “here


Have a great weekend,
Elizabeth

Supplies:
Penny Black Stamps: Foliage Fancy (30-138)
Imagine Crafts/Tsukineko: Sheet Metal Postcard, Brushstix Chisel Tip, GlazOn Matte, Copper StazOn Metallic, Forest Green StazOn, Creative Medium Vintage
Other: Green Florist Wire, Copper Wire, Tin Snips