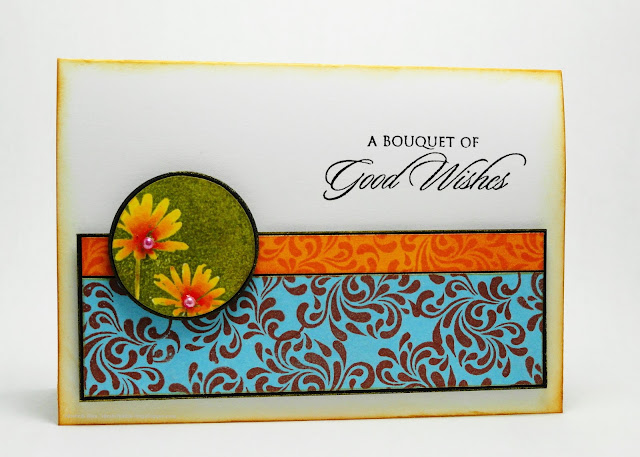
Showing posts with label Flowers. Show all posts

December 17, 2013

Studio Sessions: Memento Luxe Ink, 1 of 4

Studio Sessions

This week Jill and I are are creating with Memento Luxe inks.
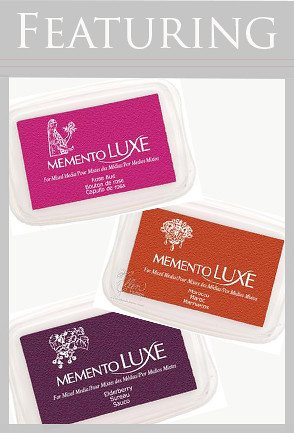
Studio Sessions Featuring Memento Luxe
Imagine Crafts / Tsukineko Memento Luxe Ink
Additional Imagine Crafts / Tsukineko Inspiration on their FACEBOOK PAGE

These pigment inks are currently available in 24 colors and are complementary to the Memento dye ink line.  The ink formulation allows you to use them on paper, fabric, wood and more.  Plus, they are permanent when heat set.

Today I am using the inks on glossy cardstock.
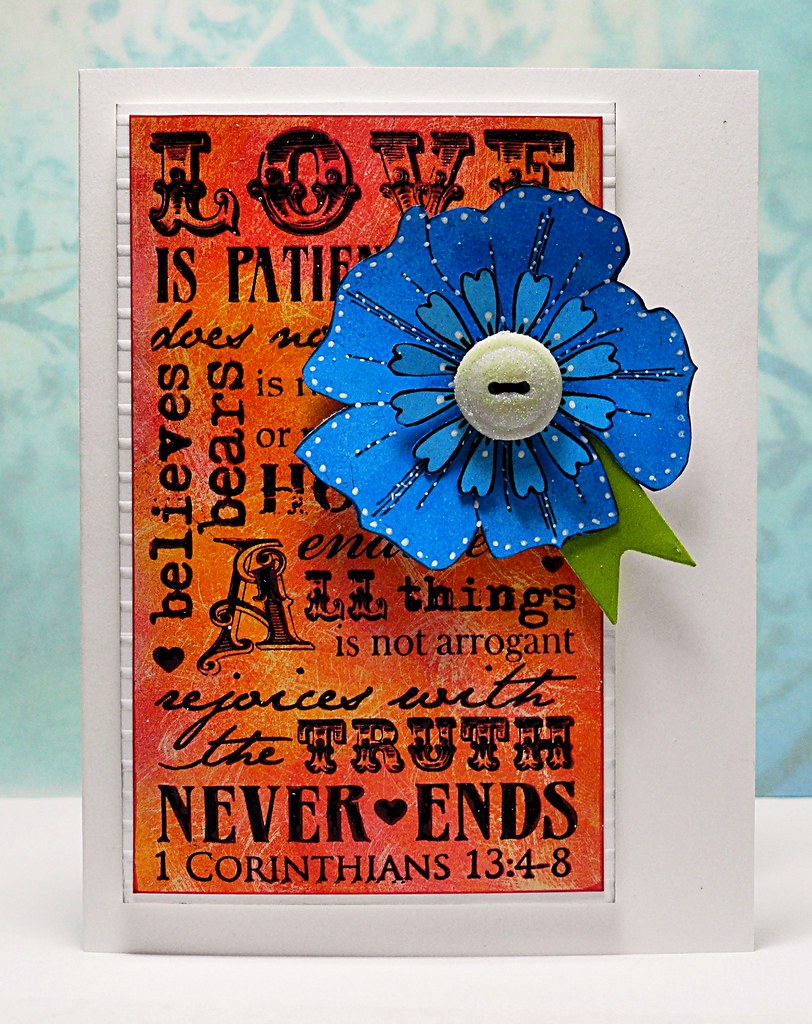

Love Is...
The blending capabilities of the Memento Luxe inks are terrific which makes it easy to create smooth marbled effects on glossy papers.  
DSC05403
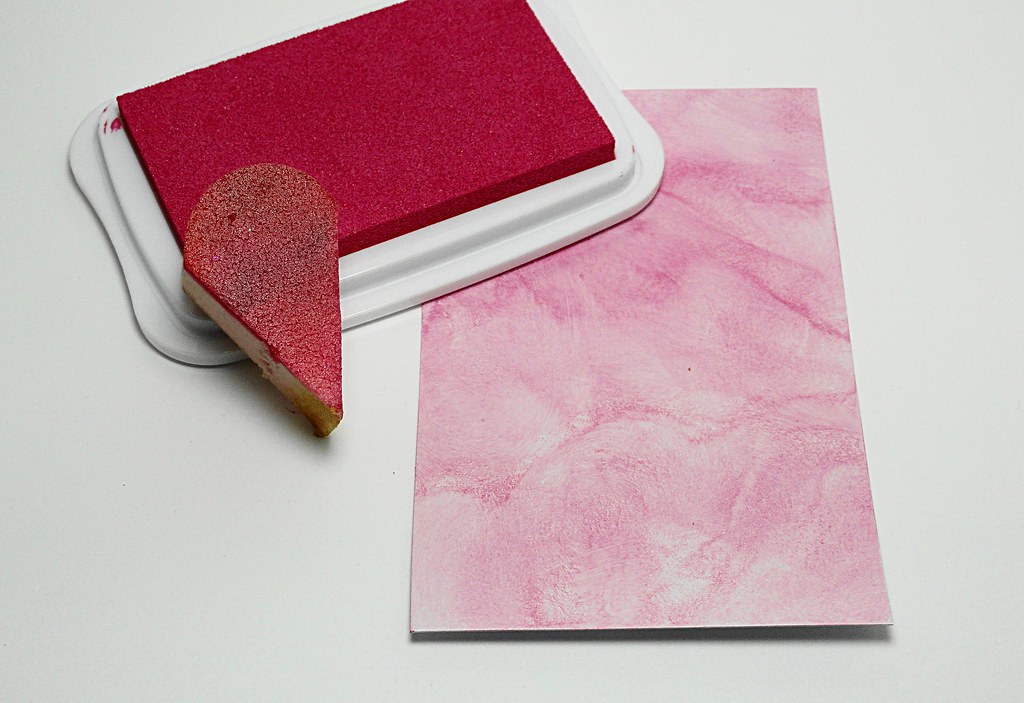
To begin, an InkBlusher was used to apply Rose Bud Memento Luxe to a piece of glossy cardstock.  A dabbing and scrunching motion of the applicator yields a marbled effect.  The same process was used to apply Dandelion and Morocco Memento Luxe next.

TIP/HINT:  Depending how much you would like the application of colors to blend, you will want to experiment with adding inks while wet and/or drying between color additions.  You will find that you have many different ways to manipulate your colors.
DSC05430
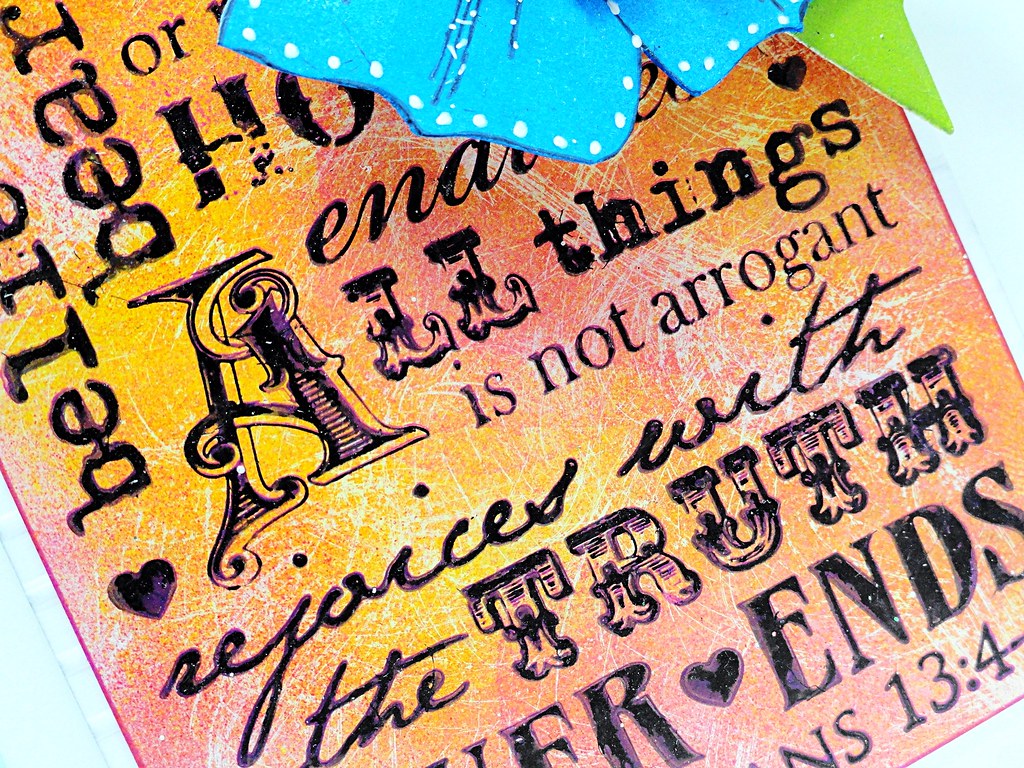
You will notice there are some hair line crackles in the mottled background.  After the ink dried (I used a heat tool), a dry crumpled paper towel was softly wiped across the color.  This removed an ever-so-slightly bit of ink.

The background verbiage (Love Chapter) was stamped in a two-part process.  First with Lilac Posies Luxe Memento, then over stamped a second time with Jet Black StazOn.  Don't worry if they are not perfectly aligned.  A slight offset gives a wonderful "echo" effect and adds even more depth to the wording.
DSC05431
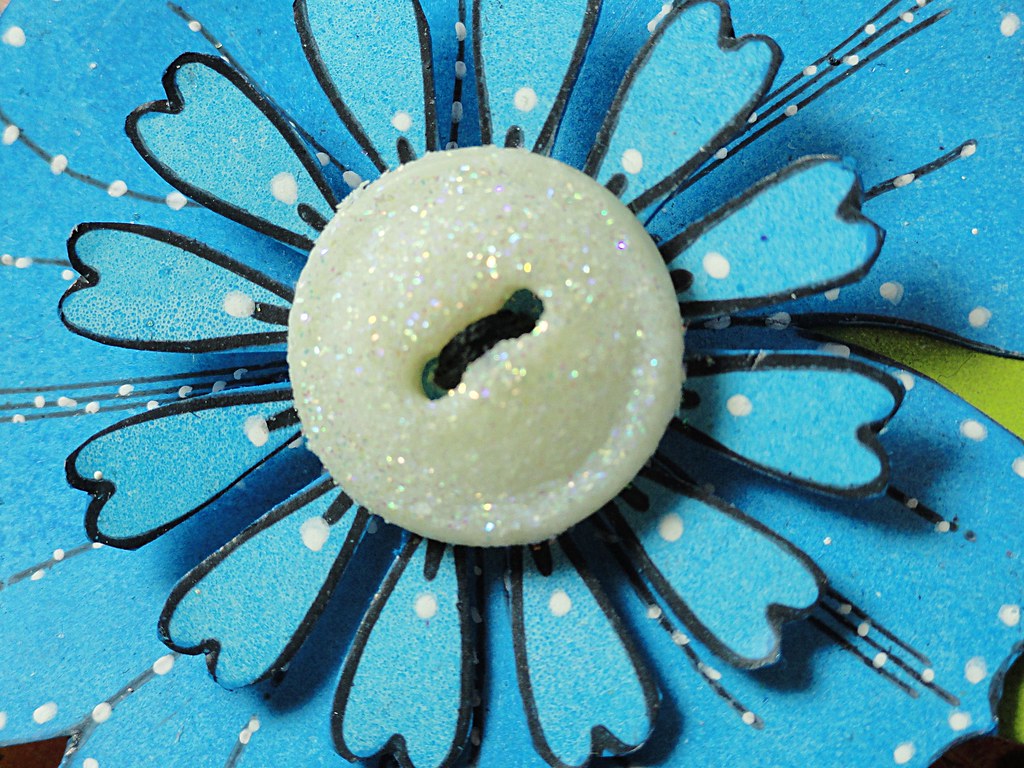
For the flowers (To You and Round & Round), I first applied the Danube Blue Memento Luxe to a piece of glossy cardstock with an InkBlusher then stamped the flowers with Jet Black StazOn.  In this instance, coloring first helped maintain the rich intensity of the stamped image.  Otherwise, in reverse order, the opaque ink would have muted the black detailing.  A heat tool helped quicken the drying process so the flowers could be handled for trimming without being smudged.

Finishing touches were a tag (Tagged) die cut from glossy cardstock inked with Pear Tart Memento Luxe and a sparkly button.  

Tip/Hint:  To add a little bling to plain buttons, pounce them with VersaMark Watermark ink, sprinkle with sparkle embossing powder and heat set. 

For another infusion of color, don't miss what Jill has created!


Jill's Studio Artwork


Colorfully,
Elizabeth

Supplies:
Penny Black Creative Dies:  Tagged 51-007
Imagine Crafts/Tsukineko:
  Memento Lux Inks: Dandelion, Morocco, Rose Bud, Lilac Posies, Pear Tart, Danube Blue
  Jet Black StazOn
  VersaMark Watermark Ink
  Sparkle Embossing Powder
  InkBlushers
  Memento Markers: Bahama Blue
 Other: Clear Embossing Stamp Pad, Clear Embossing Powder, Blending Stump

August 2, 2013

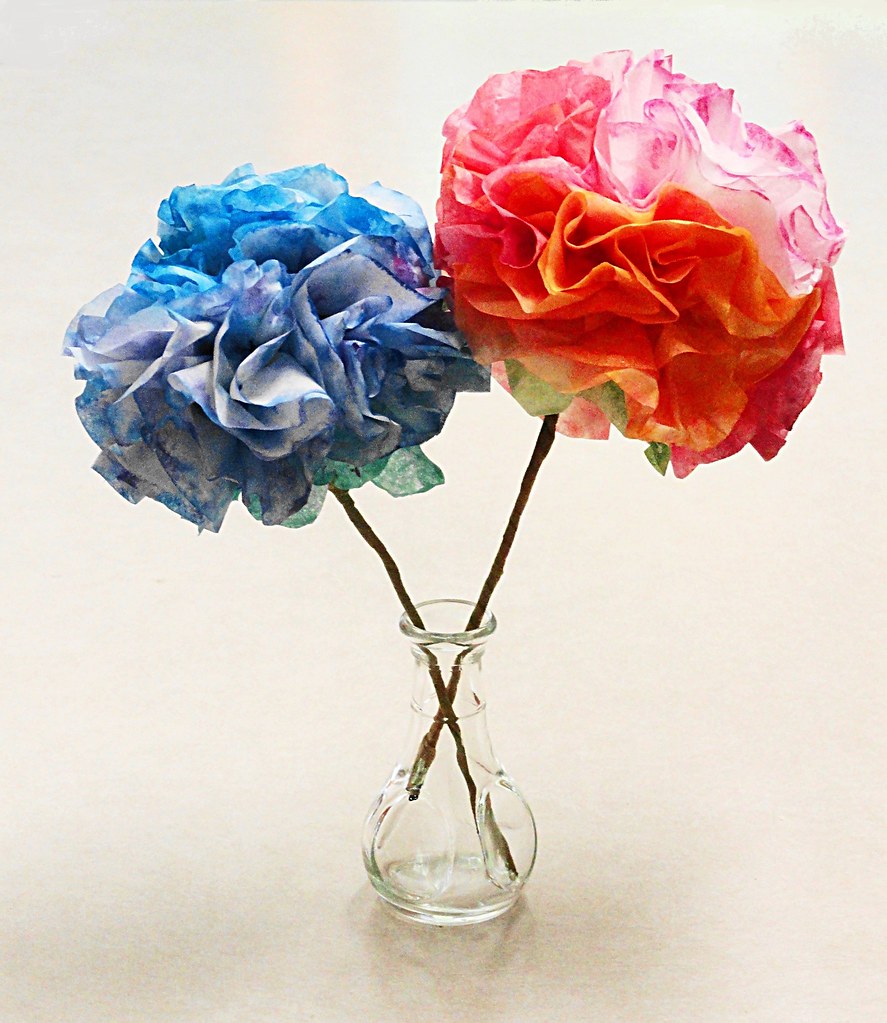
A Bouquet of Good Wishes

"Percolating" colorful flowers with coffee filters.

A Bouquet of Good Wishes

These were inspired by the large peony and hydrangea blooms that I have seen this summer.

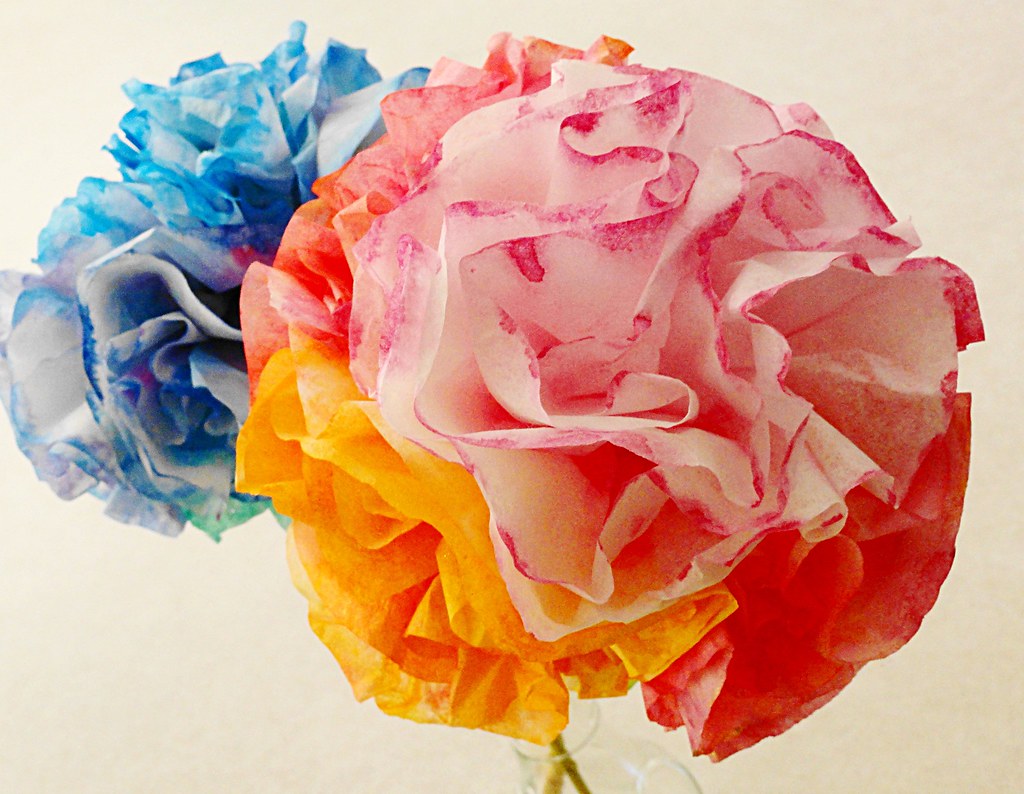
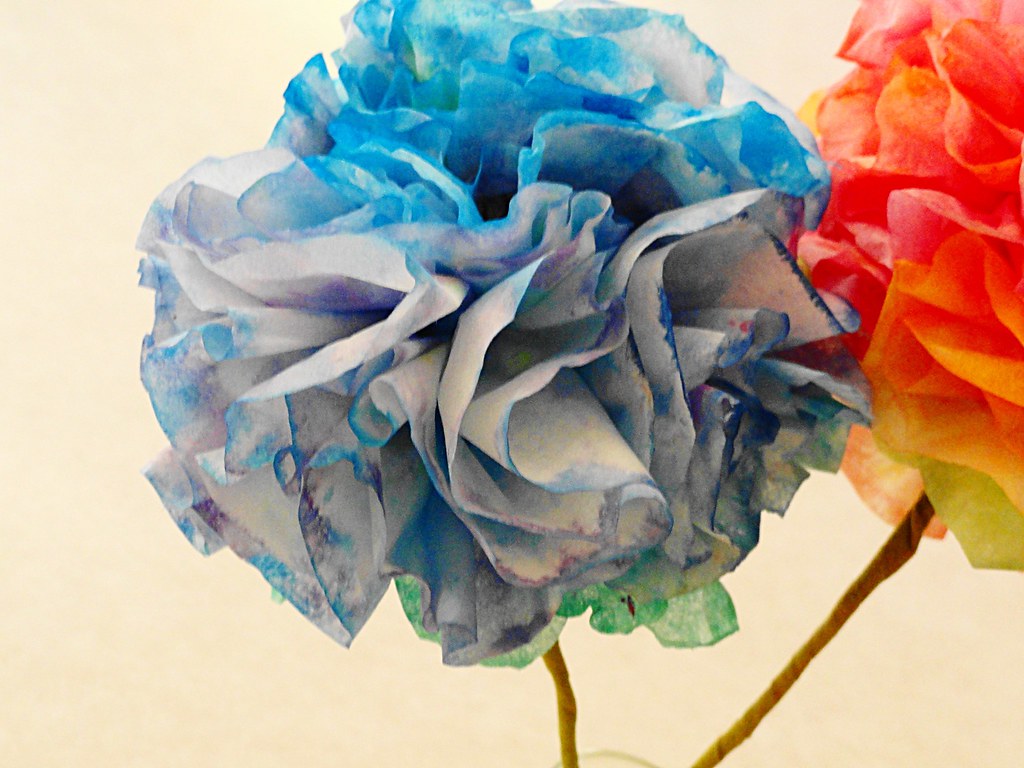
Several groupings of coffee filters were scrunched together to make small flowers.  After coloring, the groupings were then assembled together for the larger bloom.


DSC04966

This orange and pink flower was colored with a combination of Dr. Ph. Martin's Hydrus Watercolors and Ranger Distress Paints.


DSC04957

And this blue flower was painted with just the Dr. Ph. Martin's Hydrus Watercolors.  


A Bouquet of Good Wishes

The wired stems were wrapped with twill tape colored with diluted Ranger Distress Paints.  

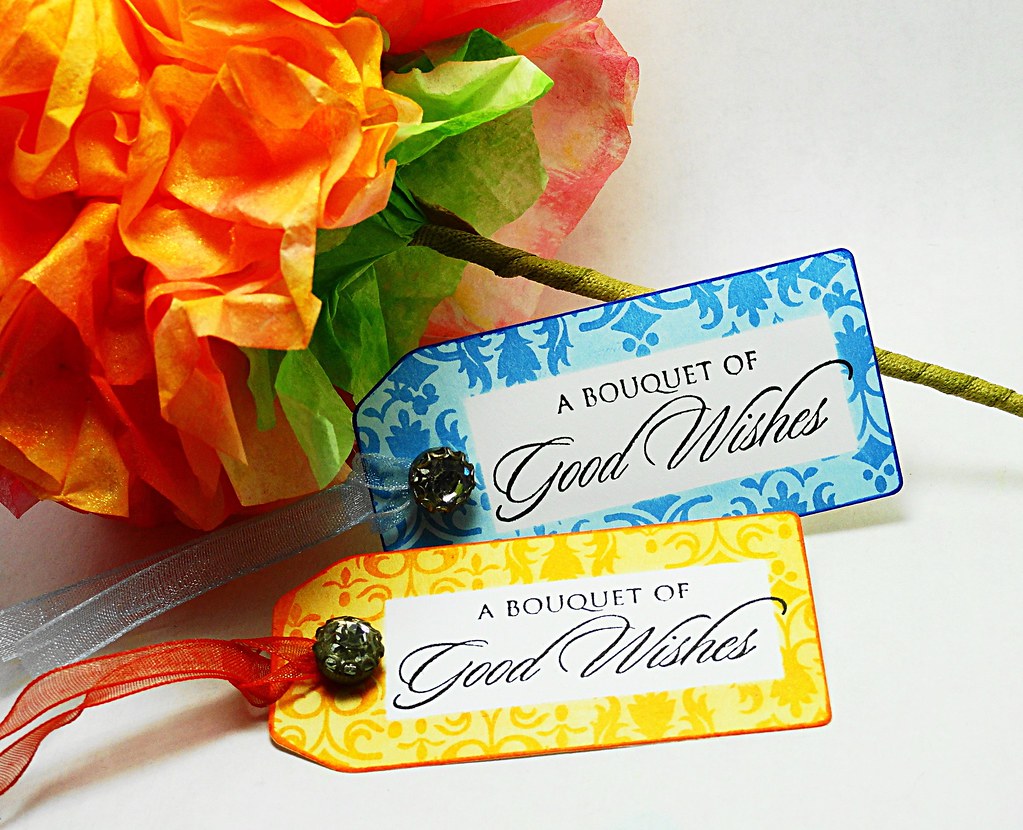
Tags die-cut from white cardstock using Penny Black's Tagged Creative Dies were first masked in the center with Eclipse Tape.  The flourish was stamped with VersaMark Watermark ink and then covered with an application of Phthalo Blue Tint and  Orange PanPastels.  After the mask was removed, the sentiment was stamped in Onyx Black VersaFine.

Colorful sheer ribbons with antique crystal buttons were attached for adornment.

Thank you for visiting.  Wishing you everlasting color....
Elizabeth

Supplies:
Penny Black Stamps:  Gratitude 30-105
Penny Black Creative Dies: Tagged 51-007
Colorfin: Phthalo Blue Tint and Orange PanPastels, Sofft Art Sponges
Dr. Ph. Martin's Hydrus Watercolors
Imagine Crafts/Tsukineko: Onyx Black VersaFine
Judi Kins:  Eclipse Tape
Ranger Distress Paints
Other: Twill, Florist Wire,

June 24, 2013

Color Combo: Orange and Teal

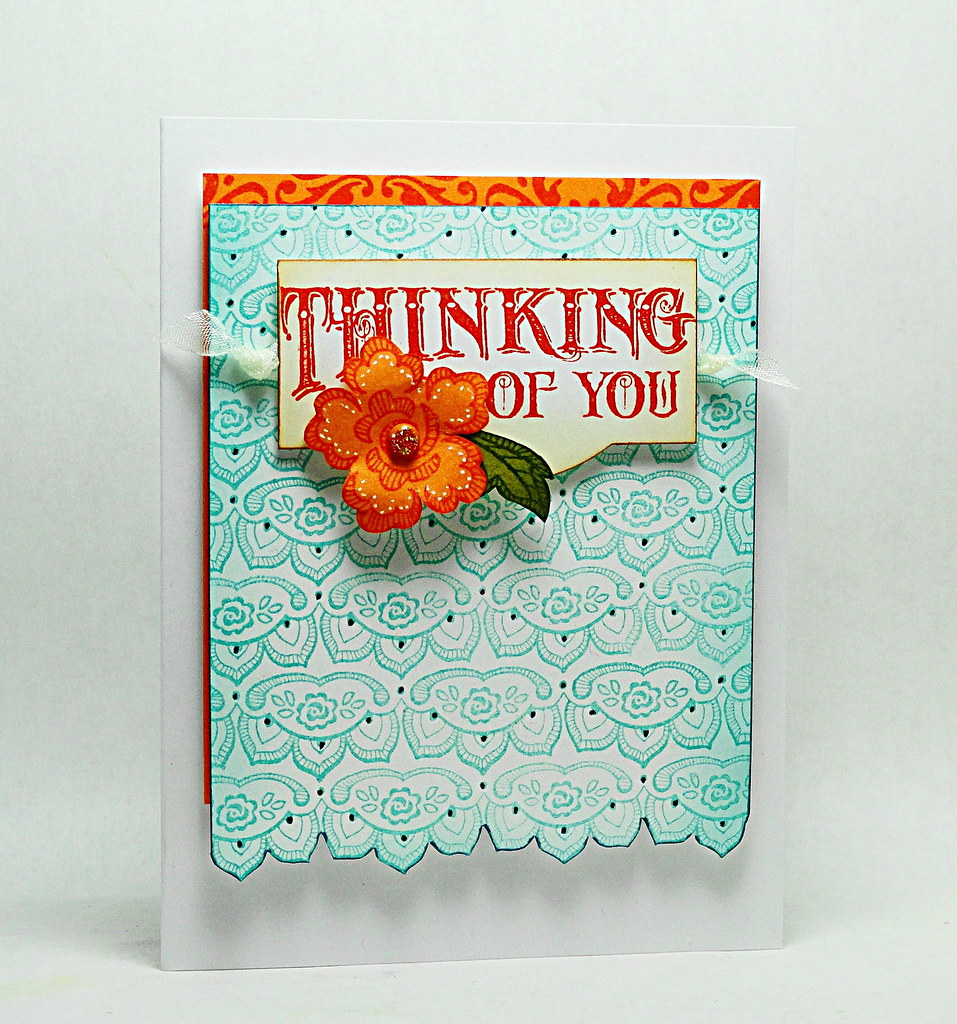
Today I am using one of my favorite color combinations: orange and teal.  

Thinking of You

For this design, you can let all the ink and cardstock do the coloring for you.  

Here's how with Imagine Crafts/Tsukineko inks and Penny Black stamps....
  • Stamp the top portion of a rectangular piece of orange cardstock with Lace Trims in Habanero VersaFine.  Adhere to the front of a white card base.
  • Stamp Lace Trims on a separate rectangular piece of white cardstock with Sea Breeze VersaMagic and trim the bottom to follow the stamped pattern.
  • Attach this on top of the orange cardstock (as shown) with dimensional foam tape.
  • Stamp the sentiment in Habanero VersaFine on a shapely piece of white cardstock and distress the edges with Peanut Brittle Memento.  Sneak a small piece of knotted ribbon behind the tag before attaching it to the front of the card with dimensional foam tape.  
  • Adorn with a fussy cut flower and leaf stamped from Floral Applique.  The flower is stamped in Habanero VersaFine on orange cardstock and the leaf is stamped in Olympia Green VersaFine on green cardstock.
  • Extras:  An orange brad covered with stickles for the center of the flower.  White gel pen accents for the flower petals.  Black pin dots used throughout the teal lace border.


Have a wonderful day,
Elizabeth

Supplies:
Penny Black Mix & Match Cardstock: Storm 01-001, Fern Green 05-003, Fall Festival 16-003
3M Scotch Dimensional Foam Tape
Image Crafts/Tsukineko: Habanero VersaFine, Olympia Green VersaFine, Peanut Brittle Memento, Sea Breeze VersaMagic, Jumbo Sponge Dauber
Ranger: Crystal Stickles
Other: Orange Brad, White Gel Pen, Black Micron Pen, Organza Ribbon

May 24, 2013

Flower Conversion

"Re-bloom" your favorite flowers to make appearances throughout the year.

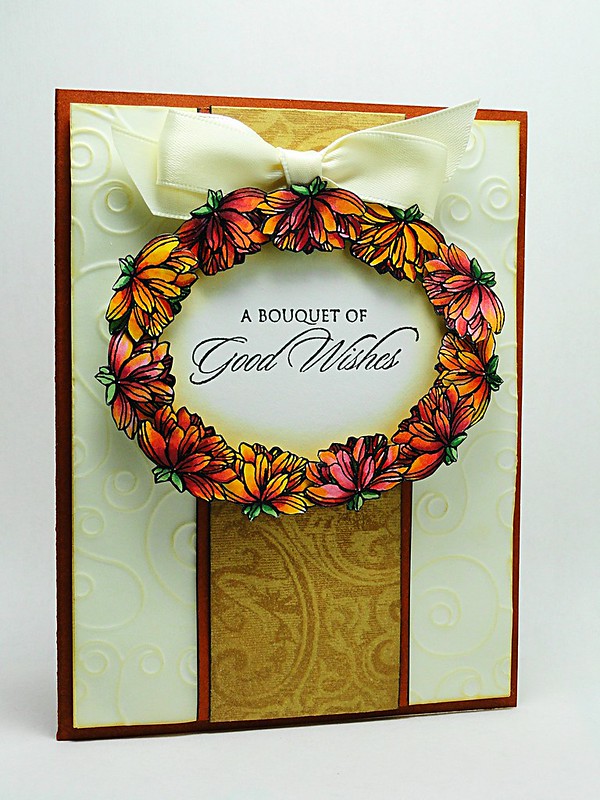
Bouquet of Good Wishes
Published in Scrap & Stamp Arts, June 2013.
Step-by-step instructions and a complete supply list are located on pages 36 & 37.

These summery flowers from Flowers Sweet were altered to create an autumn wreath.

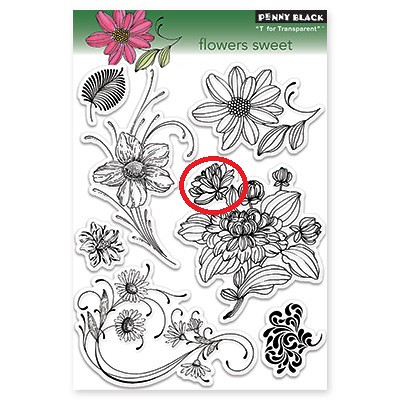
Flowers Sweet
Image used in the project is circled in red.
Color adaptation and artful arrangement of your favorite florals will "bloom" designs for any season.  

Have a wonderful weekend,

Elizabeth

Supplies:
Penny Black Mix & Match Cardstock: Storm 01-001; Sticks & Stones 02-001, 02-002; Grand Canyon 03-002
Penny Black Vellum: Scroll White Embossed EP501


April 4, 2013

Coffee Filter Flowers

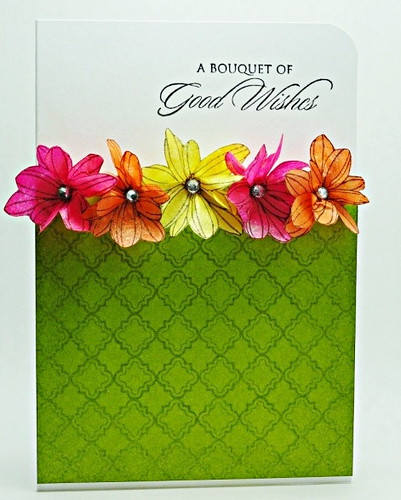
Have fun creating dimensional flowers from coffee filters!

Bouquet of Good Wishes

It's as easy as spritzing coffee filters with Imagine Crafts/Tsukineko's Fireworks and stamping with a flower from Penny Black's Flowers Sweet set. 


Instructions
  • Create a 3 ¾ x 5 ½-inch side-folded card from white cardstock.  Trim the upper right corner with a rounding punch.
  • Stamp the sentiment in Onyx Black VersaFine ½-inch from the top of the card and heat emboss with clear powder.
  • Stamp the decorative pattern with Spanish Moss VersaFine on a 3 ¾-inch square of Fern Green cardstock.  Lightly distress the edges with the same ink and a jumbo sponge dauber.
  • Attach the stamped cardstock to the front of the prepared card with dimensional foam.  Set aside.
  • Spray coffee filters with Fireworks.  Let dry.  TIP/HINT: A heat tool can be used to speed drying time.
  • Stamp the flower on the sprayed coffee filters with Onyx Black VersaFine. 
  • Trim the flowers.  Using a needle and thread, sew a basting stitch around the center of each flower.  Pull the thread ends to cinch the flower together and tie off the threads.
  • Place a crystal gem in the center of each flower.
  • Adhere the flowers to the top the elevated green mat.
Enjoy "brewing" a bouquet of blooms!

Elizabeth


Supplies:
Penny Black Stamps:  Flowers Sweet (30-096), Gratitude (30-105), Puzzle Parts (30-114)
Penny Black Mix & Match Cardstock:  Storm (01-001), Fern Green (05-002)
Imagine Crafts/Tsukineko:  Onyx Black VersaFine (VF-082), Spanish Moss VersaFine (VF-062), Fireworks: Dandelion (FW-100), Cantaloupe (FW-103), Rose Bud (FW-400), Clear Embossing Powder (EB-000-005), Jumbo Sponge Dauber (ST-PKG-002)
Mark Richards, Inc.:  Crystal Sticker Elements (Clear #1609)
Other:  Coffee Filters, Heat Tool, Dimensional Foam Tape, Corner Rounder, Needle & Thread

For questions and/or comments, please feel free to e-mail me at:  elizabeth.a.allan@gmail.com

June 15, 2012

Smiles

More new designs from Penny Black's 2012 Summer Collection!


This shapely card was created with a Spellbinders Labels Ten.  Two die cuts from white cardstock form the card base.  A third piece cut from Sea Breeze cardstock was stamped with Flower Flourish in Teal Zeal Memento ink and highlighted with the same color and a sponge dauber.  After adding faux stitching and black brads, the piece was aligned and attached to the prepared card with dimensional foam tape.

TIP/HINT:  For fast faux stitching, trace the inside of the metal die with a fine-tip black pen.  Remove the metal die and then paper pierce evenly spaced holes along the traced line.

The flower from Petal Party was stamped twice on white cardstock with Tuxedo Black Memento ink and colored with Brushstix and Memento inks (Cantaloupe, Lilac Posies and Elderberry).  The same method was used for the leaf using Pistachio and Olive Grove Memento inks.

The perfectly spaced dots were easy to stamp in Pistachio Memento ink using the stem included in Round and Round.  After the sentiment was stamped, the piece was edged in Peanut Brittle Memento.

All the components were layered with dimensional foam and accents were added to all the dots with black and green Glaze pens.

You can also see other designs using Petal Party featured on the Penny Black blog "here".

Looking forward to sharing MORE new images next week!

Smiles,
Elizabeth

Supplies:
Penny Black Mix & Match Cardstock: Storm 01-001, Sea Breeze 08-002, Fall Festival 16-003
3M Scotch: Dimensional Foam Tape
Sakura: Black and Green Glaze Pens
Spellbinders: Labels Ten (S5-022)
Tsukineko: Onyx Black VersaFine, Teal Zeal Memento, Cantaloupe Memento, Lilac Posies Memento, Pistachio Memento, Olive Grove Memento, Elderberry Memento, Peanut Brittle Memento, Sponge Daubers, Brushstix
Other: Black Brads

April 20, 2012

Pocket Full of Posies

Today’s project captures the essence of the large resist background in a coordinating medallion.


While the two flower designs do not match exactly, there is the illusion that the medallion is a smaller, colored snapshot of the larger pattern.

The bottom portion of the card is a pocket of white cardstock stamped with Posies in VersaMark Watermark ink and heat embossed with clear powder.  Nautical Blue and Cantaloupe Memento inks were applied with sponge daubers over the embossed design.  A damp tissue was used to “buff” away the ink from the embossed areas revealing the resist pattern.


The sliding portion was cut from Summer Sun cardstock and scored to create an overhanging tab.  The tab was then trimmed with Spellbinders Labels Twenty-Two.  The background from Warm Wishes was stamped in Tangelo Memento and highlights were added with the same color.

The medallion is two scalloped circles die cut from white cardstock.  One is the base which was stamped with the circular flower image from Wishes with Majestic Blue VersaFine and heat embossed with clear powder.  The flowers were then colored with Memento markers.  The second scalloped circle was die cut with a smaller standard circle to create a small window.  After distressing with Nautical Blue Memento it was elevated on top of the first piece with dimensional foam. 

Small pearls and a tiny ribbon accent the completed piece.

Wishing you a colorful weekend,
Elizabeth

Supplies:
Penny Black Mix & Match Cardstock: Summer Sun 17-003
3M Scotch: Dimensional Foam Tape
Making Memories: Ribbon from Celery Collection
Mark Richards: Pearl Stickers
Tsukineko: Majestic Blue VersaFine, Cantaloupe Memento, Tangelo Memento, Nautical Blue Memento, VersaMark Watermark Ink, Memento Markers (Dandelion #100, Cantaloupe #103, Tangelo #200), Clear Embossing Powder, Sponge Daubers
Spellbinders: Standard Circles Sm. (S4-116), Classic Scallop Circles Lg.  (S4-124), Labels Twenty-Two (S4-346)

April 18, 2012

Dreamy

This stamp, Dreamy, is so appropriately named.  I love the wispy and delicate lines of this beautiful flower. 


The card base and first layer were constructed from Penny Black’s cream cardstock called Sticks & Stones (02-001). 


Before the first mat was elevated onto the card, Delicata Golden Glitz ink was applied directly from the pad to the edges and heat embossed with gold powder.

Dreamy was stamped on a Spellbinders Labels Seventeen die cut from white cardstock.  The top of the flower was inked with Teal Zeal Memento and the stem with Olive Grove Memento.  The flower top was heat embossed with clear powder to enhance the elegant lines of the design.

Tip/Hint:  To suspend the drying time of dye ink so heat embossing can be implemented, first ink the image with VersaMark Watermark ink and then apply the dye ink directly on top.  Stamp the image and immediately apply clear embossing powder.  Tap off the excess powder and heat set.


A small amount of Ink Potion No. 9 was poured into a little dish for watercoloring with the Memento inks.   This solution helps encourage the migration of the inks and resists paper curling when dried.  Lilac Posies, Cantaloupe and Teal Zeal Memento inks were applied to a plastic surface and transferred with a paintbrush using the Ink Potion for blending as well as cleaning between colors.

Tip/Hint:  Either markers or ink pads can be used for the source of ink.

When dry, the piece was distressed with Cantaloupe, Peanut Brittle and Espresso Truffle Memento inks.  Music Background was then stamped over the entire piece in Peanut Brittle Memento ink. 

Tip/Hint:  Stamping a background over an existing image without a mask may seem daunting; however, when using a lighter ink tone the main image will not be affected and the background will seamlessly appear to blend behind the main focal point.

The piece was then layered with another Labels Seventeen die cut from Rose Garden (14-003) cardstock.  To deepen the color, Crimson Red VersaFine and Elderberry Memento inks were applied to the edges.


The sentiment from Sweet Wishes was stamped on white cardstock with Onyx Black VersaFine and heat embossed with clear powder.  The tag shape was hand drawn and trimmed.  A tiny brad colored with a teal Sharpie was inserted for a decorative embellishment.

The last step after the card was assembled was to trace the flower lines with a glue pen and then add teal glitter.

Have a dreamy day,
Elizabeth

Supplies:
Penny Black Mix & Match Cardstock: Sticks & Stones 02-001, Rose Garden 14-003
3M Scotch: Dimensional Foam Tape
Martha Stewart: Lapis Glitter
Sharpie: Teal
Tsukineko: Onyx Black VersaFine, Crimson Red VersaFine, Elderberry Memento, Cantaloupe Memento, Olive Grove Memento, Teal Zeal Memento, Lilac Posies Memento, Peanut Brittle Memento, Espresso Truffle Memento, VersaMark Watermark Ink, Delicata Golden Glitz, Ink Potion No. 9, Clear Embossing Powder, Gold Embossing Powder, Jumbo Sponge Daubers
Other: Mini Brad, Glue Pen, Paintbrush

April 13, 2012

Frame Card Art & Hidden Tag

Decorative card frames can be created in no time at all by combining die cuts, inks and stamps!


This antique frame was designed with Spellbinder’s Labels 22 and Large Classic Ovals.  Memento inks in Espresso Truffle, Toffee Crunch, Peanut Brittle and Angel Pink were applied to the white cardstock die cuts with jumbo sponge daubers and then stamped with Letter Background before assembly.

Penny Black’s hydrangea from Flower Festival was stamped with Onyx Black VersaFine on watercolor paper and heat embossed with clear powder.  After watercoloring and trimming the image, the flower centers were accented with a black Glaze pen.  A small sentiment from Wishes was tucked under the leaves.  The soft background behind the oval window is Penny Black’s Periwinkle cardstock.

There is a hidden tag...


A small pocket nestled between the layers helps the tag glide smoothly in and out.


For the card base, a separate die cut was scored to create a gluing tab.  Having an easel base for cards with extra layers will lend stability and keep the card from “slumping” when on display.


TIP/HINT:
For consistent and even placement of brads positioned on corners, a handmade template is a handy tool.  Mark the position of the first hole with a piercing on a “scrap corner”. 


This will become the guide for piercing for the remaining corners.  The template will need to be turned and rotated as you proceed from one corner to the next.  Align the template corner with the project corner and pierce the hole position.

A heartfelt “thank you” to all that visit as well as the readers who invite me into their homes by subscribing to my posts via e-mail.  Your kindness and support are greatly appreciated!

Smiles,
Elizabeth

Supplies:
Penny Black Mix & Match Cardstock: Storm 01-001, Periwinkle 11-001
Canson: Watercolor Paper
Spellbinders: Classic Ovals Large (S4-110), Labels 22 (S4-346)
Sakura: Black Glaze Pen
Tsukineko: Onyx Black VersaFine, Espresso Truffle Memento, Toffee Crunch Memento, Peanut Brittle Memento, Angel Pink Memento, Jumbo Sponge Daubers, Clear Embossing Powder
Other: Paper Piercing Tool

March 2, 2012

A Perfect Match

Are you looking for a fast way to make coordinated patterned papers?  One of my favorite methods is to use the same stamp image with the same ink color.


For this design, I selected two Penny Black colored cardstocks and then stamped both pieces with the flourish from Flowers Sweet in Habanero VersaFine ink.  A quick, instant match!  The colored cardstocks lend a vibrant contrast while the stamped pattern adds a flow of continuity. 


To soften the matted layers, all the cardstock edges were highlighted with a Delicata Golden Glitz ink pad.

The circle of flowers from Wishes was stamped in Spanish Moss VersaFine ink and heat embossed with clear powder.  Memento Markers were used for direct-to-paper coloring.

The sentiment from Gratitude was stamped in Oynx Black VersaFine and heat embossed with clear powder.  The design elements were then attached with dimensional foam tape. 

To finish the card, a soft application of Peanut Brittle Memento ink was added to the edges of the card base.

Happy Friday,  

Elizabeth 

Supplies:
Penny Black Mix & Match Cardstock: Clear Skies 10-001, Summer Sun 17-003, Storm 01-003
3M Scotch: Dimensional Foam Tape
Mark Richards: Pearl Stickers
Spellbinders: Standard Circles Large 
Tsukineko: Onyx Black VersaFine, Habanero VersaFine, Spanish Moss VersaFine, Peanut Brittle Memento, Delicata Golden Glitz, Memento Markers (100 Dandelion, 103 Cantaloupe, 200 Tangelo, 300 Lady Bug, 703 Pear Tart, 804 Desert Sand), Clear Embossing Powder, Jumbo Sponge Dauber 

February 28, 2012

Flower Gift Box & Video

This week on the Penny Black Blog they are featuring floral designs from their new Full of Surprises Collection.  

Today I am hosting their blog with a dimensional project which incorporates coloring with the new Memento ink colors three different ways – distressing, Brushstix coloring and watercoloring.


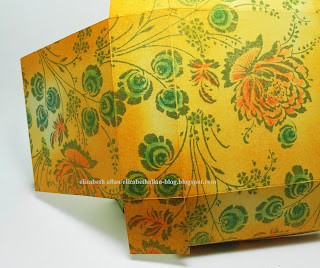
The patterned paper is a piece tan of cardstock which was stamped with Flamboyant in Olive Grove Memento ink.  Brushstixs were used to transfer Morocco, Love Letter and Zeal Teal Memento inks to the flowers. 


To give the paper a distressed, antique hue a jumbo sponge dauber with Peanut Brittle Memento ink was rubbed into the design.  The paper was then sprayed with Gold Sheer Shimmer Spritz for a soft metallic glow.


After you have traced your favorite box template onto the paper and assembled your box, highlights on the edges can be added with an Inkblusher (new sponge applicator by Tsukineko) and Vintage Sepia VersaFine ink. 

The flower accent, Sunburst, was stamped on watercolor paper three times with Onyx Black VersaFine ink and heat embossed with clear powder.  I used two full flowers and one center.


The top flower was colored with Morocco, Love Letter, Elderberry and Peanut Brittle Memento inks.  The second flower was colored with Olive Grove, Pistachio and Peanut Brittle.  To watercolor with the inks, pat the inkpad on a nonporous surface and transfer the ink with a damp paintbrush.  Clean the brush between colors.

This is a video showing the flowers being colored:


When the pieces have been colored and trimmed they are ready to be glazed.  A small amount of Goosebumps clear texture spray was poured onto a nonporous surface.  A chisel-tipped Brushstix was used to apply the Goosebumps.  When applying the glaze, use quick, even strokes without working the medium too much.  Since the flowers are created from watercolor paper, you do not want to pull and move the colors previously painted.

Slightly offset the flower elements and layer with dimensional foam and attach to the top of the prepared box.

You can view an additional video in this post “here” that shows the Brushstixs being used for coloring.

Thank you for visiting!

Elizabeth

Supplies:
Penny Black Stamps:  Flamboyant 4240K, Sunburst 4236K
3M Scotch: Dimensional Foam Tape
Basic Grey: Magnetic Snap (closure for the box)
Canson: Watercolor Paper
Tsukineko: Onyx Black VersaFine, Vintage Sepia VersaFine, Peanut Brittle Memento, Olive Grove Memento, Zeal Teal Memento, Pistachio Memento, Elderberry Memento, Morocco Memento, Love Letter Memento, Brushstix, Inkblushers, Gold Sheer Shimmer Spritz, Goosebumps Clear Texture Spray, Clear Embossing Powder

October 28, 2011

Coloring WITHOUT Markers, Pencils or Crayons


This card was colored with Ranger Distress Inks applied with Cut ‘n Dry Foam. 


The flower was stamped on glossy cardstock with black pigment ink and heat embossed with clear powder.  You can see the “photographic” appearance this type of paper provides.   After the distress inks were applied it was trimmed and attached to the front of the card with dimensional foam.    


For the card base, two labels were die-cut from white cardstock and elevated on the front of a small blue card.  Before assembling, the top label was left inside the die to create a mask while Vintage Photo Distress ink was applied.

A fun way to create a batch of colorful blossoms!

Have a wonderful weekend,
Elizabeth

Supplies:
Penny Black Stamps: Cheerful 4160K, Salutations 30-014
Penny Black Mix & Match Cardstock: Blue Skies 10-003
3M Scotch: Dimensional Foam Tape
Glossy Cardstock
Ranger: Vintage Photo, Spiced Marmalade, Fired Brick, Shabby Shutters Distress Inks; Cut ‘n Dry Foam
Tsukineko: Onyx Black VersaFine, Clear Embossing Powder
    

September 20, 2011

Autumn Kindness & 1st Blog-iversary

I would like to thank YOU for YOUR kindness!  Today marks my one-year blog-iversay!  It has been a wonderful and fun experience sharing my art and meeting so many fantastic artists through blogging.  I appreciate all your comments as you supported my artwork and the time you spent visiting with me in my studio. 
 

For this autumn thank you, Reverse Wonky Rectangles were used for the card base and layers.  Before removing the die from the water color paper, a variety of distress inks were applied to the exposed center frame.  Leaving the die frame in place, Paisley Outline was stamped on top with Vintage Sepia ink.  Don’t worry that the metal die is elevated and the stamped design does not fully reach the edges.  This creates a great fade-in for the pattern and another visual “level” within the inked space.  For highlights, random gel pen markings were added to the Paisley design.


Hand-pierced holes allowed the spacing and alignment for the sewing to be tailored to the shape.  Inked heavy-weight thread was then sewn around the design.  Laying the piece face up on a foam mat provided a soft surface to de-emboss around the stitching.  An embossing stylus or bone folder are great tools to use for tracing.


The sentiment is stamped on vellum with black pigment ink and heat embossed with clear powder.  The edges were torn before attaching the band across the rectangle.  (Hint:  Before wrapping vellum around a curved edge, trace the curve on the vellum with a stylus giving the paper a scored, curved line.  Then, as in sewing, from the end of the band cut one or two slits up to the scored line.  The slits will relieve the tension of the paper as it is wrapped around the curve and result in smoother wrap on the edge.)


The pot from Amaryllis was stamped twice on watercolor paper in black pigment ink and heat embossed with clear powder.  Color was added with Faber-Castell Pitt Pens.  While constructing the pot, the base image was curved and shaped creating side surfaces that would be flat for gluing.  A small piece of dimensional foam in the center of the pot (when attached to the card) helps maintain the shape.  The top of the pot was paper pieced for added dimension.  The flowers from Sun Days were created in the same manner and then “fussy” cut with scissors and a craft knife.

With sincere appreciation for all your kindness, smiles and hugs this past year....

Elizabeth

Supplies:
Penny Black Mix & Match Cardstock: Blue Lagoon 09-003
3M Scotch: Dimensional Foam Tape
Canson: 140 lb. Watercolor Paper
Faber-Castell: Pitt Artist Pen Big Brush (Orange Glaze #113, Deep Scarlet Red #219, Cobalt Turquoise #153, Light Cobalt Turquoise #154) 
Mark Richards: Amber Gemstones
Ranger: Antique Linen Distress, Vintage Photo Distress, Shabby Shutters Distress, Fired Brick Distress
Sakura: White Gel Pen
Spellbinders: Reverse Wonky Rectangle Nestabilities (S4-307)
Tsukineko: Vintage Sepia VersaFine, Onyx Black VersaFine, Delicata Golden Glitz Ink, Sponge Daubers, Clear Embossing Powder
Other: Heavy Carpet Thread, Needle, Vellum