Showing posts with label Tutorial. Show all posts

February 5, 2014

Happy Everything: A Mash Up

What happens when I have two stamps and can't decide which one to work with?  I use them both and mash them up!

So Grateful

This card uses a combination of two new Penny Black releases: Kind Words and Chalkboard Grateful.  Plus, a new Creative Die Perched.  

     clear_00-000_pkg      cling_4x6_pkg    die1d_30-156
They are all from their Happy Everything catalog.

happy everything  logo


Here's how the stamps were "mashed" together:

Step 1: Cut a piece of white cardstock slightly smaller than the card base and attached a small strip of Fall Festival to the top.

Step 2: Die cut Perched from Clear Skies cardstock and adhere to the top portion of the cardstock.

Step 3: Stamp the sentiment from Kind Words below the die cut in Onyx Black VersaFine.

Step 4: On a separate piece of white cardstock stamp a portion of Chalkboard Grateful in Morocco Memento Luxe.  Trim the piece and adhere across the middle of the previously stamped sentiment.  This will cover the words "Thank You".

Step 5: Attached the finished artwork to the front of the card base with 3-D Foam Tabs.

A great way to give your favorite images another fun look.

Enjoy,
Elizabeth

Supplies:
Penny Black Stamps: Kind Words 30-226, Chalkboard Grateful 40-315
Penny Black Creative Dies: Perched 51-031
Penny Black Mix & Match Cardstock: Clear Skies 10-001, Fall Festival 16-002
Imagine Crafts/Tsukineko: Onyx Black VersaFine, Morocco Memento Luxe
Tombow: Xtreme Adhesive, 3-D Foam Tabs


February 3, 2014

HAPPY EVERYTHING

Today kicks off a big week at Penny Black!

happy everything  logo

They are revealing their newest release and catalog "Happy Everything".  All during the week they will be sharing peeks of the fabulous stamp designs as well as designer inspiration.  Follow along each day "here" to be the first to see all the colorful happiness ----- and new surprises!

Happy Everything
I am joining in the fun and sharing one of the cards I designed and taught as a make-n-take at CHA. It showcases three of their newest products: Fronds (Large Slapstick Background), After Glow (Creative Dies), and Kind Words (Transparent Sentiment Set).

Here are the instructions so you can join in too.....

1)  Stamp Fronds (40-314) in Wedding Dress Memento Luxe on a piece of white cardstock slightly smaller than the card base and then set aside to dry.

2)  Die cut lanterns (After Glow 51-034) from Penny Black Mix & Match Cardstocks (Grand Canyon, Blue Lagoon, Rose Garden).  Highlight each lantern with a coordinating ink (Tangelo Memento, Teal Zeal Memento, Lilac Posies Memento) and then pounce each piece with Frost VersaMark Watermark ink.

3)  Thread the lanterns onto black string and drape across the top of the stamped cardstock. Secure the ends of the string to the back of the cardstock. Tuck a small piece of dimensional foam under each lantern.

4)  Stamp the sentiment (Kind Words 30-226) in Onyx Black VersaFine below the lanterns.

5)  Attached the finished artwork to a white card base with dimensional foam tape.

Enjoy all the colorful happiness....

Elizabeth

Supplies:
Penny Black Stamps: Fronds 40-314, Kind Words 30-226
Penny Black Creative Dies: After Glow 51-034
Penny Black Mix & Match Cardstock: Grand Canyon 03-001, Blue Lagoon 09-001, Rose Garden 14-001
3M Scotch Dimensional Foam Tape
Imagine Crafts/Tsukineko: Onyx Black VersaFine, Wedding Dress Memento Luxe, Tangelo Memento, Teal Zeal Memento, Lilac Posies Memento, Frost VersaMark Watermark Ink, Sponge Daubers

October 24, 2013

Merry & Bright

Holiday wishes with Imagine Crafts/Tsukineko's Delicata Golden Glitz and Memento inks and markers.

Merry & Bright


Instructions

4
Stamp the sentiment (Christmas Magic) on a scalloped rectangle die cut in Onyx Black VersaFine and heat emboss with clear powder.  Die cut another scalloped rectangle and score 1/2” from the top.  Apply adhesive to the scored tab and adhere to the back of the stamped piece to create the card base.  Set aside.


2
Use a small portion of a scalloped rectangle die cut from white cardstock to create a snowy hill.  Apply Bahama Blue ink to the piece using a Jumbo Sponge Dauber.  Aligning the scallops, glue this piece under the sentiment on the prepared card.


3
Die cut a frame from white cardstock.  Coat the frame by applying Delicata Golden Glitz directly from the ink pad.  Once dry, attach to the front of the card with dimensional foam. 


1

Ink the tree (A Cool Christmas) with Olympia Green and Vintage Sepia VersaFine inks, stamp on watercolor paper and heat emboss with clear powder.


5
Color the image with Memento markers and blend with a paintbrush.  Trim the design and attach to the front of the prepared card with dimensional foam.

For more Imagine Crafts/Tsukineko inspiration visit their Website and Facebook page.

Thank you for visiting...
Elizabeth

Supplies:
Penny Black Mix & Match Cardstock: Storm 01-001
3M Scotch Dimensional Foam Tape
Canson: Watercolor Paper
Imagine Crafts/Tsukineko: Onyx Black VersaFine, Bahama Blue Memento, Delicata Golden Glitz, 
Memento Markers (PM-100, PM-200, PM-302, PM-701, PM-703, PM-706, PM-800, PM-802)
Jumbo Dauber, Clear Embossing Powder
Spellbinders:  Classic Scalloped Rectangles Sm (S4-131), Classic Rectangles SM (S4-130) 


June 3, 2013

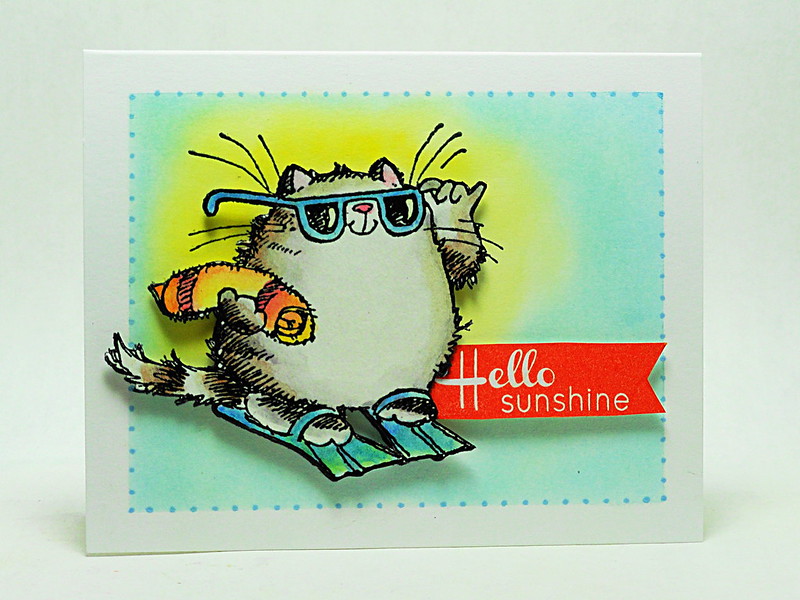
Hello Sunshine

Some fun in the sun with Penny Black's new Sunny Days...

Hello Sunshine

A one-layer card PLUS.  

A trimmed Les Petites card with PanPastels create the one layer and the dimensional cat and banner are the "plus".

Here are the sunny details for this cool cat:
  1. Trim a Les Petites card base to measure 3 1/4 x 3 and mask off a 1/4-inch border along the outside edge.
  2. Stamp the cool cat in Onyx Black VersaFine and heat emboss with clear powder.  Apply Diarylide Yellow and Phthalo Blue Tint PanPastels around the image.  
  3. Remove the mask strips and add a dotted border with a Summer Sky Memento marker.
  4. On a separate piece of white cardstock, stamp the cat in Onyx Black VersaFine and heat emboss with clear powder.  
  5. Color the image as desired.  In this sample, the cat was watercolored with Staedtler's Karat Aquarell Watercolor Pencils.  Fussy cut the image.
  6. Stamp the banner in Habanero VersaFine on white cardstock and trim.
  7. Attach the trimmed images to the front of the card with dimensional foam. 
Wishing you a bright and sunny day,
Elizabeth

Supplies:
Penny Black Stamps:  Sunny Days 30-180, Friendship 30-160
Penny Black Les Petites 90-001
3M Scotch Foam Tape
Imagine Crafts/Tsukineko: Onyx Black VersaFine, Habanero VersaFine, Summer Sky Memento Marker, Clear Embossing Powder 
PanPastel (Colorfin): Diarylide Yellow, Phthalo Blue Tint
Staedtler: Karat Aquarell Watercolor Pencils

April 4, 2013

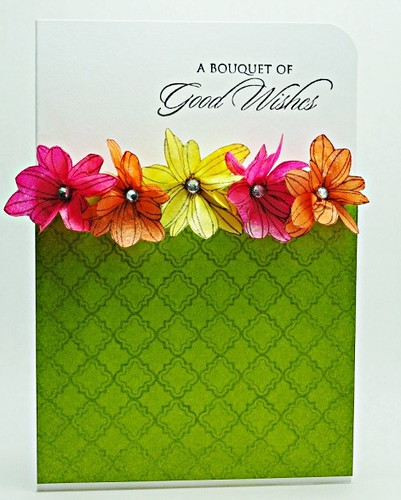
Coffee Filter Flowers

Have fun creating dimensional flowers from coffee filters!

Bouquet of Good Wishes

It's as easy as spritzing coffee filters with Imagine Crafts/Tsukineko's Fireworks and stamping with a flower from Penny Black's Flowers Sweet set. 


Instructions
  • Create a 3 ¾ x 5 ½-inch side-folded card from white cardstock.  Trim the upper right corner with a rounding punch.
  • Stamp the sentiment in Onyx Black VersaFine ½-inch from the top of the card and heat emboss with clear powder.
  • Stamp the decorative pattern with Spanish Moss VersaFine on a 3 ¾-inch square of Fern Green cardstock.  Lightly distress the edges with the same ink and a jumbo sponge dauber.
  • Attach the stamped cardstock to the front of the prepared card with dimensional foam.  Set aside.
  • Spray coffee filters with Fireworks.  Let dry.  TIP/HINT: A heat tool can be used to speed drying time.
  • Stamp the flower on the sprayed coffee filters with Onyx Black VersaFine. 
  • Trim the flowers.  Using a needle and thread, sew a basting stitch around the center of each flower.  Pull the thread ends to cinch the flower together and tie off the threads.
  • Place a crystal gem in the center of each flower.
  • Adhere the flowers to the top the elevated green mat.
Enjoy "brewing" a bouquet of blooms!

Elizabeth


Supplies:
Penny Black Stamps:  Flowers Sweet (30-096), Gratitude (30-105), Puzzle Parts (30-114)
Penny Black Mix & Match Cardstock:  Storm (01-001), Fern Green (05-002)
Imagine Crafts/Tsukineko:  Onyx Black VersaFine (VF-082), Spanish Moss VersaFine (VF-062), Fireworks: Dandelion (FW-100), Cantaloupe (FW-103), Rose Bud (FW-400), Clear Embossing Powder (EB-000-005), Jumbo Sponge Dauber (ST-PKG-002)
Mark Richards, Inc.:  Crystal Sticker Elements (Clear #1609)
Other:  Coffee Filters, Heat Tool, Dimensional Foam Tape, Corner Rounder, Needle & Thread

For questions and/or comments, please feel free to e-mail me at:  elizabeth.a.allan@gmail.com

April 1, 2013

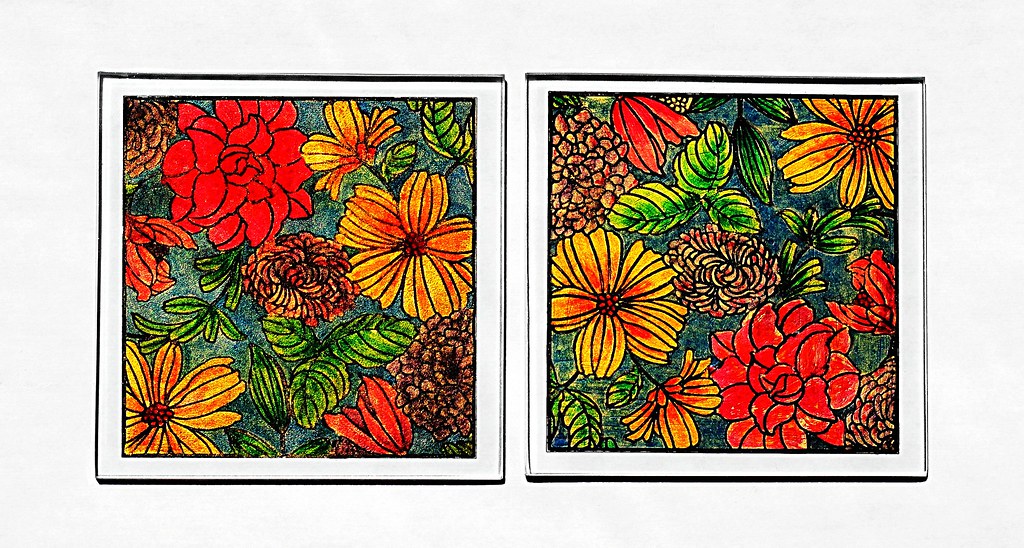
Stamped Glass Trivets (Tutorial)

One Penny Black stamp and a colorful array of Imagine Crafts/Tsukineko inks is all it took to make this pair of decorative glass trivets!

Stamped Glass Trivets

Instructions

Clean glass to remove any oils or residue.

Stamp Penny Black's Mosaic on the glass tile in Ivory Black Opaque StazOn.  Let dry.

Mask off the exterior edges of the glass/design to protect the unstamped surface.

Apply a small amount of Matte GlazOn to a Jumbo Dauber and lightly pounce across the stamped image.  Let dry.

Pull inks directly from the StazOn ink pads with Fantastixs and lightly brush on the color. 

TIP/HINTS:  
  • To cover large areas, dip the Fantastix directly into StazOn Wide Mouth Bottles of ink.  The wide-mouth bottles are ideal for re-inking pads when the ink is transferred with Ink Droppers.  The inks can also be mixed to create custom colors.
  • Working in small areas at a time can be helpful when blending two colors.
  • Applying a thin coat of GlazOn between colors will keep them from migrating or blending.
After the coloring has been completed and the inks are fully dried, pounce the whole design with another layer of GlazOn.

To finish the design, use a Jumbo Dauber to pounce on Copper Metallic StazOn.  Let dry.  Repeat two more times.

Remove the masking tape and let dry.  (For decorative use only. Not heat resistant.)

Happy April, happy spring, happy everything!
Elizabeth

Supplies:
Penny Black Stamps:  Mosaic (40-101)
Imagine Crafts/Tsukineko: Ivory Black Opaque StazOn (SZ-000-182), Vibrant Violet StazOn (SZ-012), Blazing Red StazOn (SZ-021), Cactus Green StazOn (SZ-052), Eden Green (SZ-053)
Hydrangea Blue StazOn (SZ-064), Cherry Pink StazOn (SZ-081), Mustard StazOn (SZ-091), Forest Green StazOn (SZ-099), Royal Purple StazOn (SZ-101), Copper StazOn Metallic (SZ-000-193), GlazOn Matte (GZ-000-003), Fantastix – Brush Tip (FX-100-006), Jumbo Daubers (ST-PKG-002), StazOn All Purpose Cleaner (SC-000-004)
Other:  4 ½ Square Glass Tiles (Cut at my local glass shop), Eclipse Tape by Judi Kins 

For questions and/or comments, please feel free to e-mail me at:  elizabeth.a.allan@gmail.com

March 20, 2013

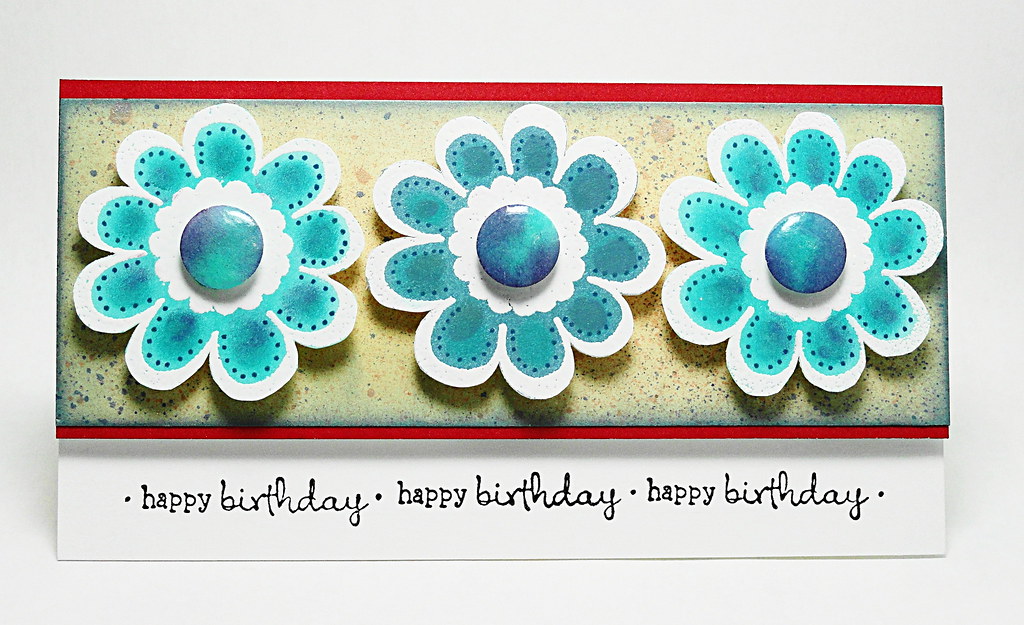
An Explosion of Fireworks and VersaMagic

Sharing a card today that I designed for a product challenge for Imagine Crafts/Tsukineko (2012 AIR Design Team) using VersaMagic and Fireworks.

Happy Birthday


Instructions
  1. Create a 3 x 5 ½ inch white card with a top fold.  Stamp “happy birthday” three times across the bottom with Onyx Black VersaFine.  Re-ink the stamp after each impression.  Add small dots between the sentiments with a Tuxedo Black marker.  Set aside.
  2. Using a Jumbo Sponge Dauber, rub Magnolia Bud VersaMagic ink over a 2 x 5 ½ inch piece of white cardstock.  Spray the piece with Danube Blue and Potter’s Clay Fireworks.
  3. Lightly ink the edges using a Jumbo Sponge Dauber and Aegean Blue VersaMagic.  Mat with a 2 ¼ x 5 ½ inch piece of red cardstock and attach to the front of the prepared card with dimensional foam.
  4. On a separate piece of white cardstock, create three circles of color with the Jumbo Sponge Daubers and Aegean Blue and Turquoise Gem VersaMagic inks.  Pat the colored areas with an anti-static embossing pouch.
  5. Stamp the flower three times over the spots of color with VersaMark Watermark ink. Re-ink the stamp after each impression.  Sprinkle with white embossing powder, tap off excess powder and heat set.  Trim the flowers.
  6. Punch three ½” circles from the leftover shaded pieces of cardstock. 
  7. Add highlights to the flowers and circles with Brushstixs randomly alternating between Turquoise Gem, Aegean Blue and Purple Hydrangea VersaMagic inks.  Add decorative dots to the flower petals with a Teal Zeal Memento marker.
  8. Attach the circles to the centers of the flowers with dimensional foam.
  9. Unscrew the cap from the GooseBumps bottle and, using the wand as an applicator, apply a thin coat to the flower centers.  Let dry.    
  10. Adhere the flowers to the front of the prepared card with dimensional foam.

TIP/HINT:  Add a small pocket to the inside to create a space to tuck a gift of money or a certificate for the recipient.

Design Variation:  Without any alterations, this card can be turned and presented with the fold on the left.  This is helpful if design elements added to the inside are vertical.  

Enjoy,
Elizabeth

Supplies:
Penny Black Stamps: Trims (30-068), Wishes (30-103)
Penny Black Mix & Match Cardstock:  Storm 01-001, Rose Garden 14-003
Imagine Crafts/Tsukineko:  Turquoise Gem (VG-015), Magnolia Bud VersaMagic (VG-032), Purple Hydrangea (VG-055), Aegean Blue VersaMagic (VG-078), Onyx Black VersaFine (VF-082), VersaMark Watermark Ink (VM-001), Memento Markers: Teal Zeal (PM-602), Tuxedo Black (PM-900), Danube Blue Fireworks (FW-600), Potter’s Clay Fireworks (FW-801), GooseBumps Clear Texture Spray (Original) (TS-000-001), Brushstix (BX-100-002), Jumbo Sponge Daubers (ST-PKG-002), White Embossing Powder (EB-000-004)
Other:  ½” Circle Punch, Double-sided Adhesive, Dimensional Foam, Anti-static Embossing Pouch, Scissors, Heat Tool

For questions and/or comments, please feel free to e-mail me at:  elizabeth.a.allan@gmail.com

March 11, 2013

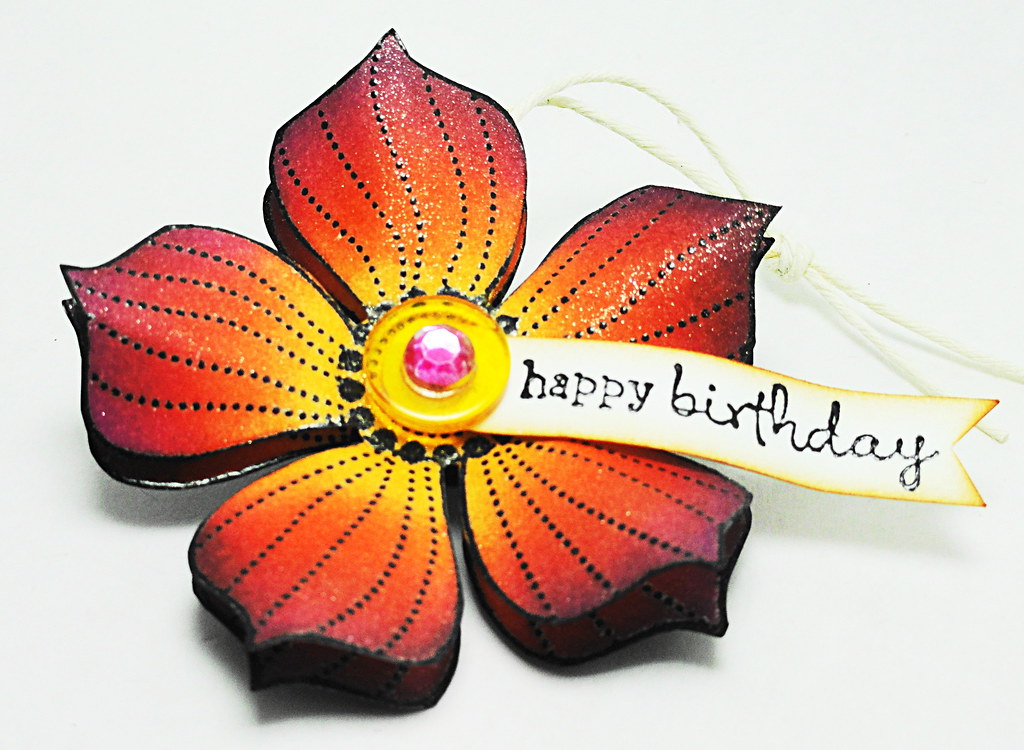
"Tagged" with Happy Wishes (Tutorial)

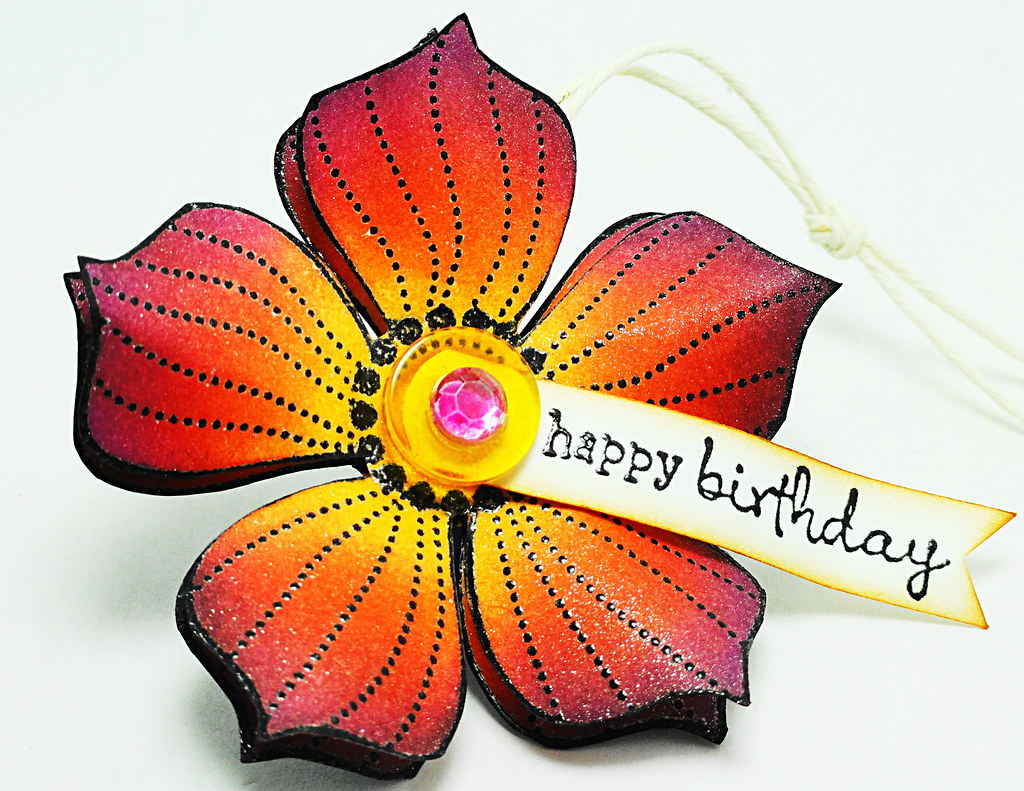
Welcome to a colorful collision of Imagine Crafts/Tsukineko inks and Penny Black stamps.

Happy Birthday Tag
A festive birthday tag!


Instructions

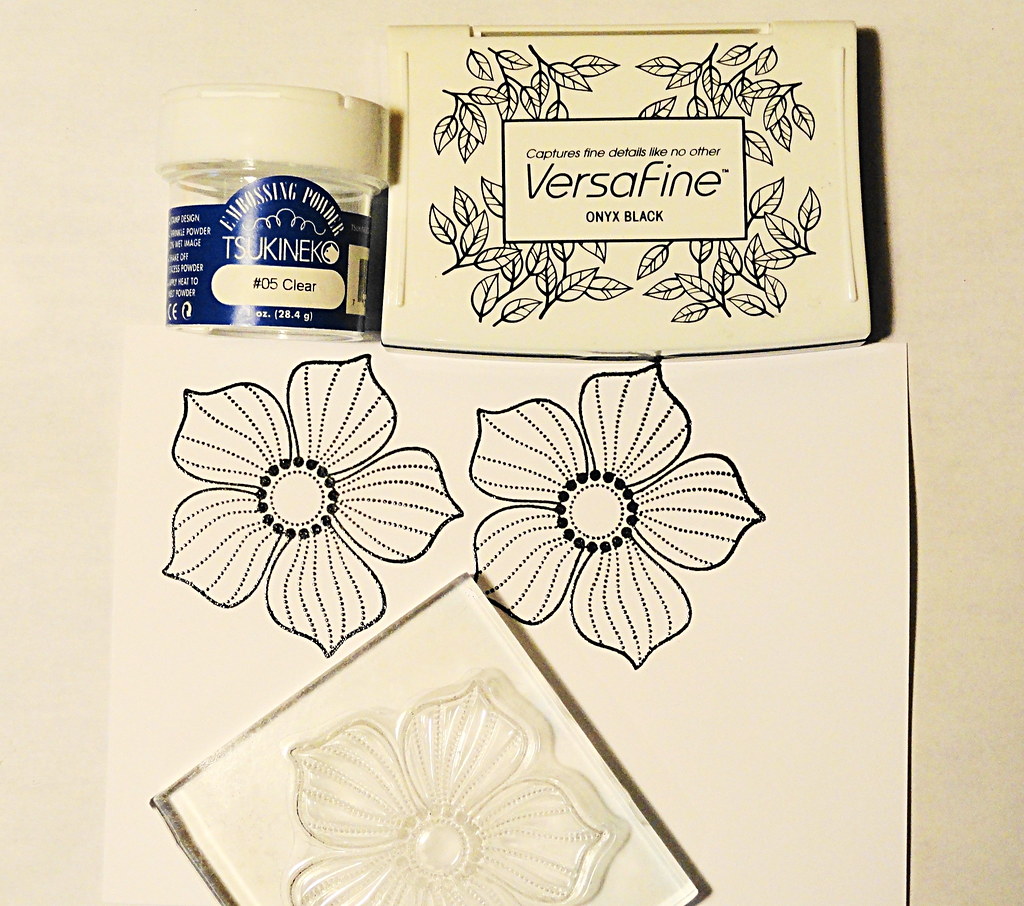
Step 1
Stamp two flowers on white cardstock with Onyx Black VersaFine
and heat emboss with clear powder.


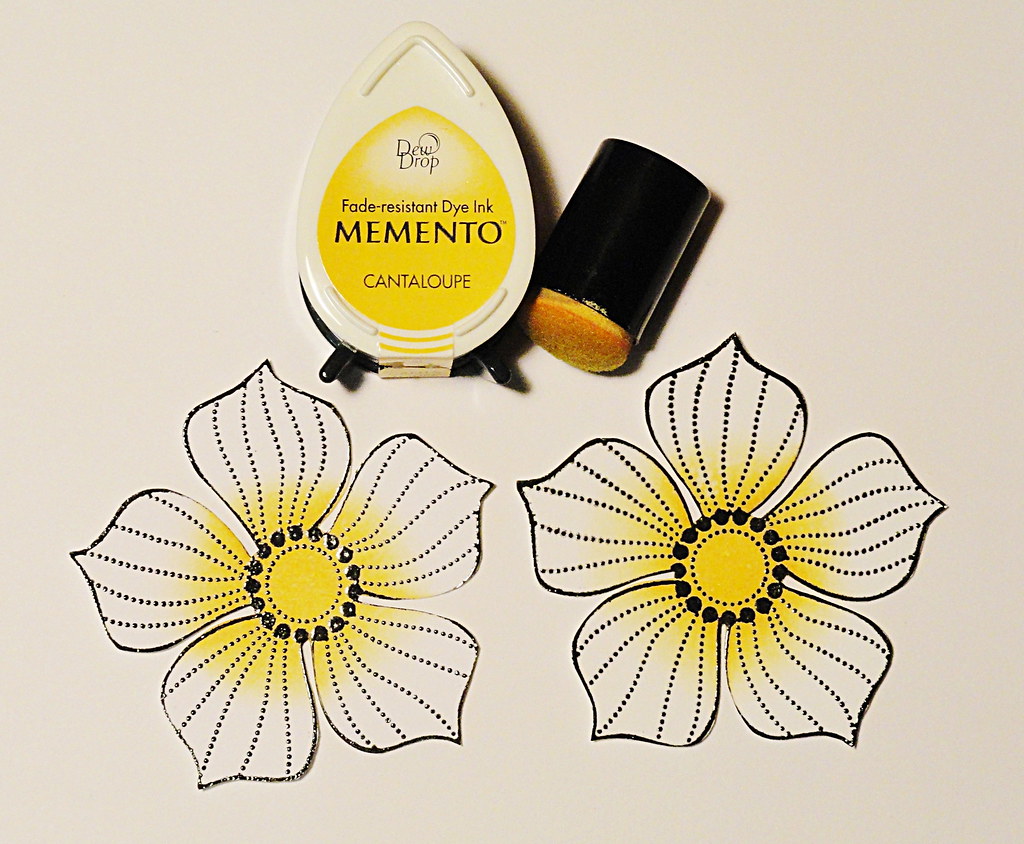
Step 2
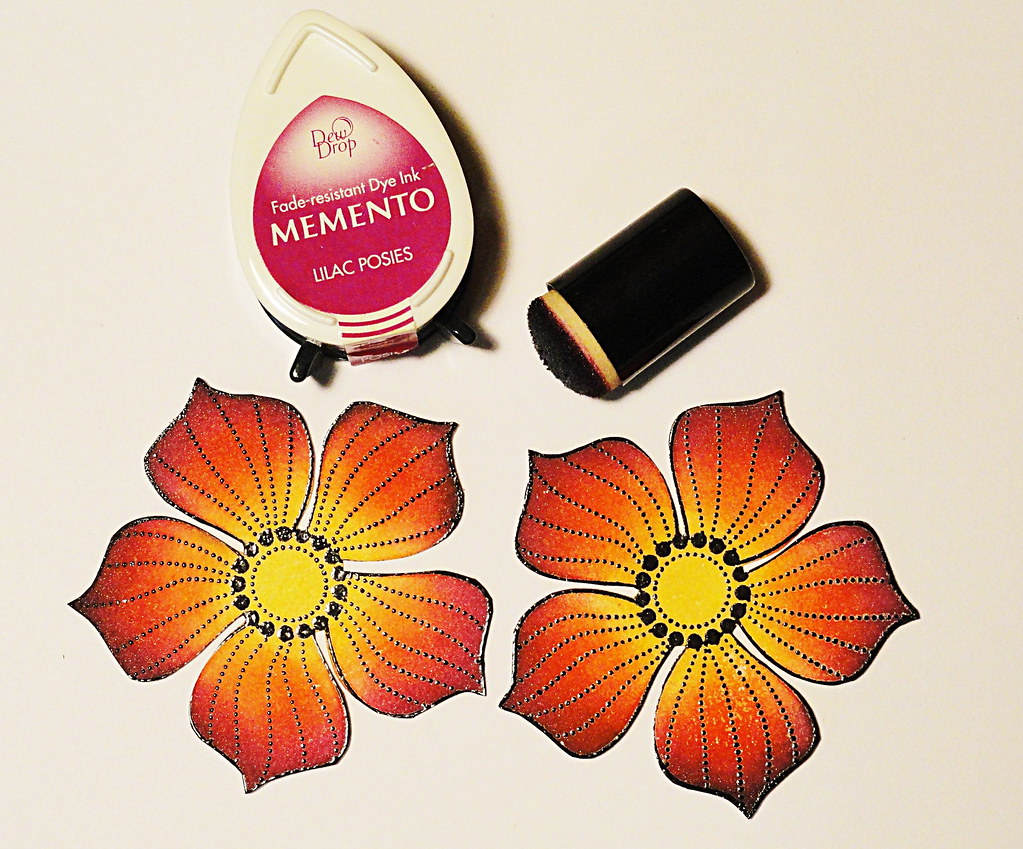
Trim the flowers and apply Dandelion Memento ink
to the centers with a sponge dauber.


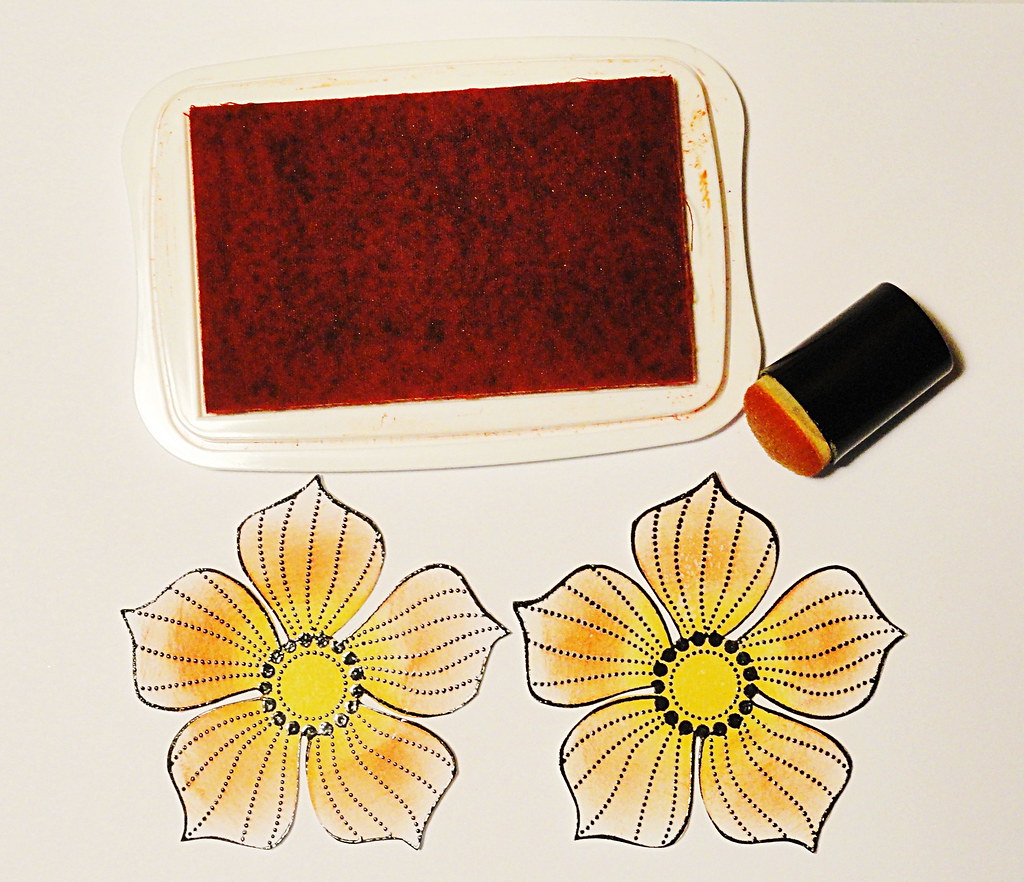
Step 3
Next, apply Morocco Memento ink with a sponge dauber.


Step 4
To finish, apply Lilac Posies Memento ink to the outside edges.


Step 5
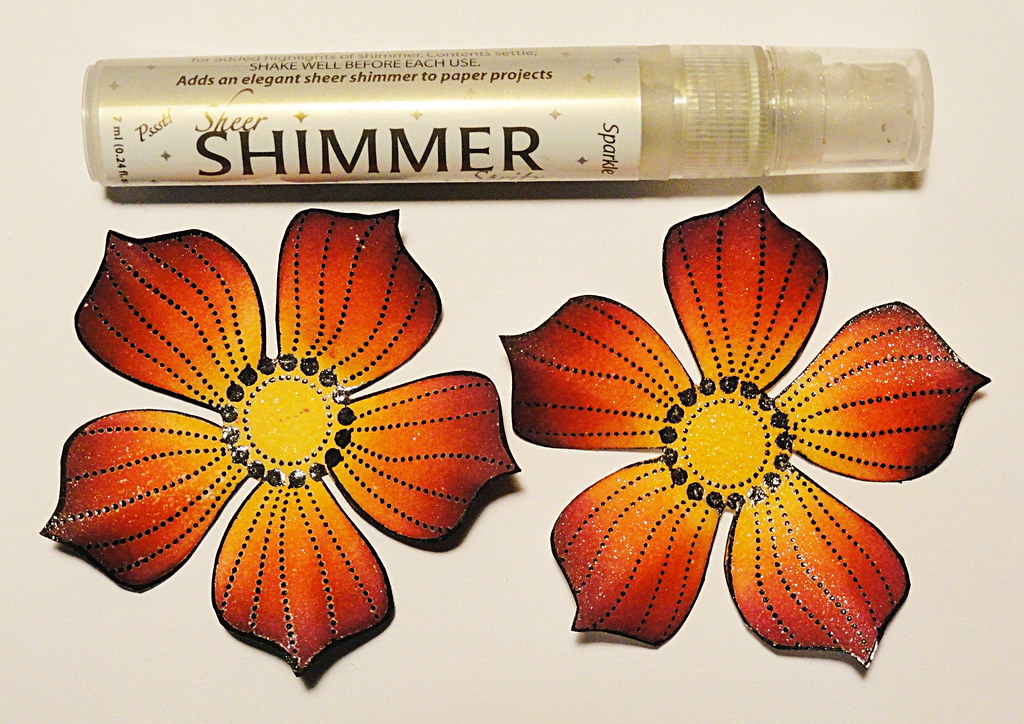
Spray the flowers with Sparkle Psst Sheer Shimmer Spritz.
For dimension, add soft bends to the flower petals.


Part of Step 6  Part (b) of Step 6
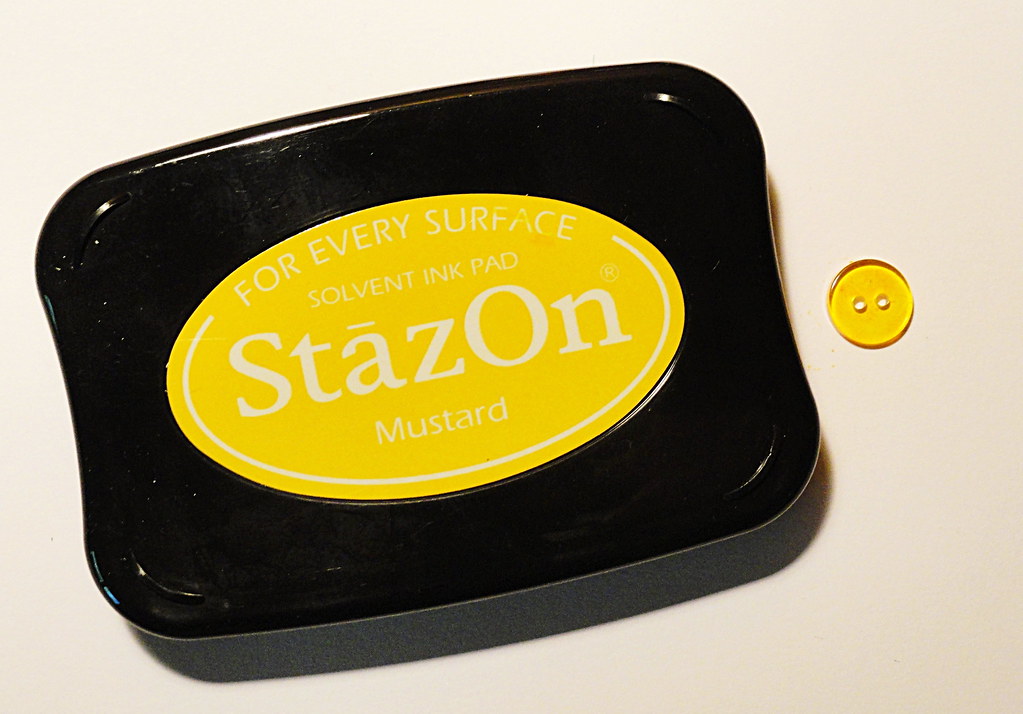
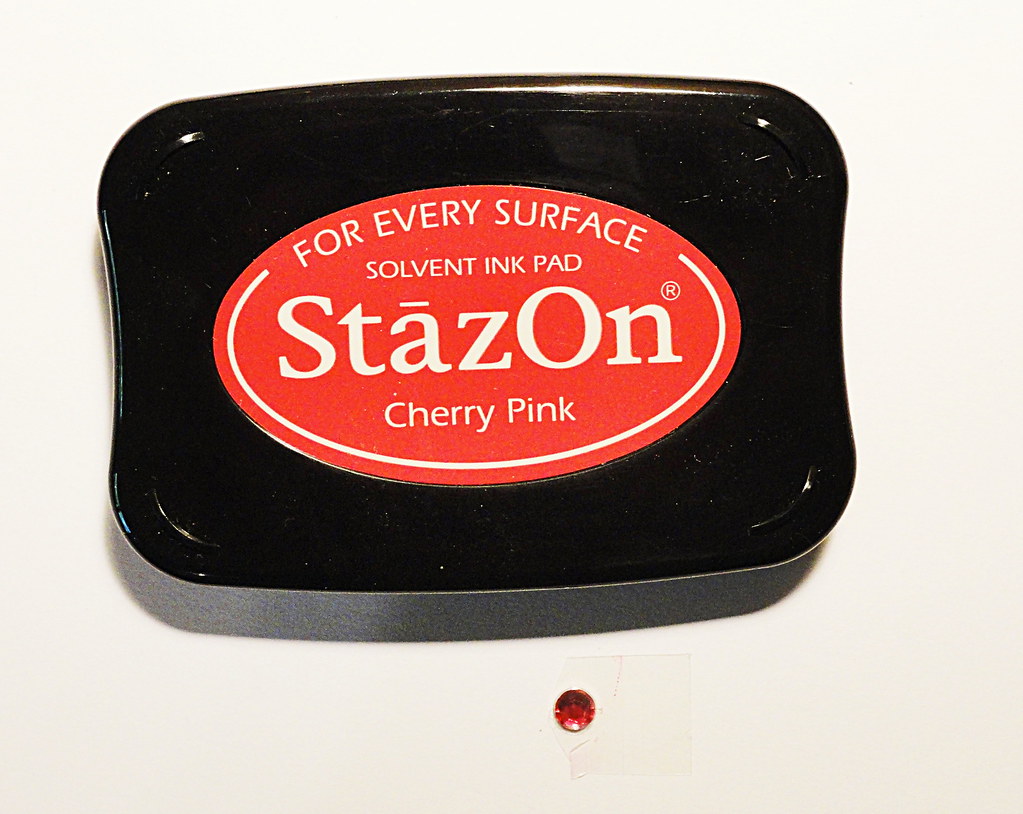
Tap Mustard StazOn on a clear button and Cherry Pink StazOn on a crystal gem.
Tip/Hint:  Embellishments that are clear or neutral can be easily color coordinated to any project. 


Layer View
Assemble the tag by placing a piece of dimensional foam in the center of the first flower 
and tie the twine loop around the foam.  Top with the second flower.

For the banner, stamp the sentiment on white cardstock with 
Onyx Black VersaFine and heat emboss in clear powder. 
Edge the banner with Peanut Brittle Memento ink.  
Attach to the back of the button using GooseBumps Clear Texture Spray as an adhesive.  
Attach the button/banner accent to the center of the flower with dimensional foam. 
Add the colored gem to the button.

Design Variations:  Eliminate the twine loop and use as a bow for a gift.
                             String multiple flowers together for a festive garland.
                             Use as a card embellishment.

Thank you for stopping by!  

Have a wonderful day,
Elizabeth

Supplies:
Penny Black Mix & Match Cardstock: Storm 01-001
Imagine Crafts/Tsukineko:  Onyx Black VersaFine (VF-082), Dandelion Memento (MD-100), Morocco Memento (ME-201), Lilac Posies Memento (MD-501), Peanut Brittle Memento (ME-802), Mustard StazOn (SZ-091), Cherry Pink StazOn (SZ-081), Sparkle Psst Sheer Shimmer Spritz (IA-SML-004), GooseBumps Clear Texture Spray (TS-000-001), Sponge Daubers (ST-DAB-003) , Clear Embossing Powder (EB-000-005)
Other:  Clear Button, Crystal Sticker Gem – Mark Richards, Twine, Heat Tool, Scissors, Dimensional Foam

For questions and/or comments, please feel free to e-mail me at:  elizabeth.a.allan@gmail.com

February 25, 2013

Transforming Backgrounds into Gifts

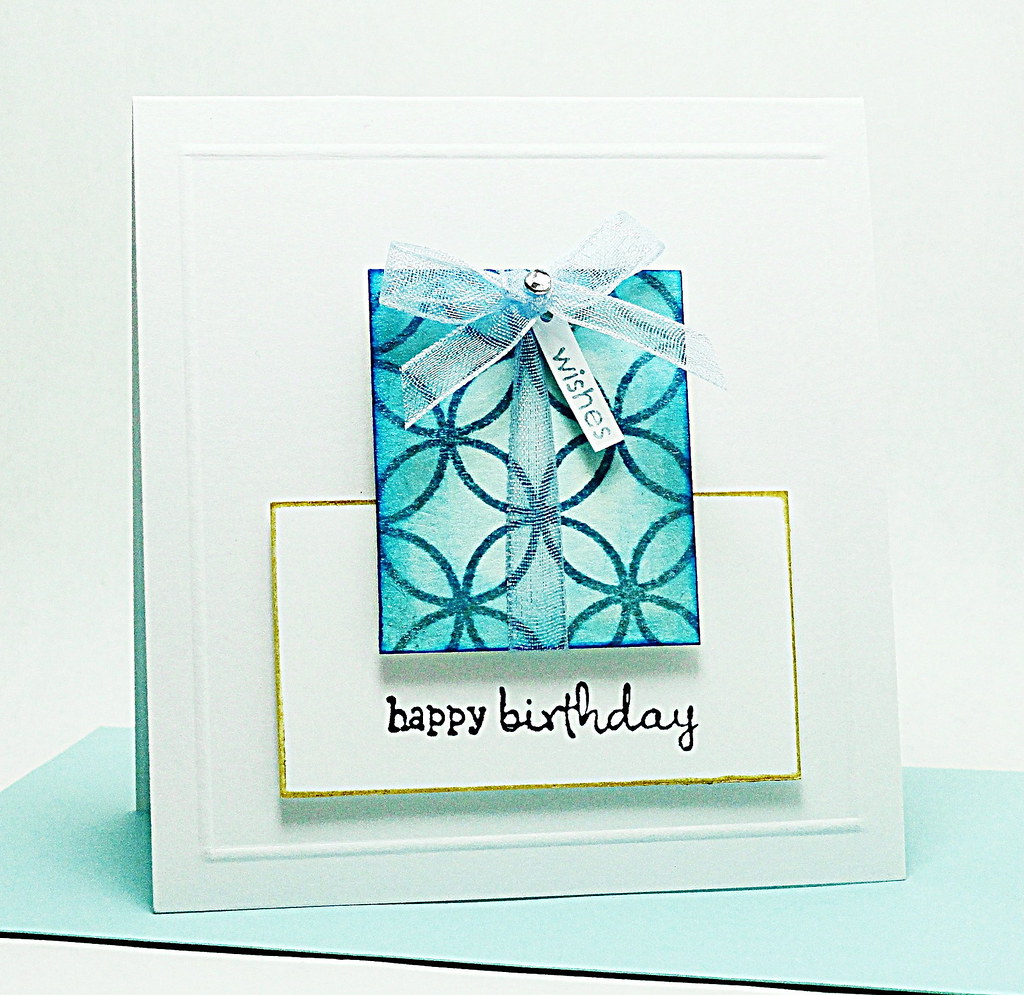
Large background stamps make great gifts!

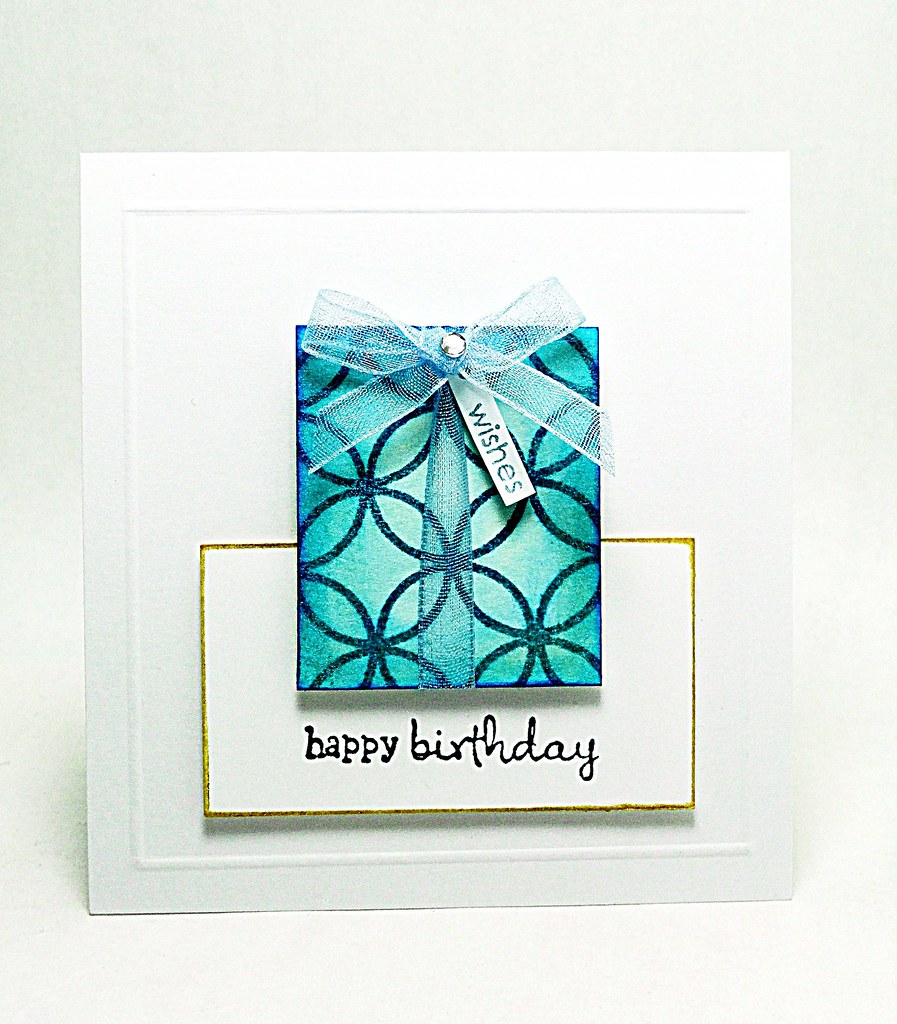
Happy Birthday

Taking a small portion of a larger background can instantly create a decorative miniature.


DSC03945


DSC03944


Clean and simple in 5 quick steps: 
  1. Trim a white Les Petites card to measure 3 ¼ x 3 3/8 and dry emboss a border ¼” from the sides around the perimeter.  Set aside.
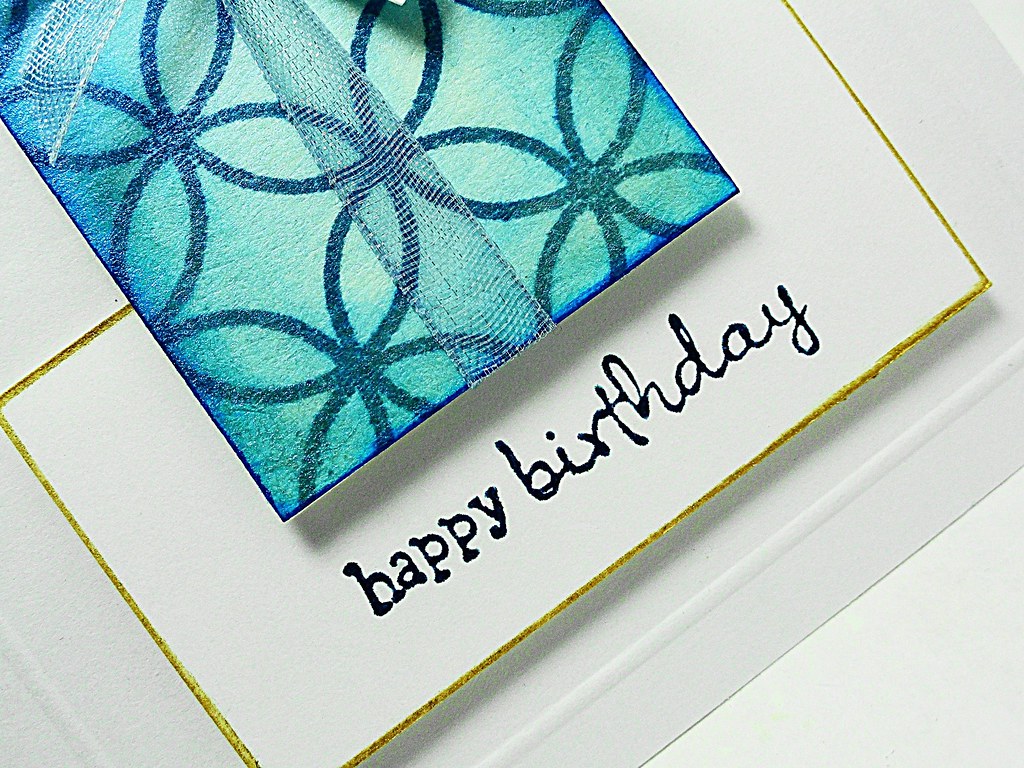
  2. Cut a 1 ¼ x 2 ¼-inch piece of white cardstock and edge with Delicata Golden Glitz ink.  Stamp "happy birthday" in Onyx Black VersaFine and heat emboss with clear powder.
  3. Cut a 1 3/8 x 1 5/8-inch piece of white cardstock and stamp Allover Pattern across the front in Teal Zeal Memento ink.  Softly distress the sides with the same color ink and then paint with a light layer of Interference Blue Watercolor.
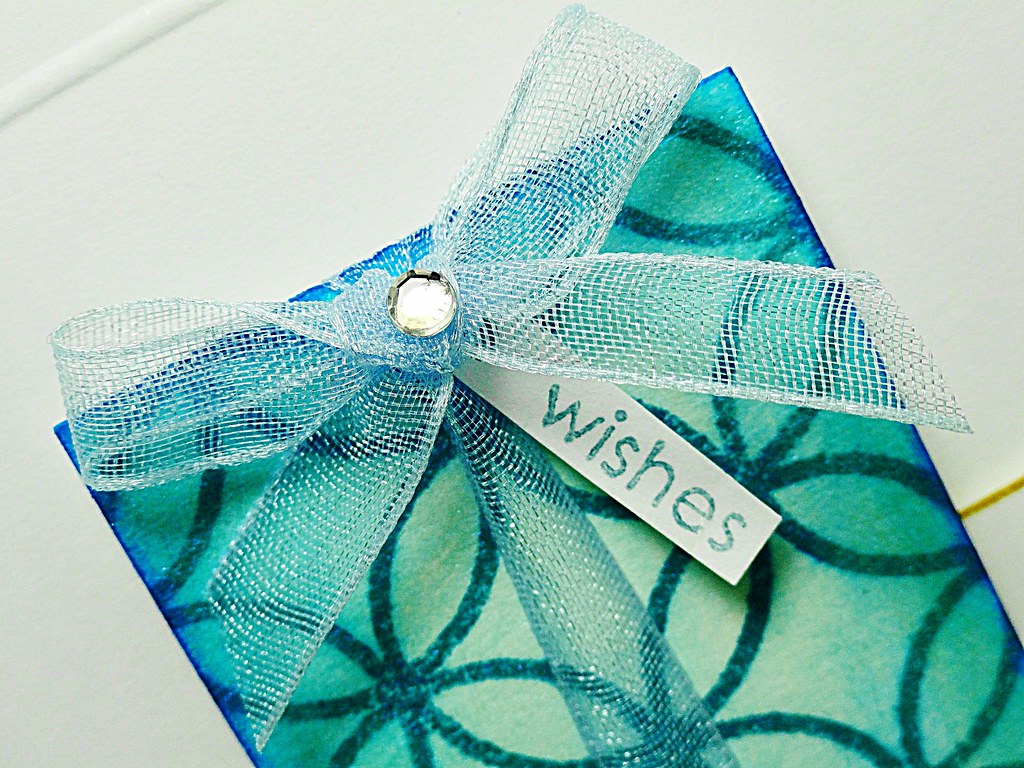
  4. Tie a sheer ribbon around the gift and add a tag stamped with "wishes" in Teal Zeal Memento.  Add a tiny gem to accent.
  5. Attach the gift with dimensional foam tape to the sentiment panel then attach the entire piece to the front of the prepared card with dimensional foam tape.


DSC03946

Smiles,
Elizabeth

Supplies:
Penny Black Stamps: Allover Pattern 40-109, Wishes 30-103, Sentiments 30-025
Penny Black Mix & Match Cardstock: Storm 01-001
Penny Black Les Petites: Berrylicious 90-004
Imagine Crafts/Tsukineko: Onyx Black VersaFine, Teal Zeal Memento, Delicata Golden Glitz, Jumbo Sponge Dauber, Clear Embossing Powder
Offray: Sheer Ribbon
USArtQuest: Jewelz Duo & Interfence Watercolor Palette (Interference Blue)
Other: Scoring Tool, Crystal Gem

February 18, 2013

Tin-spiration (From Trash to Treasure)

I laugh as I look at my recyclables.  They are sorted according to plastic, metal, glass, cardboard/paper and future craft supplies!

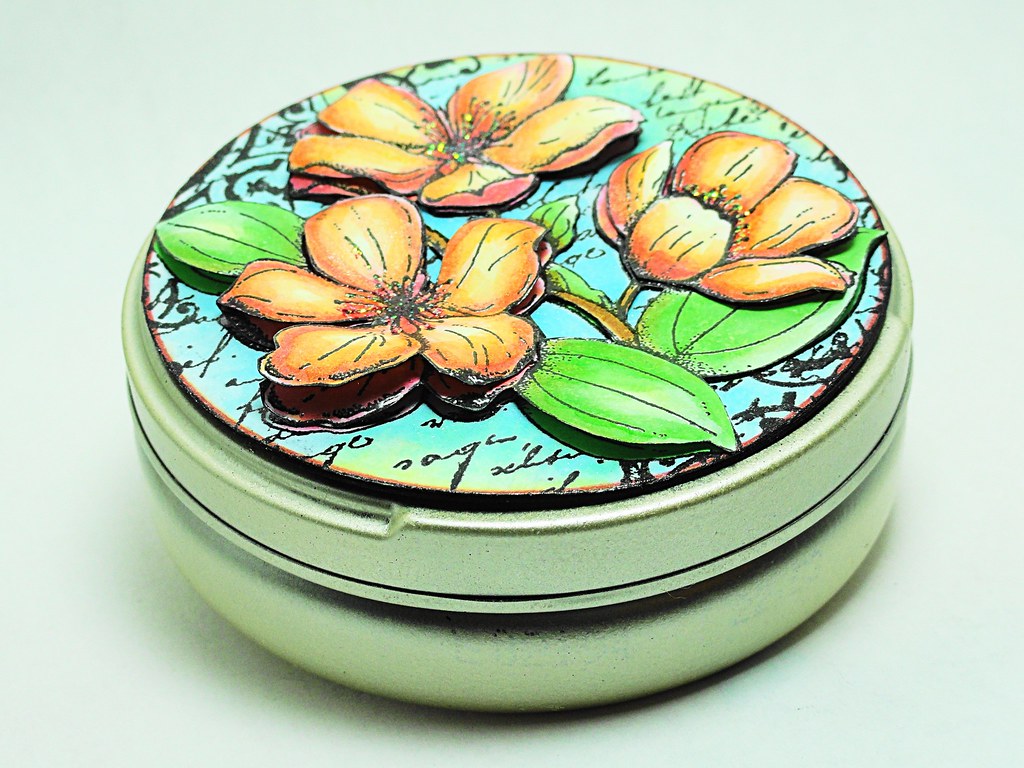
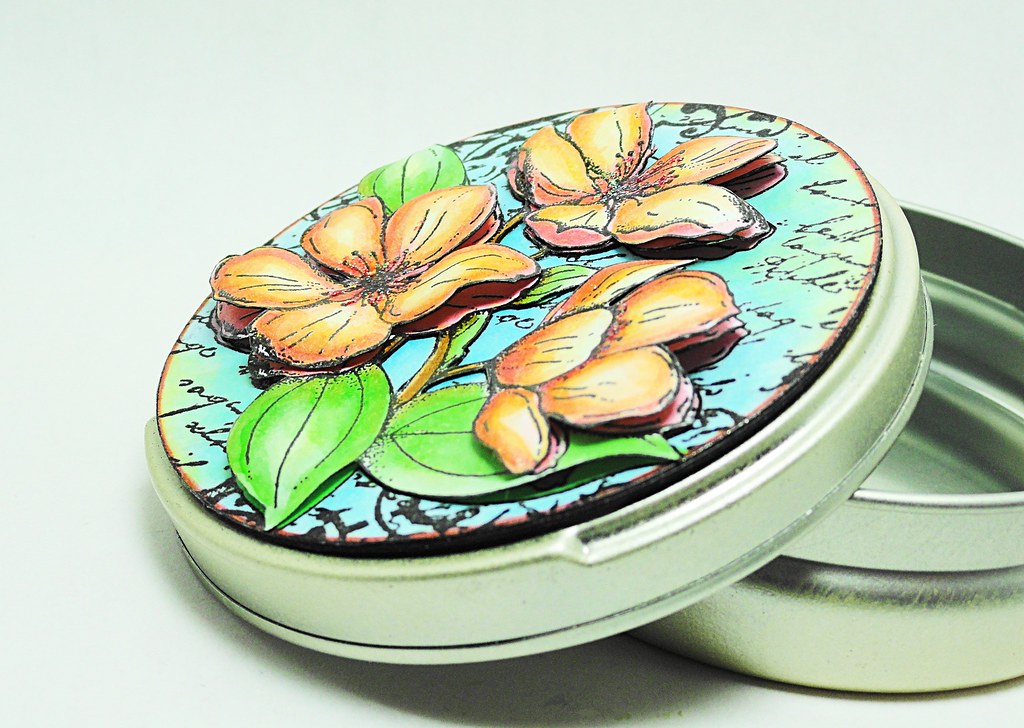
Altered Tin

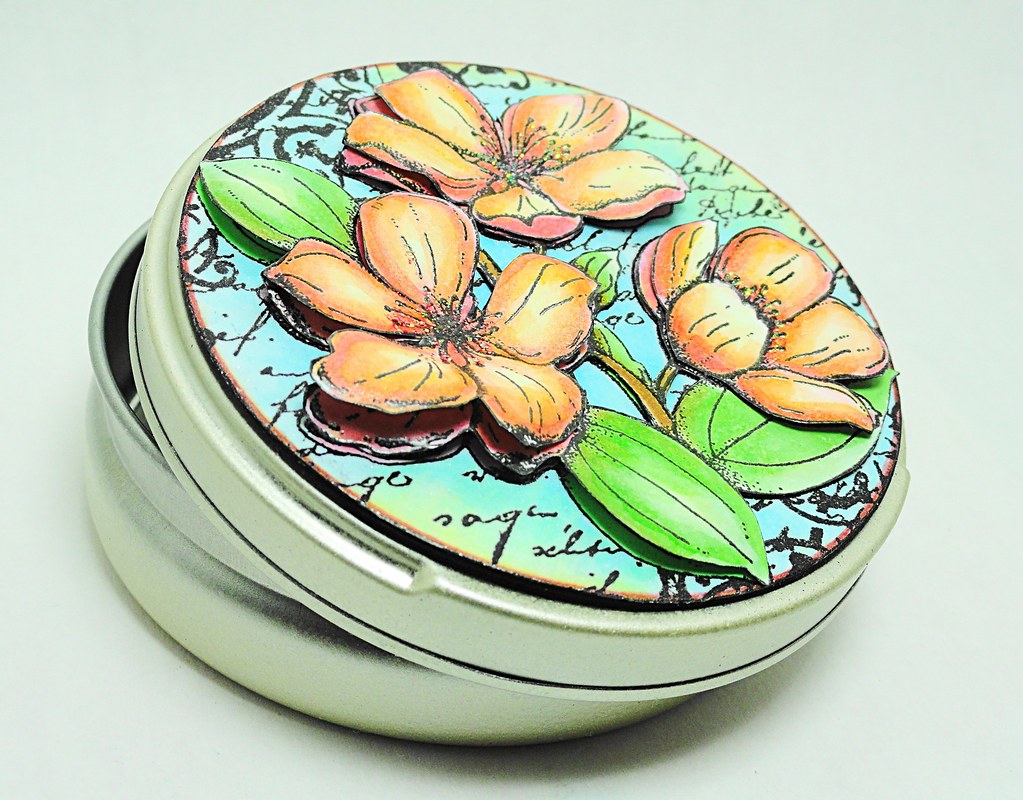
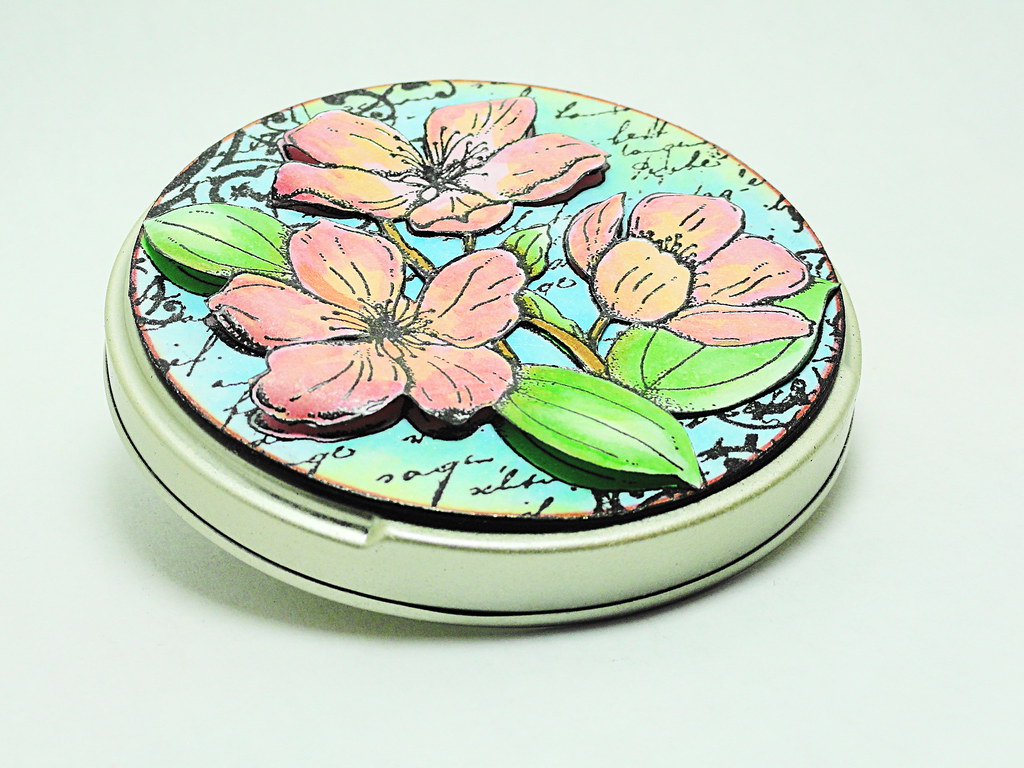
I saved this empty candy tin as it was a lovely shape and size to make this treasure tin.


This project was created with just one stamp!
Flower Poetry by Penny Black.


Here is a picture tutorial that shows the metamorphosis from trash to treasure…..


 DSC04354
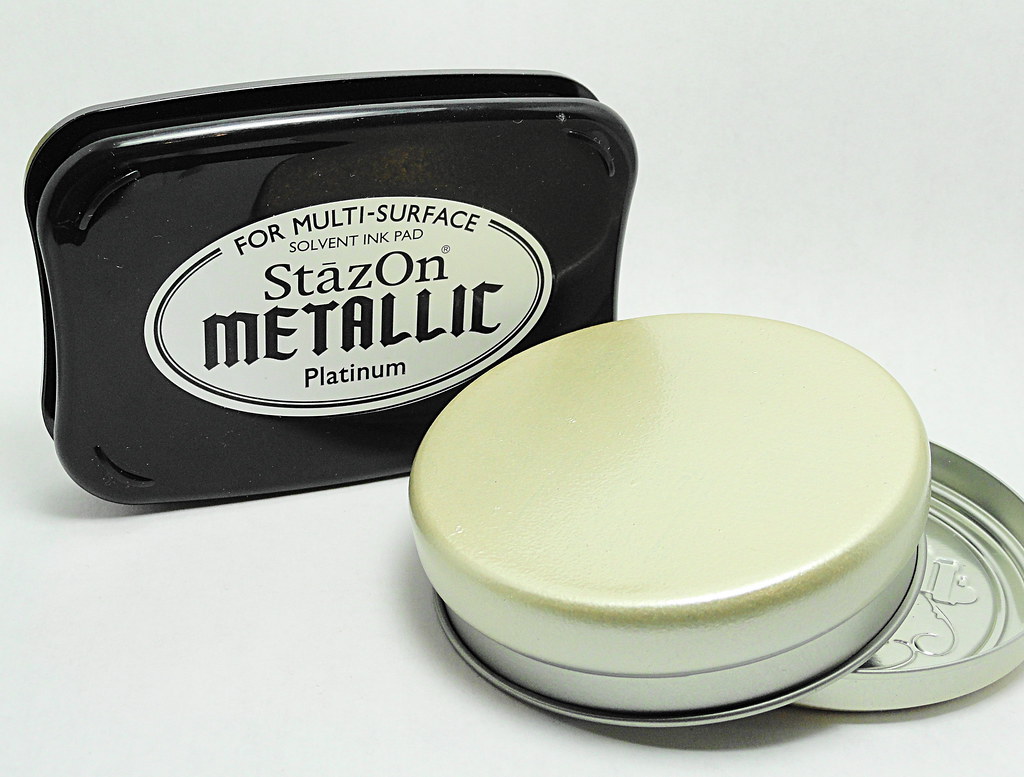
Platinum StazOn was applied to the tin to give it a silver burnished effect while also covering any manufacturing wording.  Several coats were needed with ample drying time between each application.


DSC04355
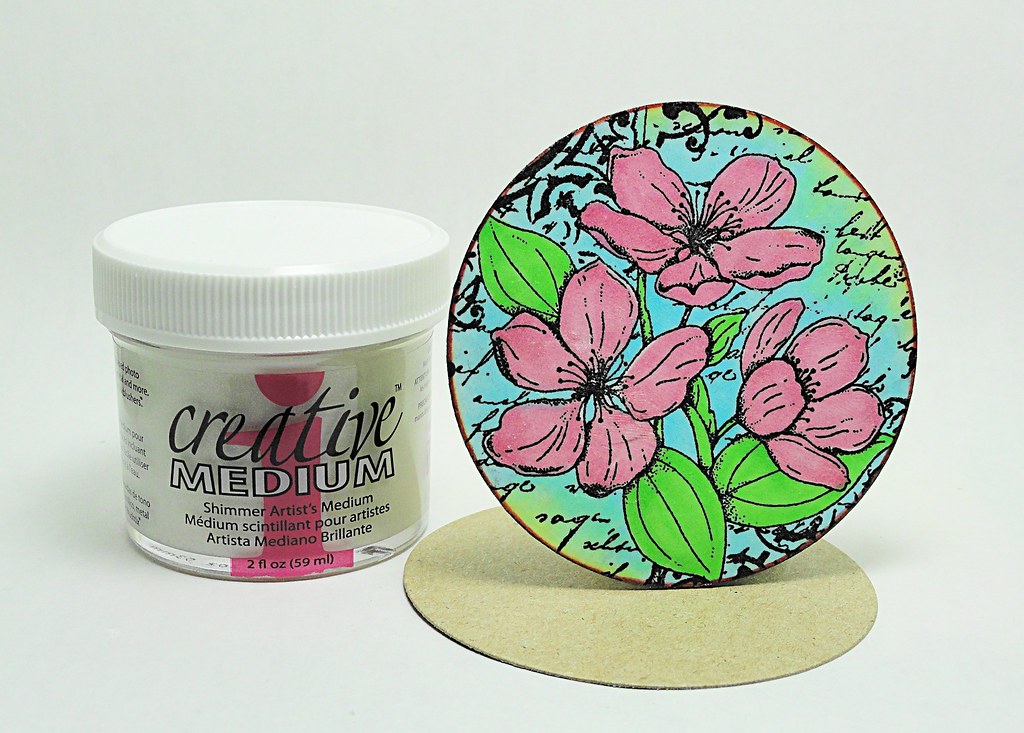
Flower Poetry was stamped on white cardstock with Onyx Black VersaFine and heat embossed with clear powder.  A circle was die cut from the image to fit the top of the tin.  A second circle of the same size was die cut from cardboard (cereal box) to serve as a reinforcing stability base for the image.

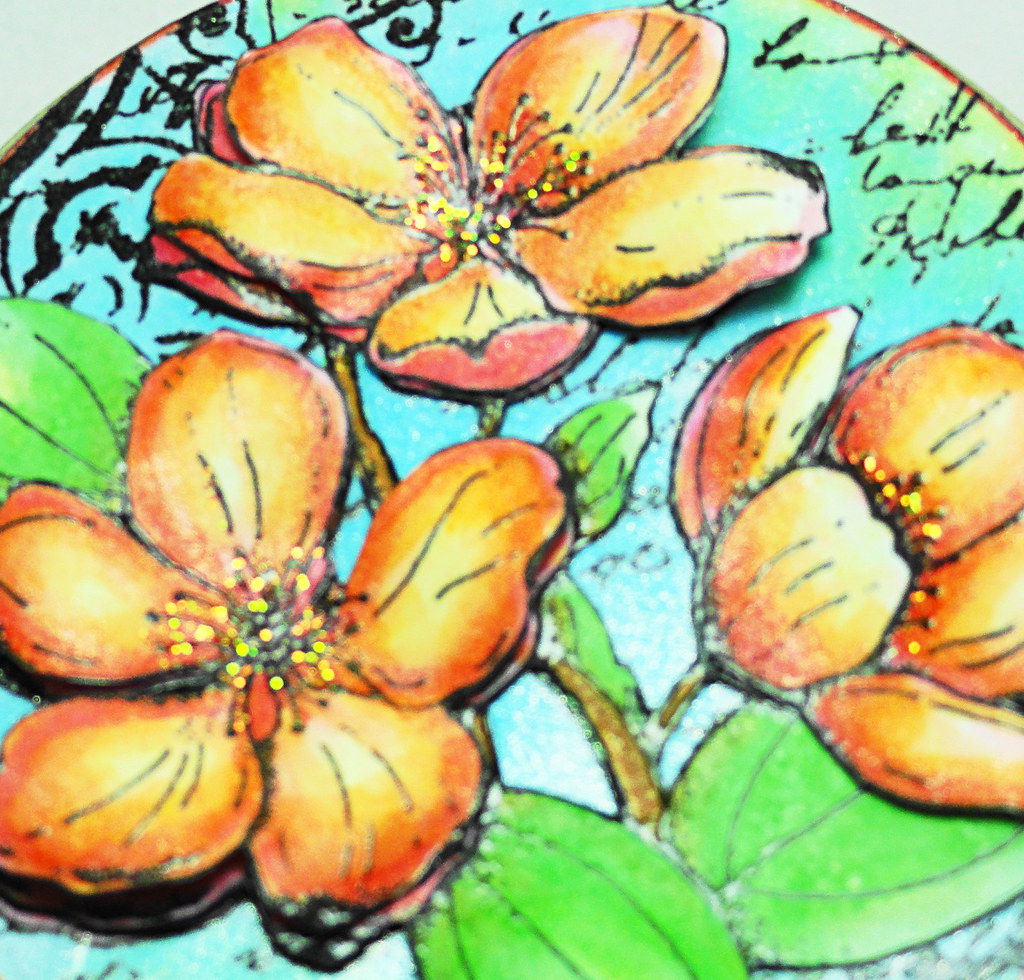
After coloring the image (Copic Markers), Shimmer Creative Medium was spread across the surface to give a subtle, sparkly shine.  Tip/Hint:  Detailed shading is not needed on the flowers/leaves in this step as they will be subsequently covered with additional images.

The colored image was then adhered to the cardboard then attached to the top of the prepared tin with Tombow Power Adhesive Tabs.


 DSC04357
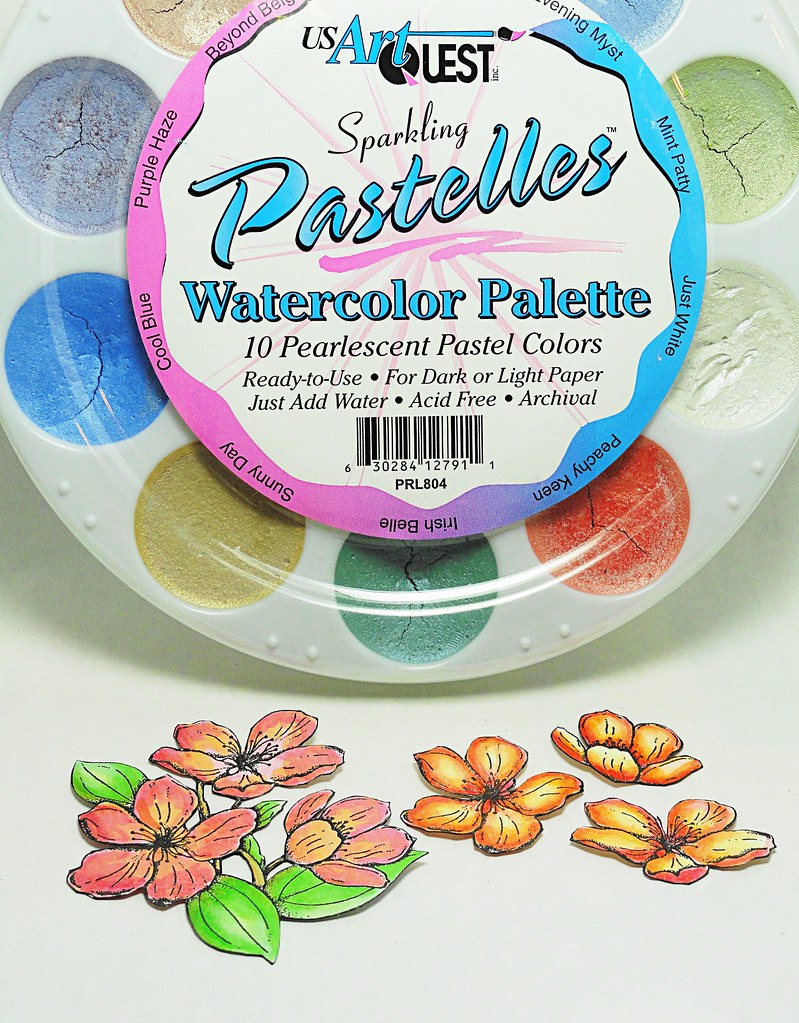
Flower Poetry was stamped two more times on a separate piece of white cardstock in Onyx Black VersaFine and heat embossed with clear powder.  Each set was colored (Copic Markers) and trimmed.  Detailed shading is needed on the leaves from the set on the left and the individual flowers on the right as they will be the elements exposed in the final layering.  A top coat of Peachy Keen watercoloring was added to the individual flowers for a sparkling glow.


DSC04361
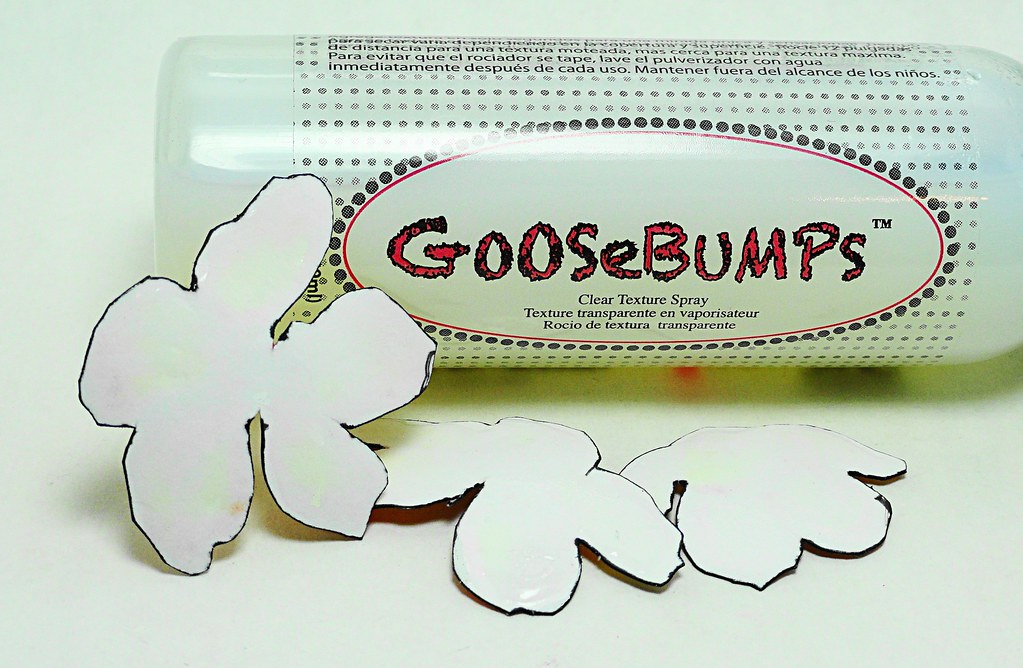
A light coating of GooseBumps was added to the back of the flowers to add stability.


DSC04358
The largest grouping of flowers was aligned and adhered to the top of the prepared tin.  Tip/Hint:  Glue was used in strategic areas so portions of the flowers and leaves could be bent to add dimension.


DSC04363
Next, the individual flowers were adhered.  Tip/Hint:  Using a combination of alignment and slight off-setting while adhering the flower elements will add to the visual depth of the design.


DSC04365
The centers of the flowers were accented with Fruit Punch Stickles.


DSC04366

As always, if you have any questions and/or comments, please feel free to contact me at:  elizabeth.a.allan@gmail.com

Thank you for stopping by to visit,
Elizabeth


Supplies:
Penny Black Stamps:  Flower Poetry 4311K
Copic Markers
Imagine Crafts/Tsukineko: Onyx Black VersaFine, Platinum StazOn Metallic, GooseBumps Clear Texture Spray, Shimmer Creative Medium, Clear Embossing Powder
Tombow: Power Adhesive Tabs
Ranger: Fruit Punch Stickles
Spellbinders: Classic Circles
USArtQuest: Peachy Keen – Sparkling Pastelles Watercolor Palette

February 15, 2013

Take Flight 20 - Day 12


Take Flight Twenty Penny Black

Penny Black's Take Flight Twenty is in full swing and I am excited to share my second project on Day 12.

Hooray for Graduation Sneak Peek

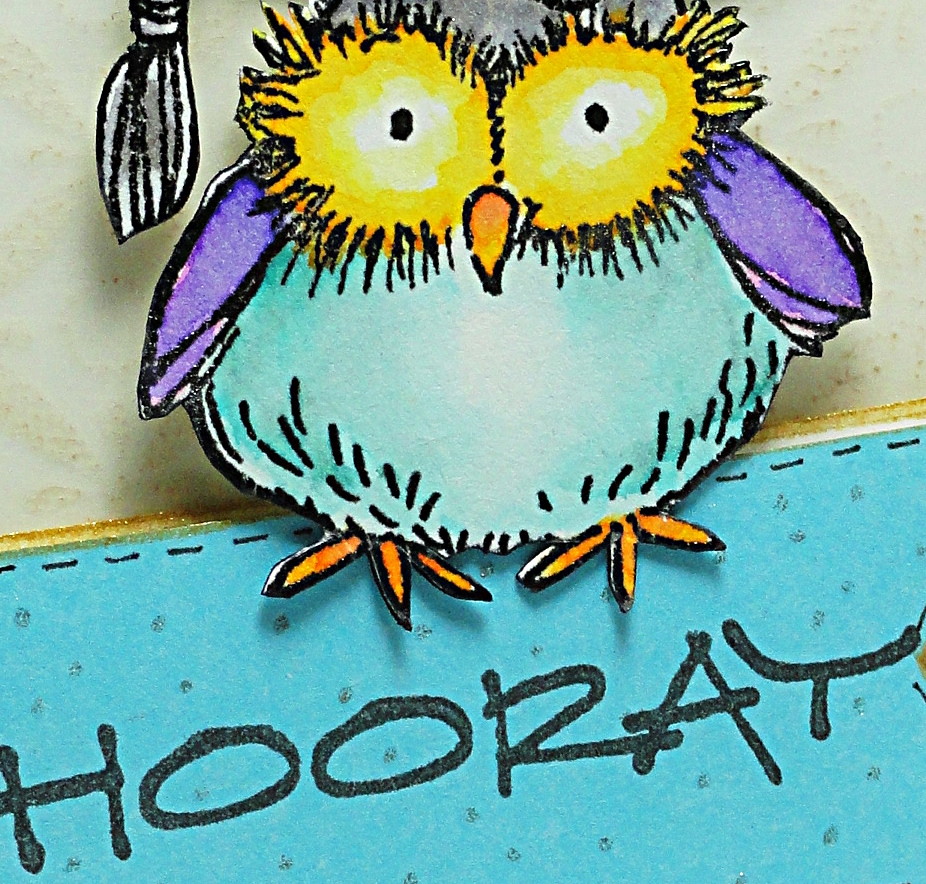
This envelope project has lots of Hoo, Hoo, Hooraying to share with graduates!  To see the full reveal with a step-by-step photographic tutorial click "here".

Don't forget that besides twenty days of creative inspiration from all the designers, one lucky person has the chance to win 20 of Penny Black's new stamps!!

Hooray for Fridays!!
Elizabeth

February 13, 2013

Bring On The Cake!

A happy dash of sweet wishes ....

 Bring in the Cake

...with Penny Black stamps!


Make This Card in 6 Steps
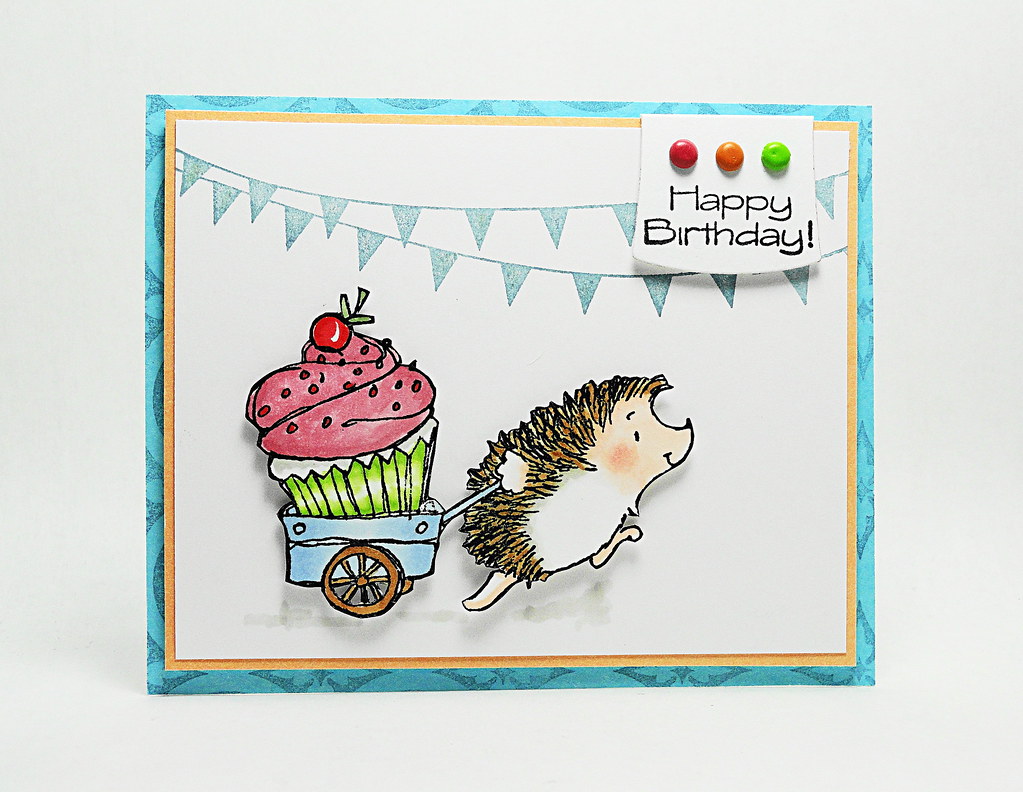
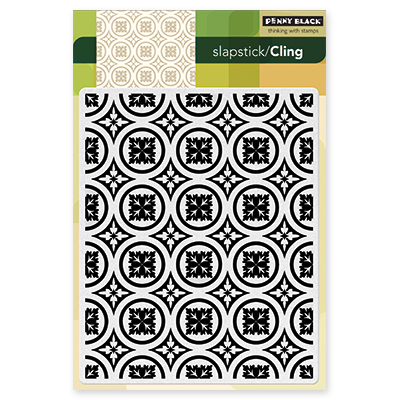
  1. Create a card base from Clear Skies cardstock and stamp Roman Surround across the front in Aegean Blue VersaMagic.  Set aside.
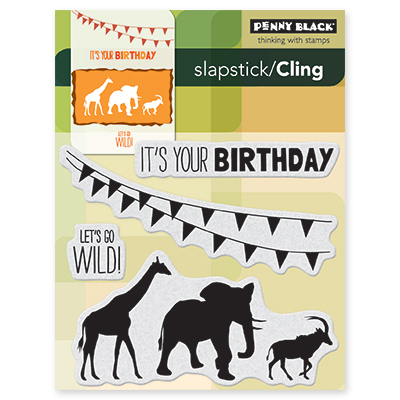
  2. Stamp the party flags from Let’s Go Wild in Aegean Blue VersaMagic across the top part of a white piece of cardstock.
  3. Mat the white cardstock from the previous step with a slightly larger piece of Grand Canyon cardstock. 
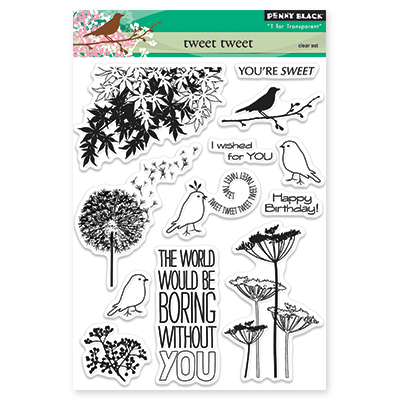
  4. Die cut a small Reverse Wonky Rectangle from white cardstock and fold in half.  Stamp the sentiment from Tweet Tweet in Onyx Black VersaFine toward the bottom of the die cut.  Insert three colored brads just below the fold then wrap around the top of matted cardstocks.  Place adhesive on the back side of the tag and dimensional foam under the front.
  5. Attach the entire piece from Step 4 to the front of the prepared card with dimensional foam.
  6. Stamp Prize Cupcake on a separate piece of white cardstock in Onyx Black VersaFine and heat emboss with clear powder.  Color, trim and attach to the front of the card with dimensional foam.  Design Variation: As an alternative to fussy cutting the image, Prize Cupcake can also be stamped on the main white cardstock panel as part of Step #2.
Enjoy!
Elizabeth

Supplies:
Penny Black Mix & Match Cardstock: Storm 01-001, Blue Skies 10-002, Grand Canyon 03-001
3M Scotch: Dimensional Foam
Copic Markers
Image Crafts/Tsukineko: Onyx Black VersaFine, Aegean Blue VersaMagic, Clear Embossing Powder
Spellbinders: Reverse Wonky Rectangles
Other: Colored Brads


February 8, 2013

Take Flight 20....Elegant Note Box

Welcome as I design today for Penny Black’s Take Flight 20. 

 Take Flight Twenty Penny Black

This fabulous blog event spans twenty days and is filled with colorful inspiration, creative designs and the chance for one lucky person to win 20 stamps!

This is a little sneak peek of my dimensional project……

 Sneak Peek

Click “here” to see the full reveal and a step-by-step photographic tutorial.

Enjoy,
Elizabeth

February 4, 2013

Blooming Hearts

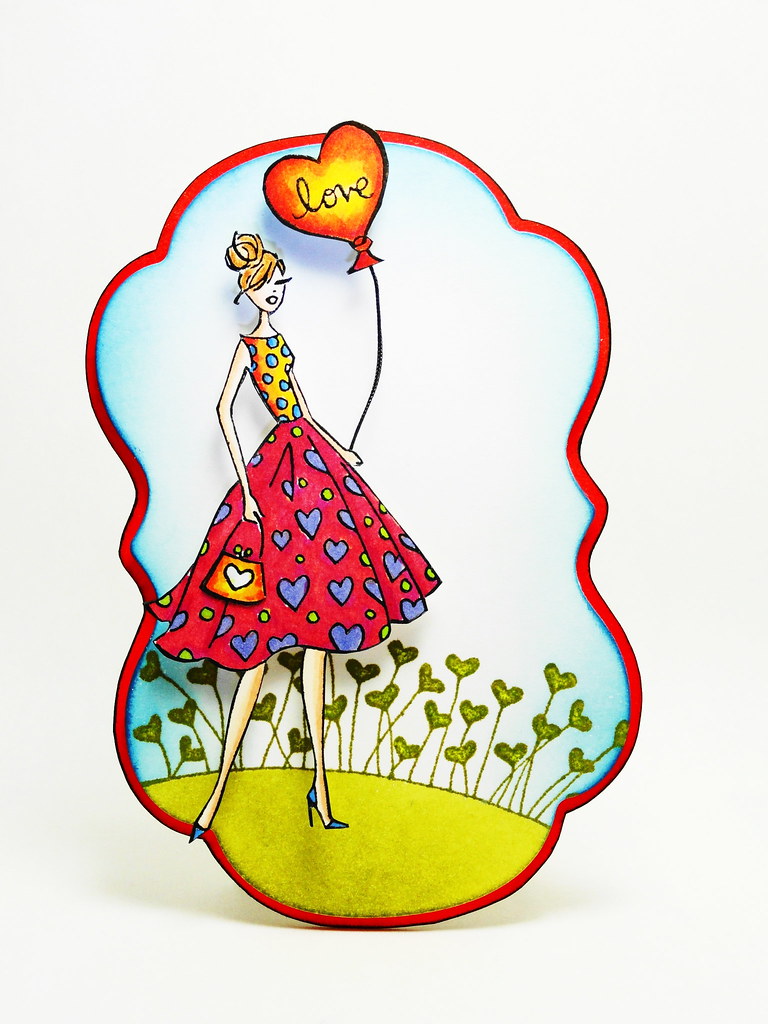
A fashionably fun design to share love during Valentine’s Day.

Love is in the Air

This stylish girl is part of Penny Black’s "T for Transparent" set called Love is in the Air and is paired with a field of Love Blossoms.         

Fashion Girl Close Up

Her balloon was personalized for the occasion by stamping a "love" sentiment in the center.


INSTRUCTIONS

  • Create a card base from a Spellbinders Label 14 cut from Coral Reef cardstock.
  • Die cut a slightly smaller Label 14 from white cardstock and stamp Love Blossoms toward the bottom with Spanish Moss VersaFine.  Use a sponge dauber to color the mound with additional Spanish Moss ink.
  • Using a separate sponge dauber, apply Blue Danube Memento ink around the top portion for a bright sky.  
  • Attach the finished piece to the front of the card with dimensional foam tape.
  • On a separate piece of white cardstock, stamp the girl in Onyx Black VersaFine and heat emboss with clear powder.  Color and trim the image.  Stamp “love” inside the colored balloon.
  • Use a small piece of black string to connect the balloon to the girl’s hand.
  • Attach the finished pieces to the front to of the card with dimensional foam.

To finish... send with love!

Elizabeth

Supplies:
Penny Black Mix & Match Cardstock: Coral Reef 15-003   
Copic Markers
Dimensional Foam: 3M Scotch & EK Success
Imagine Crafts/Tsukineko: Onyx Black VersaFine, Spanish Moss VersaFine, Blue Danube Memento, Sponge Daubers, Clear Embossing Powder
Spellbinders: Labels Fourteen (S4-290)