June 28, 2013

Fun Friends & Creative Dies

All this week Penny Black has been celebrating the newest addition to their product line... Creative Dies!  They have also sprinkled in more new rubber stamps.

Fun Friends

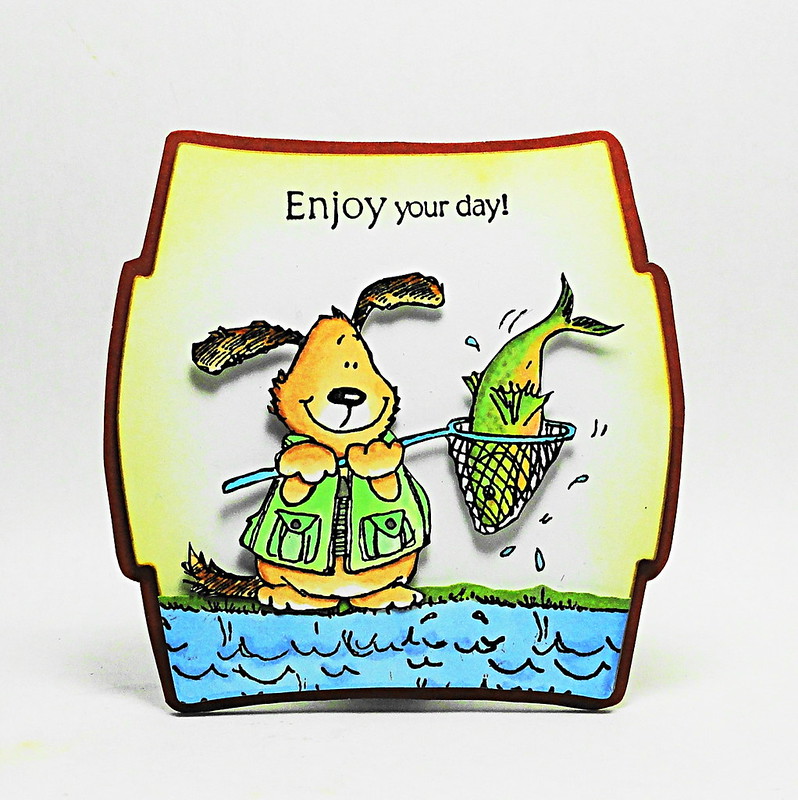
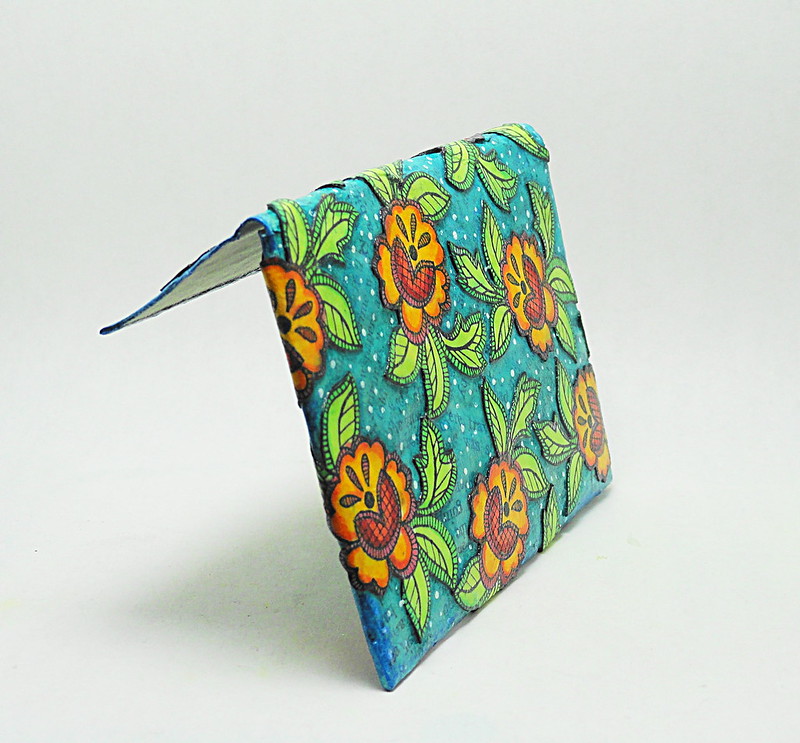
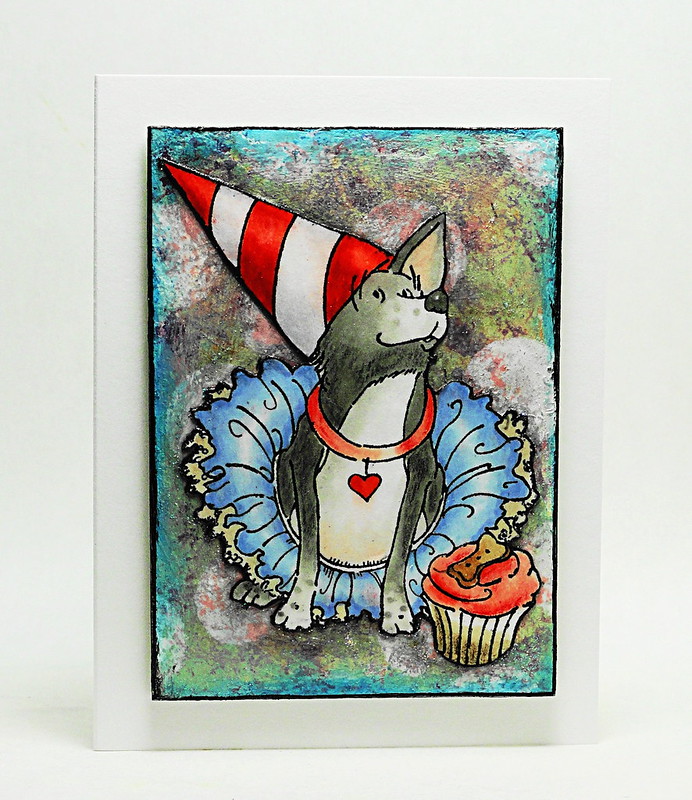
This mini card was created with the new transparent set Homemade and a banner from the Tagged Creative Dies set which includes 9 different shapes.


Make this "summer refreshment" in 4 steps!  
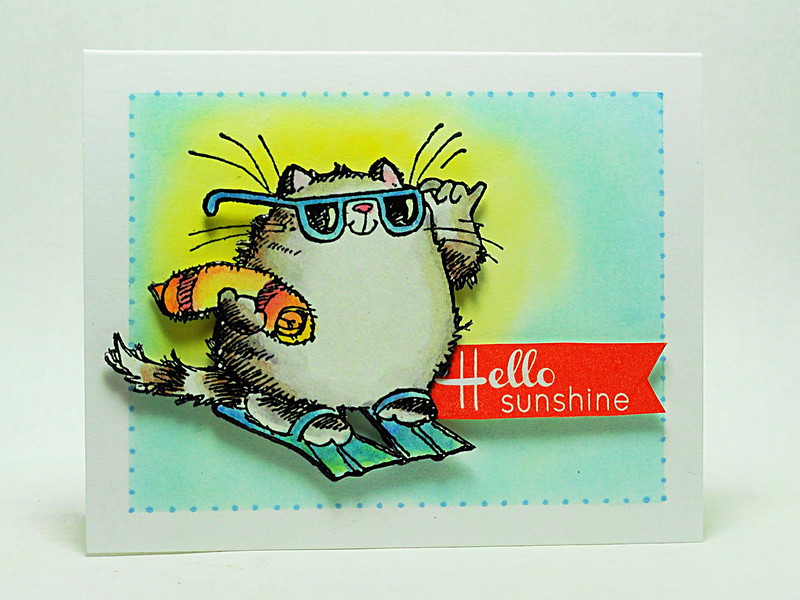
  1. Trim a Les Petites card base to measure 3 x 3 3/4.  Round the top right corner.  Stamp the sentiment in Onyx Black VersaFine and heat emboss with clear powder.  Set aside.
  2. Die cut the banner from red cardstock and stamp Warm Wishes (checkered pattern) on top with Love Letter Memento ink.
  3. Attach the banner to the front of the prepared card with dimensional foam tape and accent the left end with a black glaze pen to create three faux brads.
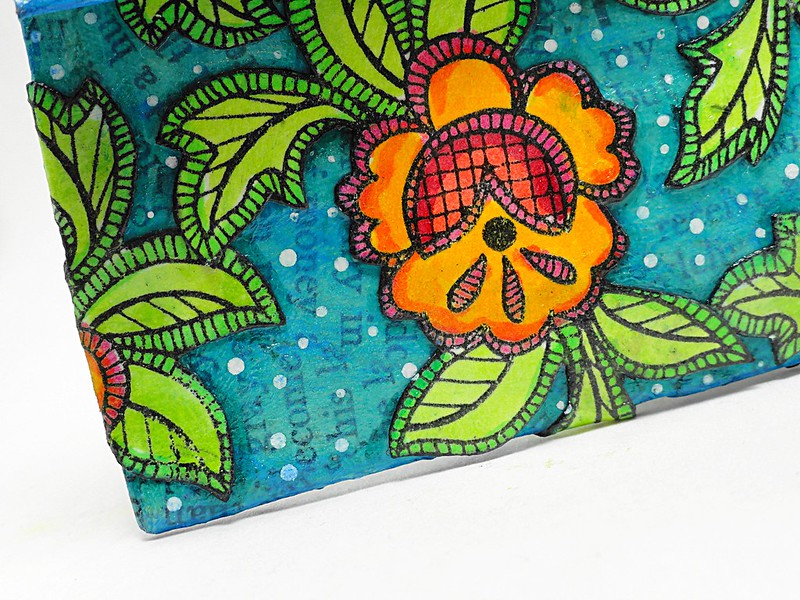
  4. Stamp "Homemade" on a separate piece of white cardstock in Onyx Black VersaFine and heat emboss with clear powder.  Watercolor the image and fussy cut.  Adhere to the banner as shown.

TIP/HINT:  To extend/lengthen banners, simply cut the image in half letting the left and right hand sides extend beyond the layered image.  The separation cut will be hidden behind the layered image.

Happy Friday,
Elizabeth

Supplies:
Penny Black Creative Dies: Tagged 51-007
Penny Black Mix & Match Cardstock: Storm 01-001, Fall Festival 16-003
Penny Black Les Petites 90-001
3M Scotch Dimensional Foam Tape
Image Crafts/Tsukineko: Onyx Black VersaFine, Love Letter Memento, Clear Embossing Powder
Sakura: Black Glaze Pen
Staedtler Karat Aquarell Watercolor Pencils
Other: Corner Rounder

June 24, 2013

Color Combo: Orange and Teal

Today I am using one of my favorite color combinations: orange and teal.  

Thinking of You

For this design, you can let all the ink and cardstock do the coloring for you.  

Here's how with Imagine Crafts/Tsukineko inks and Penny Black stamps....
  • Stamp the top portion of a rectangular piece of orange cardstock with Lace Trims in Habanero VersaFine.  Adhere to the front of a white card base.
  • Stamp Lace Trims on a separate rectangular piece of white cardstock with Sea Breeze VersaMagic and trim the bottom to follow the stamped pattern.
  • Attach this on top of the orange cardstock (as shown) with dimensional foam tape.
  • Stamp the sentiment in Habanero VersaFine on a shapely piece of white cardstock and distress the edges with Peanut Brittle Memento.  Sneak a small piece of knotted ribbon behind the tag before attaching it to the front of the card with dimensional foam tape.  
  • Adorn with a fussy cut flower and leaf stamped from Floral Applique.  The flower is stamped in Habanero VersaFine on orange cardstock and the leaf is stamped in Olympia Green VersaFine on green cardstock.
  • Extras:  An orange brad covered with stickles for the center of the flower.  White gel pen accents for the flower petals.  Black pin dots used throughout the teal lace border.


Have a wonderful day,
Elizabeth

Supplies:
Penny Black Mix & Match Cardstock: Storm 01-001, Fern Green 05-003, Fall Festival 16-003
3M Scotch Dimensional Foam Tape
Image Crafts/Tsukineko: Habanero VersaFine, Olympia Green VersaFine, Peanut Brittle Memento, Sea Breeze VersaMagic, Jumbo Sponge Dauber
Ranger: Crystal Stickles
Other: Orange Brad, White Gel Pen, Black Micron Pen, Organza Ribbon

June 21, 2013

The Artist

A new image from Penny Black's 2013 New Edition catalog.

The Artist

"The Artist" (illustrated by Mo Manning) was softly colored with Copic markers.  A small accent band was created with Ranger Distress Paints in a Roy G. Biv rainbow of colors.

Think art....
Elizabeth

Supplies:
Penny Black Stamps: The Artist 40-232
Penny Black Mix & Match Cardstock:  01-001, 01-002, 01-003
3M Scotch Dimensional Foam Tape
Copic Markers
Imagine Crafts/Tsukineko: Onyx Black VersaFine, Clear Embossing Powder
Ranger Distress Paints

June 17, 2013

Enjoy Your Day

Reeling in the fun with Penny Black's Sunny Days transparent stamp set.


Enjoy Your Day

Wishing you a day full of all kinds of big "catches".  

Enjoy,
Elizabeth

Supplies:
Penny Black Stamps: Sunny Days 30-180
Penny Black Mix & Match Cardstock: Storm 0-001, Grand Canyon 03-003
3M Scotch Dimensional Foam Tape
Copic Markers
Image Crafts/Tsukineko: Onyx Black VersaFine, Dandelion Memento Ink, Jumbo Sponge Dauber, Clear Embossing Powder
Spellbinder's: Labels Two S4-162

June 14, 2013

Mini "No-Sew" Wallet

Using duct tape today instead of needle and thread to create this fabric-lined wallet.

DSC04782
Finished size 2 1/2 x 3 3/4

DSC04778
To create the lining, a piece of muslin was covered with strips of duct tape.  A  3 3/4 x 6 1/2-inch rectangle was then trimmed from the taped material.


DSC04781
A 2 1/2-inch segment was folded up from the bottom and duct tape was used to secure the sides.  The remaining portion at the top (when folded down) will become the top flap.  The exterior was covered with book text and then painted with clear gesso.  Tip/Hint:  Blue painter's tape is helpful for temporarily protecting the exposed lining from becoming marred with ink during the project.


DSC04790
The wallet was then painted with a combination of Ranger Distress Paints and Dr. Ph. Martin's Hydrus Watercolors.  A number of flowers from Penny Black's "Floral Applique" were stamped on white cardstock in Onyx Black VersaFine and heat embossed with clear powder.  The colored and trimmed flowers were then applied to the wallet with Mod Podge.


DSC04784
Two coats of gloss varnish protect the piece as well as adding flexibility.


DSC04785
A view of the fabric interior after the blue painter's tape has been removed with the addition of a magnetic snap for a classy closure.


DSC04788
A close up of the layers showing the appliqued flowers floating over the colored book text with white polka dot accents.

Thank you for stopping by to visit.

Smiles,
Elizabeth

Supplies:
Penny Black Stamps:  Floral Applique 40-238
Basic Grey: Magnetic Snap 
Copic Markers
Dr. Ph. Martin's Hydrus Watercolors
Imagine Crafts/Tsukineko: Onyx Black VersaFine, Clear Embossing Powder
Ranger Distress Paints
Other: Duct Tape, Muslin, Mod Podge, Clear Gesso, Gloss Varnish, Blue Painter's Tape


June 10, 2013

Paper Mache + Mixed Media = Bird Whimsy

As my imagination flew by the sun, moon and stars, my heart was tattooed with indelible, colorful happiness.

Starlight and Sunbeam
Meet Starlight and Sunbeam.

These little 5 1/2-inch tall birds are a collision of paper mache and mixed media techniques.


In Progress

To begin, I drew my components on a piece of corrugated cardboard and covered them using book text and Mod Podge.  Each segment was then prepped with clear gesso.

Color was added in layers using Ranger Distress Paints and Dr. Ph. Martin's HYDRUS Watercolors.  I like the depth you can achieve with the combination of opaque and translucent paints.


Close Up

For "feathery" detail, Penny Black's "Lace Trims" were stamped in Black Soot Distress Paint.  Accent dots were created with White Linen Distress Paint applied with the tip of a stylus.

After heavy-gauge florist wire was thread through the birds for legs, they landed on old buttons that had been updated with more Ranger Distress Paints and "moon dust" (crystal glitter).

May your imagination take flight...
Elizabeth

Supplies:
Penny Black Stamps:  Lace Trims 30-181
Ranger Distress Paints
Dr. Ph. Martin's HYDRUS Watercolors
Other: Corrugated Cardboard, Book Text, Floral Wire, Buttons, Crystal Glitter, Mod Podge, Clear Gesso

June 6, 2013

"Petite" Mixed Media

One stamp and a whole lot of fun color.

Petite Card (Mixed Media)

This tiny mixed media was created on a 2 1/2 x 3 1/2 piece of mat board decorated with Ranger Distress Paints.  The dabber applicators are great for making quick and festive circles.  A coat of Shimmer Creative Medium adds a semi-gloss finish with sparkle.

Tutu and Cupcake (illustrated by Mo Manning) was stamped on a separate piece of white cardstock, colored and trimmed.  After the piece was adhered to the decorated mat board, a layer of Gloss Varnish was painted on top of the birthday dog and his cupcake for an enamel finish.

The completed piece was attached to a trimmed Les Petites card base measuring 3 1/8 x 4 1/8.

Design Variations

Magnet:  Attach a magnet to the back of the mat board and temporarily adhere to the card.  The recipient can remove the design for a magnetic piece of art.

Tag:  Attach a decorative ribbon to the mat board and use as a tag to adorn a gift bag or present.

Wearable Art:  Attach a pin back to the mat board.  Punch two holes in the card base to accommodate the pin and attach.  The recipient can remove the design and has a "birthday badge" to wear.

Speaking of wearable art and "pins",  if you enjoy "pinning" be sure to check out the Penny Black Blog all this week as they have daily features spotlighting their Pinterest Page.   

Thank you for visiting today and taking a peek at some "tiny" art.

Elizabeth

Supplies:
Penny Black Stamps: Tutu & Cupcake 4334J
Penny Black Les Petites 90-001
Copic Markers
Imagine Crafts/Tsukineko: Onyx Black VersaFine, Creative Medium (Shimmer), Clear Embossing Powder
Ranger Distress Paints
Other: Mat Board, Gesso, Matte Medium, Gloss Varnish

June 3, 2013

Hello Sunshine

Some fun in the sun with Penny Black's new Sunny Days...

Hello Sunshine

A one-layer card PLUS.  

A trimmed Les Petites card with PanPastels create the one layer and the dimensional cat and banner are the "plus".

Here are the sunny details for this cool cat:
  1. Trim a Les Petites card base to measure 3 1/4 x 3 and mask off a 1/4-inch border along the outside edge.
  2. Stamp the cool cat in Onyx Black VersaFine and heat emboss with clear powder.  Apply Diarylide Yellow and Phthalo Blue Tint PanPastels around the image.  
  3. Remove the mask strips and add a dotted border with a Summer Sky Memento marker.
  4. On a separate piece of white cardstock, stamp the cat in Onyx Black VersaFine and heat emboss with clear powder.  
  5. Color the image as desired.  In this sample, the cat was watercolored with Staedtler's Karat Aquarell Watercolor Pencils.  Fussy cut the image.
  6. Stamp the banner in Habanero VersaFine on white cardstock and trim.
  7. Attach the trimmed images to the front of the card with dimensional foam. 
Wishing you a bright and sunny day,
Elizabeth

Supplies:
Penny Black Stamps:  Sunny Days 30-180, Friendship 30-160
Penny Black Les Petites 90-001
3M Scotch Foam Tape
Imagine Crafts/Tsukineko: Onyx Black VersaFine, Habanero VersaFine, Summer Sky Memento Marker, Clear Embossing Powder 
PanPastel (Colorfin): Diarylide Yellow, Phthalo Blue Tint
Staedtler: Karat Aquarell Watercolor Pencils