December 30, 2011

Penny Black & Flower Soft Blog Hop

Welcome Blog Hoppers!   

If you are just now joining in, click “here” for the starting point of the hop and to read more about how your comments on each designer's blog will enter you in random drawings for fabulous prizes.  There is also a creative challenge that could win you a guest designing spot at Penny Black!  


The addition of Flower Soft to these fanciful stamped hearts gives the design colorful dimension. 


Here are 3 quick steps for creating these textured flowers:  
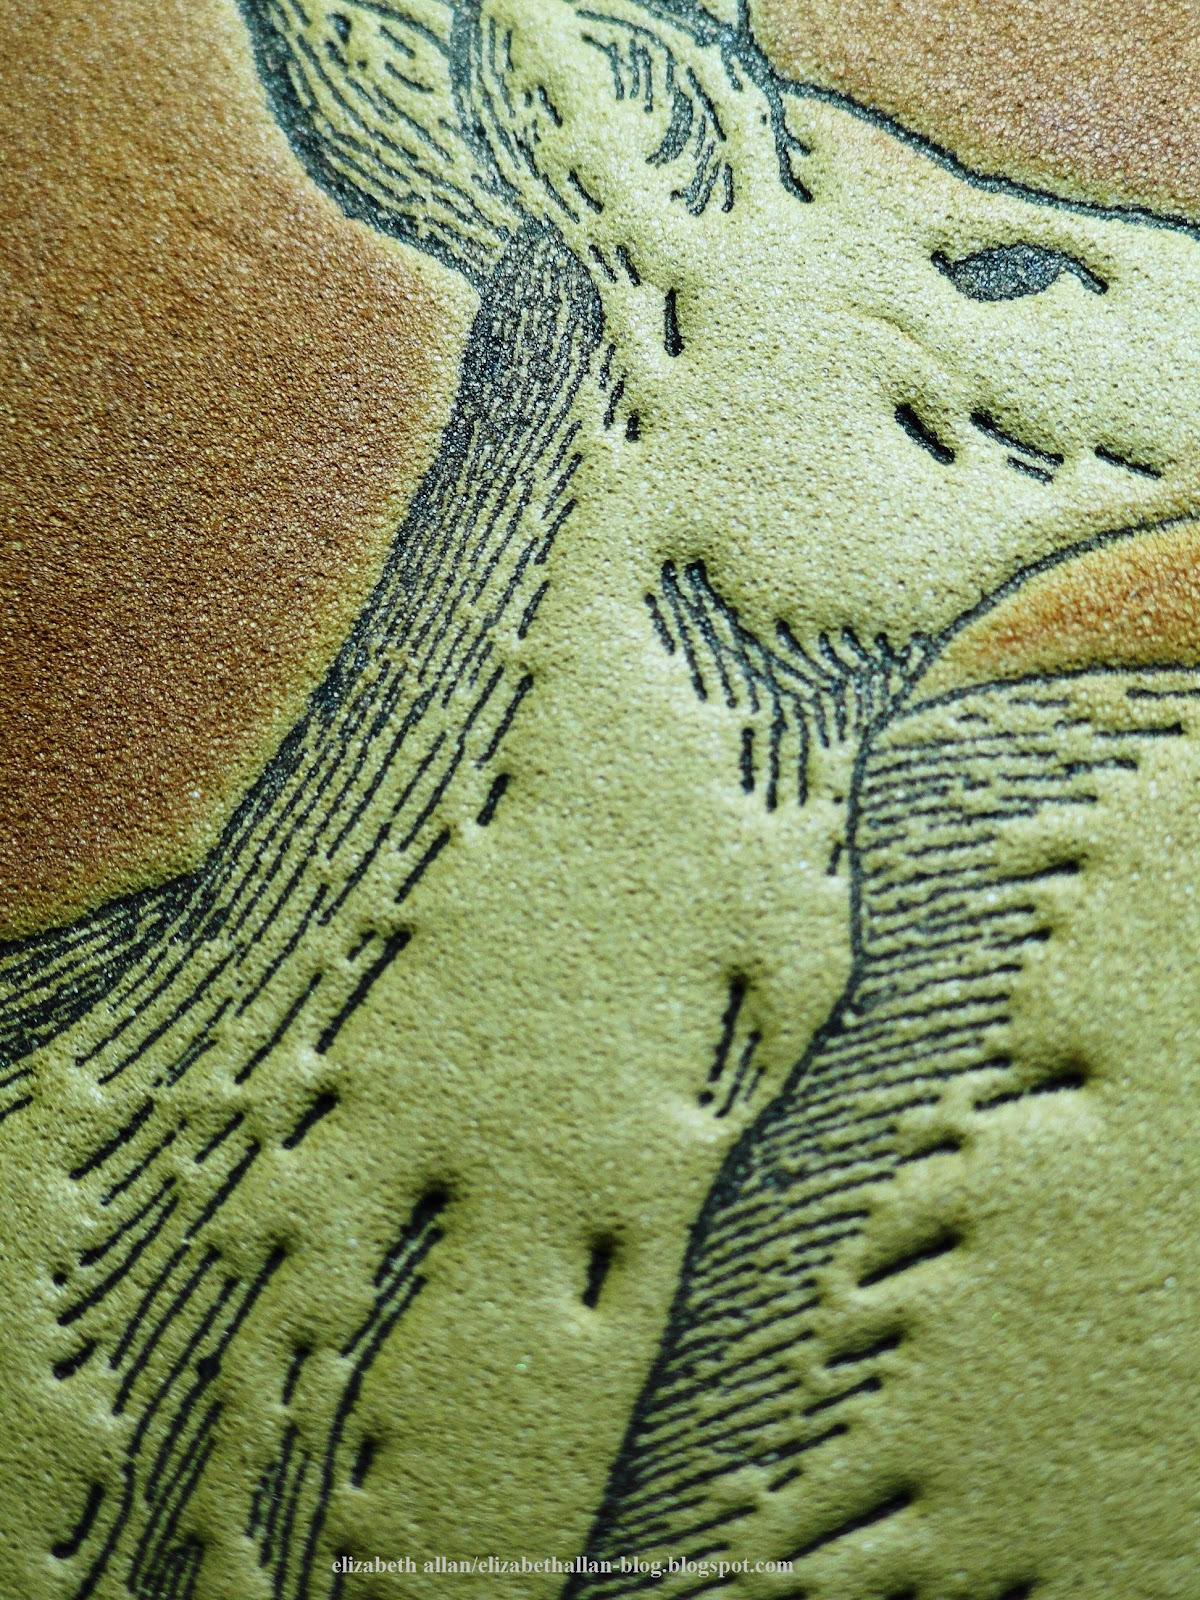
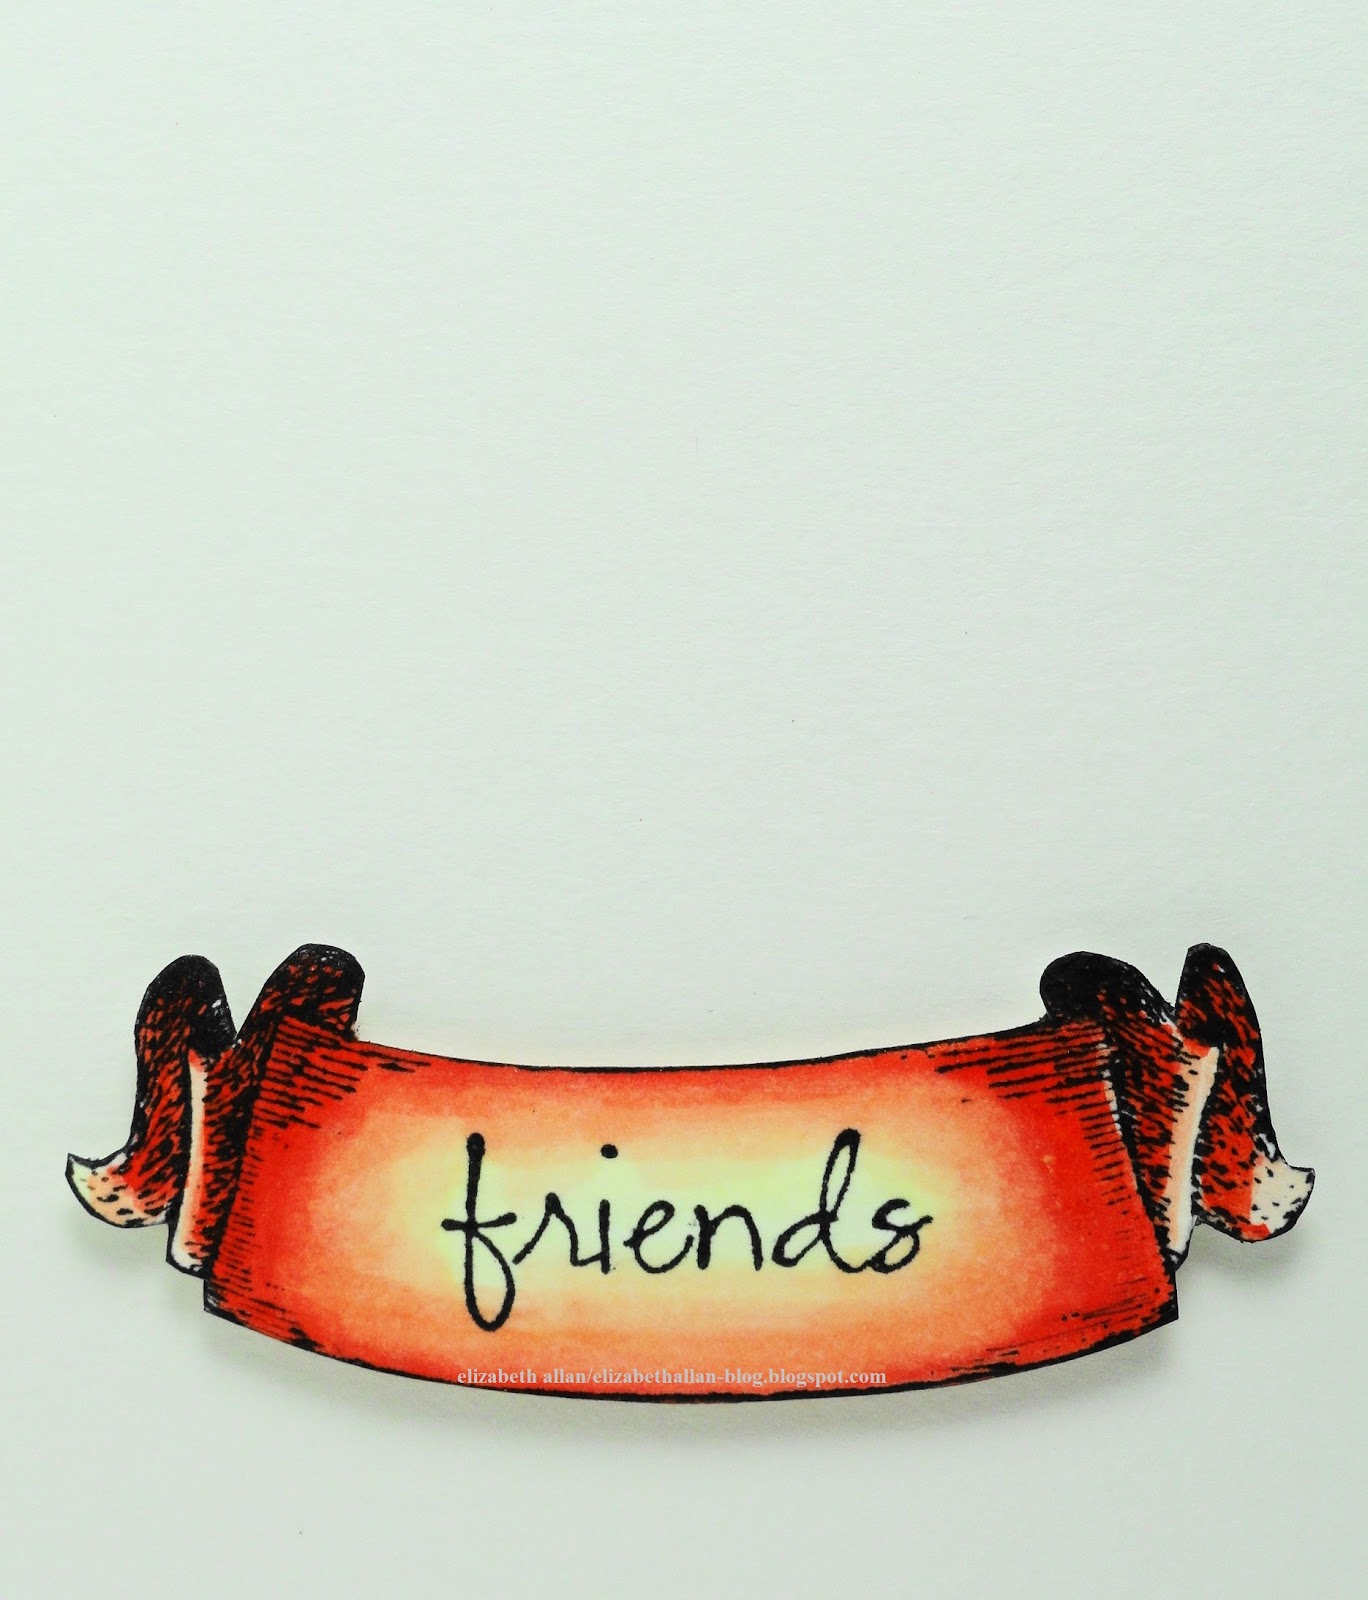
The butterfly from the transparent Illumination set was used for an embellishment and the sentiment is from Raindrops & Kisses.
 
Enjoy your “hopping” as you continue on to Gini Cagle’s blog “here”.   This event will be open until January 1, Midnight PST.  

Thank you for all your love and support throughout 2011.    

Happy New Year!

Elizabeth

Supplies:
Penny Black Mix & Match Cardstock: Rose Garden 14-003
3M Scotch: Dimensional Foam Tape
American Crafts: Red Sheer Ribbon
Ranger: X-Mas Red Stickles
Tsukineko: Spanish Moss VersaFine, Onyx Black VersaFine, Crimson Red VersaFine, Vintage Sepia VersaFine, Clear Embossing Powder

December 28, 2011

Truly * Madly* Deeply

Have you seen the new transparent Valentine set called Raindrops & Kisses?  After making this card I realized I only used half of the images offered in the set!  It has a terrific assortment of fabulous designs. 


Follow along step-by-step:
  • Create a 3 ¾ x 5 ½ card from Rose Garden cardstock and round the top two corners.
  • Cut a 3 ½ x 5 ¼ piece of white cardstock and round the top two corners. 
  • Mask off the top portion of the white cardstock allowing only 1 ¾ inches exposed on the bottom section.  With a sponge dauber, lightly rub Pink Grapefruit ink along the sides and bottom of the exposed section.  Repeatedly stamp “love” on top with the same color ink.  Remove the mask and attach the piece to the front of the card with dimensional foam.
  • Stamp “truly, madly, deeply” in black ink and heat emboss with clear powder on a ½ x 3 ¼-inch piece of white cardstock.  (Note: An extra heart was stamped at the beginning of the phrase.) Mat with a 5/8 x 3 ¼-inch piece of Rose Garden cardstock.  Attach to the front of the card with double-sided adhesive.
  • Stamp the bear with the wreath on a separate piece of white cardstock in black ink and heat emboss with clear powder.  (Note: I stamped the image multiple times so I could create additional elements to layer.)
  • Color the image and trim.  Attach to the front of the card with dimensional foam.
  • Accent with glitter.

I look forward to seeing you on Friday when I will be sharing a "hopping" fun event!  

Thank you for visiting.  The time you share with me is greatly appreciated!

Elizabeth

Supplies:
Penny Black Stamps: Raindrops & Kisses 30-088
Penny Black Mix & Match Cardstock: Rose Garden 14-003
3M Scotch: Dimensional Foam
Copic Markers
Ranger: Red Stickles, Crystal Stickles
Tsukineko: Onyx Black VersaFine, Pink Grapefruit VersaMagic, Sponge Dauber, Clear Embossing Powder

December 26, 2011

Sweetheart

The new Valentine release by Penny Black has so many wonderful images for mixing and matching.  Today I paired a transparent set with a slapstick stamp for this circular card.


The background under the elevated circle frame is white cardstock distressed with Pink Grapefruit VersaMagic with Hearts All Over stamped in the same color ink. 

The bears and sentiment are from the transparent set called Beep Beep.  The bears were colored with Copics, fussy cut and then attached with dimensional foam.

The border used for the grass band is from the set called Halloween Treats.  I love that this set has many designs that I can use throughout the year.

All the supplies for this card are listed below for a quick reference. 

Please always feel free to e-mail me at elizabeth.a.allan@gmail.com if you would like more information or have questions about any of my postings.

Have a wonderful day,
Elizabeth

Supplies:
Penny Black Mix & Match Cardstock: Rose Garden 14-003
3M Scotch: Dimensional Foam Tape
Copic Markers
Tsukineko: Onyx Black VersaFine, Pink Grapefruit VersaMagic, Clear Embossing Powder
Sakura: White Gel Pen
Spellbinders: Standard Circles

December 23, 2011

Christmas Wishes

A special holiday wish for you……

These snugly little mice from Dreaming of a White Christmas were water colored, fussy cut and layered onto a Retro Pattern background stamped in Summer Sky Memento ink.  The “dreamy” sentiment is from the transparent Winter Wonders set.

May your holidays be blessed with love, joy and peace.

Merry Christmas!

Elizabeth

Supplies:
Penny Black Mix & Match Cardstock: Spring Meadows 06-001, 06-002; Fuchsia Fantasies 13-002
3M Scotch: Dimensional Foam Tape
Canson: Watercolor Paper
Tombow: Dual Brush Markers
Tsukineko: Onyx Black VersaFine, Summer Sky Memento, Clear Embossing Powder

December 21, 2011

FOREVER....friends!

Today I have another new Penny Black Valentine stamp illustrated by Mo Manning. 

This “Queen of Hearts” is perfect for sending an adamant message….


She is very passionate about her friends as you can see from the inside of the card!


The banner from “Love Assortment” was used in its original format on the front of the card.  The inside greeting omitted the inking of the sentiment, turning it upside down and substituting “friends” from “Mimi’s Many Loves” transparent collection.

The card base and matted layers were constructed from Penny Black’s Mix & Match Cardstocks: Rose Garden (14-003), Periwinkle (11-003) and Storm (01-003).


The background behind the queen is a fabulous slapstick stamp called “Hearts All Over” stamped in Aspen Mist VersaMagic.  All the coloring was done with Copics and the trimmed images were elevated with dimensional foam.

Be sure to stop by the Penny Black Blog to see how the designers are using all these fabulous new Valentine designs.

Smiles,
Elizabeth

Supplies:
Penny Black Mix & Match Cardstock: Rose Garden 14-003, Periwinkle 11-003, Storm 01-003
3M Scotch: Dimensional Foam Tape
Copic Markers
Tsukineko: Onyx Black VersaFine, Aspen Mist VersaMagic, Crimson Red VersaFine (to darken the card base)  

December 19, 2011

Hugs & Kisses

Penny Black has just released their new Valentine collection and they have some fantastic Mo Manning images as a part of the release.

This slapstick stamp called “Kisses” makes me smile.


I exchanged her bouquet of flowers for a Valentine heart from the transparent Beep Beep set.  I can picture her giving this surprise to a beau at school.

The square background is a separate piece of white cardstock stamped with Hearts All Over in Pink Grapefruit VersaMagic ink and then distressed with more of the same ink color.  Edging the piece with a black marker makes it appear it has been matted without the extra bulk.

Tip/Hint: To accentuate the appearance of her leaning forward, dimensional foam was used toward the top of the fussy cut image and regular double-sided adhesive down toward the feet.

The sentiment is a portion of Purr-fect Message stamped in black and the heart pendant was accented with Glossy Accents.

You can view all the new fabulous images in the digital Valentine catalog "here".

Wishing you a day filled with lots of hugs and kisses,
Elizabeth

Supplies:
Penny Black Mix & Match Cardstock: Sticks & Stones 01-001
Copic Markers
Ranger: Glossy Accents
Tsukineko: Onyx Black VersaFine, Pink Grapefruit VersaMagic, Clear Embossing Powder

December 16, 2011

Thanks a Bunch!

This set of thank you cards was made using a portion of “Brimming with Love” one of Penny Black’s new Valentine stamps.


Rounded corners and decorative scored lines were added to simple tent cards.  The carts were stamped in Black VersaFine and heat embossed with clear powder.  After coloring each design with Copic markers, they were trimmed and adhered to the card with dimensional foam.  Star Dust Stickles were added as an accent.  The sentiment is part of the transparent Betsy Blue Bell set.

Enjoy pairing this cute “cart of hearts” with different sentiments for cards for all occasions!

Elizabeth

Supplies:
EK Success: Dimensional Foam
Copic Markers: R24, R39, R83, RV19
Ranger: Star Dust Stickles
Tsukineko: Onyx Black VersaFine, Clear Embossing Powder 

December 14, 2011

Merci Penguins

This week Penny Black is featuring thank you cards and today I am hosting their blog with this pair of thankful penguins.   


The card bases were constructed using Spellbinder’s Labels Eighteen.  The card on the left was processed through the die-cutting machine with an embossing mat and the card on the right has an additional frame added.  The white cardstock die-cut frame was transformed with Bahama Blue Memento ink and stamped with the background from Warm Wishes. 

The sentiment is from the transparent set Salutations and the cute penguin is a part of Christmas with Mimi.  A black glaze pen is great for creating brad-like accents. 


Tip/Hint:  Cutting a small portion from the back card base will give the card three points of contact when displayed and prevent the piece from “rocking”.


Merci beaucoup for visiting today!
Elizabeth

Supplies:
3M Scotch & EK Success:  Dimensional Foam
Copic Markers
Sakura: Black Glaze Pen
Spellbinders: Labels Eighteen (S4-310), Classic Ovals Large (S4-110)
Tsukineko: Onyx Black VersaFine, Bahama Blue Memento, Clear Embossing Powder, Sponge Daubers

December 12, 2011

Deck The Halls

Hedgies love to decorate for the holidays!


The garland on Penny Black’s Star Struck was altered to include the round sentiment from Let It Snow.

The festive background was created by horizontally stamping Circles & Lines and then over stamping with Kind Wishes which was inked with coordinating Tombow Markers.

All images were water colored, fussy cut and then elevated on a small piece of white cardstock before being attached to the prepared card base cut from Reverse Wonky Rectangles.

Enjoy the festivities of the season,
Elizabeth

Supplies:
Penny Black Mix & Match Cardstock: Spring Meadow 06-003
Canson: Watercolor Paper
Ranger: Yellow Stickles
Spellbinders: Reverse Wonky Rectangles (S4-307) 
Tombow: Dual Brush Markers
Tsukineko: Onyx Black VersaFine, Clear Embossing Powder

December 9, 2011

"Chalk Pouncing" Technique

Soft pastel chalks make great backgrounds for your favorite sentiments.


This technique can be achieved in TWO steps!

Step 1:  Ink the desired image with VersaMark Watermark ink and stamp on white cardstock.

Step 2:  Using small bits from a cotton ball, apply chalk colors in a pouncing fashion.  The ink will “grab” the chalk and the image will come to life.

Hint:  If you find that you need to remove chalk from a non-stamped area, a clean white eraser is the perfect tool.

The card design was finished by stamping the sentiment in black ink and adding a sparkly sheer ribbon.

Have a great weekend,
Elizabeth

Supplies:
Penny Black Stamps:  Hillflowers 3938K, Gratitude 3855E
Penny Black Mix & Match Cardstock: Blue Lagoon 09-003
Tsukineko: VersaMark Watermark Ink, Onyx Black VersaFine
Offray: Ribbon
Other: Chalk, Cotton Ball  

December 7, 2011

Faux Leather Technique

This week the Penny Black designers are sharing techniques and I am hosting their blog today with this “faux leather” design. 


The “leather” is a piece of tan craft foam that was heated until it was very soft and pliable.  Directly after heating, a pre-inked Forest Friends in Jet Black StazOn was stamped on the surface.  Firm pressure for several seconds creates not only the impression, but also an embossed, etched effect in the foam.


After the impression was made, a combination of Vintage Sepia and Gingerbread VersaMagic inks were applied with daubers around the deer.


For a stylized design, the “leather” was wrapped around a heavy piece of cardstock and the edges were secured by using a hot glue gun.  After completion, the entire piece was attached to the front of the card with Tombow Power Adhesive Tabs.

A tan tent card burnished with Vintage Sepia ink was sprayed with Gold Sheer Shimmer Spritz.  The thin decorative band is white cardstock stamped with Winter Sky in black ink and heat embossed with clear powder.  The green tone is a pouncing of Spanish Moss ink.

The decorative band was attached with pewter brads to a piece of dark brown cardstock stamped with Retro Pattern in Vintage Sepia ink. 

The “happy birthday” sentiment stamped on white cardstock with black ink and heat embossed with clear powder was aged and distressed with Spanish Moss and Vintage Sepia inks.  A black glaze pen was used to simulate brads and a small piece of dimensional foam under the center of the banner adds dimension.

This is also a fun technique to use with white fun foam and snowflake stamps!

Thank you for sharing your time with me.

Elizabeth


Supplies:
Penny Black Mix & Match Cardstock: Sticks & Stones 02-002 & 02-003
Making Memories: Pewter Brads
Tombow: Power Adhesive Tabs
Tsukineko: Onyx Black VersaFine, Vintage Sepia VersaFine, Spanish Moss VersaFine, Gingerbread VersaMagic, Gold Sheer Shimmer Spritz, Sponge Daubers

December 5, 2011

Color, Spritz & Stamp

Stamping with markers is an easy technique for creating beautiful watercolor images.


Tombow markers were used to apply color directly on the stamp.  Prior to stamping on watercolor paper, a light misting of water was spritzed on the colored stamp.  Voila!  Instant watercoloring in three steps - Color, Spritz & Stamp!  Subsequent lighter images can be made from the same colored stamp by re-activating any remaining ink on the stamp with additional mists of water.   

The elegant gold border was created by edging the sides of the paper with a Delicata Golden Glitz ink pad.  


The sentiment embellishment was created from two tags die cut from white cardstock.  One was distressed with Crimson Red VersaFine, stamped with the sentiment and accented with pewter brads that were randomly colored with red and black Sharpies.  Dimensional foam was used in the center of the tag to adhere it to the stamped image.  The second tag was aligned with the first behind the stamped artwork and the tag ends were glued together.  A fun visual accent which also hides the end of the brads.

The finished piece was then adhered to the front of a 2 ¼ x 4 ¾ forest glen tent card.

Thank you for stopping by to visit.  I hope you are inspired to watercolor with your stamps. 

Elizabeth

Supplies:
Penny Black Mix & Match Cardstock: Forest Glen 07-003
Canson Watercolor Paper
Making Memories: Pewter Brads
Ranger: Xmas Red Stickles, Lime Green Stickles
Tombow Dual Brush Markers: 158, 757
Tsukineko: Onyx Black VersaFine, Olympia Green VersaFine, Crimson Red VersaFine, Delicata Golden Glitz
Sharpie Pens: Red and Black
Spellbinders: Ribbon Tag Trio Three (S4-323)

December 2, 2011

Stamped Necklace Pendant

A while ago a friend had given me a box of microscopic slides and I have been anxious to work with them as I had an idea for a jewelry design.


This week I dismantled an old watch with the intention of using the gears as accents, but I ended up fascinated with the spring mechanism and how it uncoiled into this metal embellishment.

The pendant is a layered stack consisting of one microscopic slide, black cardstock, stamped white cardstock and topped with the final microscopic slide.  Copper Memory Foil Tape was used to create the faux soldering and tubing.  To give it a burnished look, Stone Gray StazOn was randomly applied to the foil.   

The artwork is a section of Penny Black’s Eternal stamped in Jet Black StazOn ink on white cardstock and very lightly colored with Memento Inks applied with sponge daubers.    

A black brad was placed in the top coil as an accent while one of the watch gears was positioned under the bottom coil.  Glossy Accents held the gear in place and while the glue was wet, crystal glitter was sprinkled on top.

These also make lovely window accents.

Have a great day and a terrific weekend,
Elizabeth

Supplies:
Penny Black Stamps: Eternal 4207K
Penny Black Mix & Match Cardstock: Storm 01-003
Inkssentials: Copper Memory Foil Tape
Ranger: Glossy Accents
Tsukineko: Jet Black StazOn, Stone Gray StazOn, Bamboo Leaves Memento, Lilac Posies Memento, Tangelo Memento, Sponge Daubers
Other: Microscopic Slides, Black Cording, Repurposed Watch Parts, Black Brad, Crystal Glitter

November 30, 2011

Stamped Candles

Transform simple white pillar candles with rubber stamps and tissue paper.


Holly Candle:
  • Stamp Holly Tree on a band of white tissue paper with black ink and heat emboss with clear powder.  Color the image and trim along the top portion of the band.
  • Wrap the stamped band around the candle with a band of wax paper on top.
  • Gently apply heat with a heat tool.  The tissue paper will absorb the heated wax and become translucent.
  • Remove the wax paper.


Gold Tree Candle:
  • Stamp Tree with Delicata Golden Glitz ink on white tissue paper and heat emboss with gold powder.
  • Trim closely around the image.
  • Lay the trimmed image on the candle and place a piece of wax paper on top.
  • Gently apply heat until the tissue paper absorbs the heated wax and becomes translucent.  Peel off the wax paper.

All this week the Penny Black blog will be featuring "Anything-But-A-Card" projects.  If you have a moment pop in.  You'll be inspired by all the unique ideas.

I will be back on Friday to share a stamped piece of jewelry!

Smiles,
Elizabeth

Supplies:
Tsukineko: Onyx Black VersaFine, Delicata Golden Glitz, Clear Embossing Powder, Gold Embossing Powder, Memento Markers (Cottage Ivy #701, Bamboo Leaves #707, Rhubarb Stalk #301, Rich Cocoa #800)
White Tissue Paper
Wax Paper

November 28, 2011

A Polar Bear Hello & CardMaker Thank You

I enjoy my Christmas/holiday stamps so much that I look for ways to use them throughout the year. 

A little bit of altering to Bear Hug and this cheery hello was created to tuck away for a snowy winter day.


Here is the original stamp image:


For my design, I simply omitted inking Mimi before stamping.


I drew a separate signpost which I then stamped with “hello friend” in black ink.  Layering different elements with dimensional foam added depth and gave me the chance to do one of my favorite things – fussy cut!


The glittery orange background is Summer Sun cardstock lightly distressed with Pumpkin Spice VersaMagic.  After adding the highlights, Champagne Dazzle VersaMark Ink was pounced directly from the ink pad onto the cardstock.  Sparkle embossing powder was sprinkled on top and heat set.  This is an easy and inexpensive way to make your own specialty cardstocks to match any project! 

Circle Nestabilities were used for the card base.  The bottom of the card was trimmed to emphasize the linear horizontal snow line and give the upper portion the added sense of a full, warm sun.  The circular die-cut on the back of the card was scored 1 inch from the top before the decorative orange die-cut was adhered.  This eliminated having a small folded crease at the top of the card.

A special thank you to CardMaker Magazine for featuring me "here" on their blog today as a part of their "Meet the Designer" series.

Thank you for all the smiles you share with me!  

Elizabeth

Supplies:
Penny Black Stamps: Bear Hug 4188K, Hello Friend 30-069
Penny Black Mix & Match Cardstock: Summer Sun 17-003
Copic Markers
Tsukineko: Onyx Black VersaFine, Pumpkin Spice VersaMagic, Champagne Dazzle VersaMark, Clear Embossing Powder, Sparkle Embossing Powder, Sponge Daubers
Spellbinders: Standard Circle Nestabilities
Dimensional Foam: 3M Scotch and 3-D Dots by EK Success

November 25, 2011

Christmas Tree Joy

A quick card using Penny Black’s cute holiday tree from “Around Christmas”.


In a previous post “here” I eliminated the tree from the design, while today’s card features the tree as the main focal point.


How to make this card:

Step 1: Create a 3 x 4 ¼-inch top-folded card.

Step 2: Score two horizontal lines on the bottom of a 2 5/8 x 4 7/8-inch piece of white cardstock and mat with a 2 ¾ x 4-inch piece of brown cardstock.  Attach the matted layers to the front of the card with dimensional foam.

Step 3:  Stamp Around Christmas in black pigment ink and heat emboss with clear powder.  Color the tree and trim.

Step 4:  Create a banner from white cardstock and stamp the sentiment in black ink.  Attach behind the star.

Step 5:  Using dimensional foam, attach the tree to the front of the prepared card and accent with gems and glitter.

Have a wonderful weekend,
Elizabeth

Supplies:
Penny Black Mix & Match Cardstock: Sticks & Stones 02-003
3M Scotch: Dimensional Foam Tape
Copic Markers
Mark Richards: Sticker Elements
Ranger: X-Mas Red Stickles, Star Dust Stickles
Tsukineko: Onyx Black VersaFine, Clear Embossing Powder