August 31, 2011

Ornamentally Designed

For the past several weeks, Penny Black has been showcasing all their latest designs from their 2011 Christmas Collection.

This week Mimi takes the spotlight.


The border was created from two die-cut scalloped rectangles that were spliced together to fit the length of the design.  Hand stitching, Crimson Red VersaFine distressing and Delicata Golden Glitz edging on white cardstock were combined for the next layer. 


For the patterned paper, Snow Scroll was stamped in VersaMark Watermark ink on white cardstock and heat embossed with clear powder to resist the Crimson Red VersaFine applied on top.  To add a bit of sparkle, crystal glitter was applied to the scrolls.


The original stamped hanger for the ornament was trimmed away and replaced with a heavy black thread.  A tip for adding stiffness to thread is to run it through candle wax.

Here is a peek at the inside of the card:


The ornament was stamped in black and heat embossed with clear powder.  After coloring and trimming the image, it was attached to red holographic thread wrapped around the card.


Enjoy viewing the Penny Black Blog here to see daily inspiration from all the designers and Mimi!

Have a colorful day,
Elizabeth

Supplies:
Penny Black Mix & Match Cardstock: Rose Garden 14-003
Tsukineko: Onyx Black VersaFine, Crimson Red VersaFine, Golden Glitz, VersaMark Watermark Ink, Jumbo Sponge Dauber, Clear Embossing Powder
Ranger: Crystal Stickles
Copic Markers
3M Scotch: Dimensional Foam
Tombow: Stamp Runner Permanent Adhesive
Spellbinders: Sm. Classic Scallop Rectangles (S4-131)
Sulky: Holographic Thread

August 29, 2011

Wonderfully White

There is something about working with layers of white that I love.  The fresh and crisp way it spotlights an image always makes me smile.


These are some of my favorite ways to incorporate texture and dimension when working with predominantly white cards:
  • Dry embossing designs on cardstock layers.
  • Placing dimensional foam between layers.
  • Hand-knotting white ribbons. 
  • Rounding corners on cardstock layers to add visual interest
  • Mixing white cardstocks from different manufacturers with each other.  No two whites are alike and this can lend interesting hue variations.
  • Incorporating crystal or off-white glitters to add sparkle.
Wishing you a day filled with things that make you smile!

Elizabeth

Supplies:
Provo Craft:  Swiss Dots Embossing Folder
Tsukineko: Onyx Black VersaFine, Clear Embossing Powder
Copic Markers
Ranger: Crystal Stickles
Offray: White satin ribbon
3M Scotch:  Dimensional Foam

August 26, 2011

Vintage Sleigh Bells

Hello and Happy Friday!

Today I am hosting the Penny Black Blog with this elegant vintage card using the new Sleigh Bells Ring wood-mounted stamp.


By combining both dry embossing and resist distressing on white cardstocks, rich colors and texture were obtained.


The dry embossed snowflakes were made with a Spellbinders Impressability.  After lightly inking the raised design, they were accented with Crystal Stickles.

The lower portion of the card is a separate piece of white cardstock that was stamped with Sleight Bells Ring in VersaMark Watermark ink and heat embossed with clear powder.  A random application of distress inks were then applied over the heat embossed design.  A damp towel or baby wipe are great for removing any inks that may be on the embossed image.  After matting this to a small piece of black cardstock it was attached to the front of the card with dimensional foam.


Another one of my stamping favorites are circular designs.  When I saw this sentiment in the transparent Let It Snow set my mind went into overdrive with all the things I would like to design with it.

Here the image was stamped twice on white cardstock.  Once with Crimson Red then again with Onyx Black.  Both were heat embossed with clear powder.  While the red design was “fussy” cut by hand, the black inner design fit perfectly in a 1 ½” circle punch.  Holding the punch upside-down allowed the image to be adjusted and centered for an even cut.  The smaller “date” circle is a die-cut using the smallest round standard circle from the large Spellbinders set.  Kate Text was used to personalize the month and date.  This fabulous upper-case alphabet font also contains numbers!  A little more distress ink was added to coordinate with the project and then it was attached with dimensional foam.

If you would like to enter your *new* Penny Black stamped card in an elegant style, upload your entry into their Gallery by Midnight Sunday night, PST.  Be sure to tag your elegant card with “pennyblackelegant”.  A random winner will be chosen to win Penny Black stamps and announced on Penny Black's Blog next Tuesday.  Good luck!  

Have a wonderful weekend,

Elizabeth

Ranger: Antique Linen, Fired Brick, Concord Grape, Peeled Paint Distress Inks; Cut ‘n Dry Foam; Crystal Stickles, Super Fine Detail Clear Embossing Powder
Tsukineko: Onyx Black and Crimson Red VersaFine Inks
Spellbinders: Snowflake Impressabilities (12-1003), Standard Circles Large (S4-114)
3M Scotch:  Dimensional Foam Tape
Other: Black Button, Crystal Gem

August 24, 2011

In My Heart & Thoughts

This sentiment from Penny Black's transparent Valentine set called “Hugs!” is one of my favorites.  It can be used for so many different occasions and with different styles of stamps.

Today I paired the greeting with one of their new elegant holiday designs called “Winter Sky”.


Blended inks are great backgrounds for silhouette images. 

These are the quick steps I used to create this card:

  • Create a 3 ½ x 4 5/8-inch white card with a left-side fold and distress the edges with Antique Linen ink.  Set aside.
  • Cut a 3 ¾ x 4 ¼-inch piece of white cardstock and blend inks on top starting with the lightest and working down toward the darkest. (Thatched Straw, Mango Madness, Red Magic VersaMagic)
  • Stamp “Winter Sky” and the sentiment with black ink and heat emboss with clear powder.
  • Trim a 5/8-inch strip from the right side.  Cut this strip in half and attach the two pieces to the front of the card ¾-inch from the bottom edge.  One piece on the left and one piece on the right.  This will give the illusion of a full band once the card is finished.
  • Mat the stamped art with a 3 ¼ x 4 3/8-inch piece of black cardstock and attach to the front of the prepared card with dimensional foam tape.
Be sure to visit the Penny Black Blog to see additional inspiration using their new elegant stamps and enter their weekly challenge!

I will have another elegant design with a vintage flair to share with you on Friday.....

Smiles,
Elizabeth


Supplies: 
Penny Black Stamps:  Winter Sky 4204L, Hugs! 30-020
Tsukineko:  Onyx Black VersaFine; Mango Madness, Red Magic, Thatched Straw VersaMagic Inks; Sponge Daubers, Clear Embossing Powder
Ranger:  Antique Linen Distress Ink
3M Scotch:  Dimensional Foam Tape

August 22, 2011

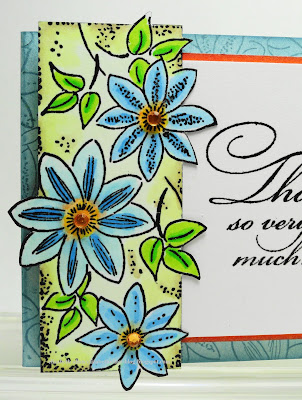
Thank You So Very Much!

Each time I create a thank you card it is a reminder of how blessed I am that someone bestowed a beautiful act of kindness upon me.


One technique that I like to use frequently is to create a background design with the same stamp used for the focal image.  You are always guaranteed a match!


Besides the orange used to mat the sentiment, everything else utilizes white cardstock.

Card Instructions:

  • Create a 2 ¾ x 4 ¼-inch side-folded card from white cardstock.
  • Blend blue ink around the edges then stamp the flower design on top with the same ink.
  • Stamp sentiment on a 2 ¼ x 3 1/8-inch piece of white cardstock with black ink and heat emboss with clear powder.
  • Mat with a 2 3/8 x 3 ¼-inch piece of orange cardstock.  Adhere to the front of the prepared card with dimensional foam.
  • Using the same floral image inked in black, stamp on white cardstock and heat emboss with clear powder.  Color image and trim.
  • Attach the image to the left side of the sentiment with double-sided adhesive and accent the flowers with rhinestones.
Thank YOU so very much for your visits and lovely comments.

With appreciation,
Elizabeth

Supplies:
Penny Black Mix & Match Cardstock:  Fall Festival 16-001
Tsukineko:  Onyx Black VersaFine, Aegean Blue VersaMagic, Clear Embossing Powder, Sponge Dauber
Copic Markers
Kaiser Craft:  Rhinestones
3M Scotch:  Dimensional Foam Tape

August 19, 2011

"Just For You" Gift Tag

If you have fallen in love with the Fashion Girls from Penny Black you will be excited to hear that they have added three new holiday designs that are featured in the Christmas Collection 2011.

The Penny Black designers have been creating divine projects all week with these fashionable girls "here".  Today I am hosting the Penny Black blog with this holiday gift tag which could also be incorporated into a greeting card.


The music background is stamped in a new gold ink called Delicata Golden Glitz by Tsukineko.  This ink is now my favorite for gold.  It is bright and sparkly and doesn’t appear brassy. 


A little accent that is hard to detect in the photo is flocking added to the boots and jacket.  I also made the jacket buttons a little bigger and shinier with a black Glaze pen.

I’ve included my detailed instructions below if you would like to read more about how I created the patterned background and the specific measurements of the project.

Detailed Instructions:

  • Cut a 2 1/8 x 4 7/8-inch piece of white cardstock and ink the edges with Gingerbread VersaMagic.  Set aside.
  • Stamp Fashion Delivery on white cardstock with black ink and heat emboss with clear powder.  Color with Copics and trim the image.  Accent the jacket and boots with white flocking and embellish the buttons with a black Glaze Pen.  Set aside to dry.
  • Stamp Music Background in Golden Glitz on a 2 x 4 ¾-inch piece of white cardstock. 
  • Using ink daubers, blend in Thatched Straw, Aloe Vera, Pink Grapefruit and Red Magic VersaMagic inks in the order listed. 
  • Edge the distressed piece with a black Copic marker.
  • Lay the trimmed fashion girl on top of the distressed cardstock to determine the best fit for the sentiment.  Remove the trimmed piece and stamp the sentiment with black ink and heat emboss with clear powder.
  • Attach a die-cut slider to the back of the stamped piece letting the tab of one end extend beyond the edge to create a ribbon hanger.
  • With dimensional foam, adhere the piece to the prepared tag base.
  • Attach the trimmed Fashion Girl also with dimensional foam.
  • Tie a pretty bow to the top of the tag.  Hint:  Attach tags with bows to gifts with fishing line.  It makes it easy to leave the bow intact after being removed from the present.
If you are like me and can’t wait until Christmas to use this stamp, simply change the colors of the Fashion Girl’s outfit and make a birthday greeting!

Enjoy,
Elizabeth

Tsukineko: Onyx Black VersaFine, VersaMagic: Aloe Vera, Pink Grapefruit, Red Magic, Thatched Straw; Delicata Golden Glitz; Clear Embossing Powder; Jumbo Sponge Daubers
Offray: Pink Sheer Organdy Ribbon
3M Scotch:  Dimensional Foam
Doodlebug Designs: Crushed White Velvet Flock
Provo Craft: Sliders (37-1215)
Sakura: Black Glaze Pen

August 17, 2011

A Sweet Surprise

This birthday wish was made especially for my “mother-in-love”.  An endearing term I use to show my affection for her.

You may recognize this fashion girl, “Sweet Surprise”, from the 2011 Touch of Whimsy collection.


For part of the background I used a Penny Black Christmas sticker (Joy to the World 10-197) upside down!  Rotating the sticker positioned the ornate border along the left side giving balance to the design while also providing a fun base.  The remaining portion of the sticker, including the holiday sentiment, was trimmed away.

This is how I created the layers:
  • Create a 3 3/8 x 4 ½-inch card base from clear skies cardstock.
  • Cut a 3 x 4 1/8-inch piece of white cardstock and randomly apply Thatched Straw, Key Lime and Pink Grapefruit VersaMagic inks.
  • Mat with a 3 1/8 x 4 ¼-inch piece of white cardstock and adhere to the front of the prepared card.
  • Place the sticker on white cardstock, trim and apply to the front of the card with dimensional foam.
  • Stamp “Sweet Surprise” on white cardstock with black ink and heat emboss with clear powder.  Color and trim the image.  Attach to the card with dimensional foam.
  • Add a sentiment of your choice and accent the cake with glitter glue.

Thank you for visiting,

Elizabeth

Penny Black Stamps:  Sweet Surprise 4162K, Make A Wish 30-052 (sentiment)
Penny Black Stickeroos:  Joy to the World 10-197
Penny Black Mix & Match Cardstock:  Clear Skies 10-003
Copic Markers
Tsukineko: Onyx Black VersaFine; Thatched Straw, Key Lime, Pink Grapefruit VersaMagic; Sponge Daubers
Ranger:  Crystal, Yellow Stickles; Super Fine Detail Clear Embossing Powder
3M Scotch:  Dimensional Foam Tape

August 15, 2011

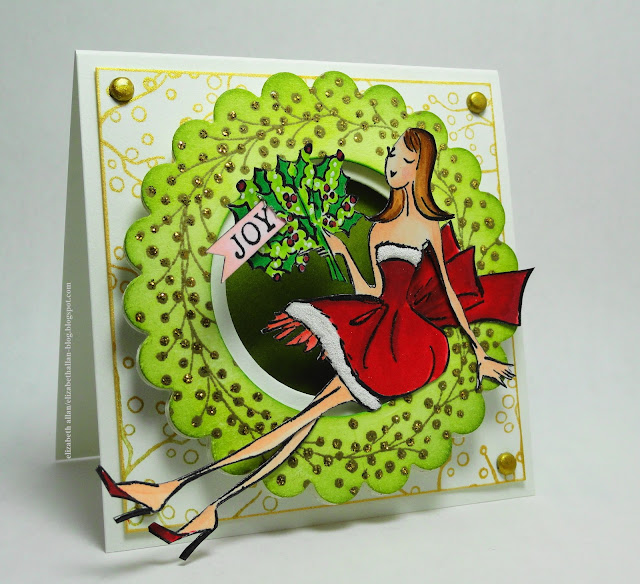
A Fashionable Wreath

The Fashion Girls from Penny Black are back with all new poses for their 2011 Christmas appearance.


I must admit that I did a little surgery on this stylish girl.  This is the original image:


Fashionably Wrapped 4212L

The present was left out as I wanted to have her sitting on that spectacular Berry Wreath, but you will also notice that I did some reconstructive positioning of her leg!  The new angle worked much better with the card design.


I’ve included the detailed instructions for today’s card if you would like to read more about how this piece was created. 
  • Create a 3 ½” square top-fold card base from heavy-weight watercolor paper.
  • Cut a 3 ¼” square piece of heavy-weight watercolor paper and stamp Twinkling with Delicata Golden Glitz Ink.  Also edge the piece with the same ink.  When dry, insert a gold brad in each corner.  Tip:  If you happen to be out of gold brads as I was, color pewter brads with Gold StazOn ink.
  • Adhere the decorative mat to the prepared card.
  • Stamp Berry Wreath on heavy-weight watercolor paper with VersaMark Watermark ink and heat emboss with gold powder. Die-cut the image using Spellbinders scalloped and standard circles.
  • Apply several tones of green Memento ink for shading.
  • Layer the wreath with dimensional foam on a second die-cut that has a smaller interior circle removed then lastly layer on a circle die-cut from fern green cardstock.  Adhere to the front of the prepared card with double-sided adhesive.
  • Accent the berries with gold Stickles. 
  • Stamp fashion girl on white cardstock, color and trim.  Make a small slit in the holly bouquet to insert the “Joy” sentiment. (This sample has a bow that was added separately.)
  • Attach image to the wreath.  Hint:  As an alternative to using flocking on the dress, glue can be applied to sections with an application of white embossing powder sprinkled on top (do not heat set).

You will also be able to see daily “fashion” designs with these gorgeous divas on the Penny Black Blog all this week.

If you find you have an image that just needs a little tweaking to fit with your design, don’t be afraid to “doctor” it up.

Happy stamping,
Elizabeth

Penny Black Mix & Match Cardstock:  Fern Green 05-003
Canson: 140 lb. Watercolor Paper
Copic Markers
Making Memories: Pewter Brads (colored with Gold Metallic StazOn)
Ranger: Golden Rod Stickles
Spellbinders:  Classic Scallop Circles Lg (S4-124), Standard Circles Sm (S4-116) and Lg (S4-114)
Tsukineko: Delicata Golden Glitz Ink: Onyx Black VersaFine; New Sprout, Pear Tart, Bamboo Leaves Memento Inks; Gold Metallic StazOn; VersaMark Watermark Ink; Clear Embossing Powder; Gold Embossing Powder; White Embossing Powder; Jumbo Daubers
3M Scotch:  Dimensional Foam Tape

August 12, 2011

Nature's Best

This week on the Penny Black blog the designers have been contributing holiday cards with a “nature” theme using new stamps from the Christmas Collection 2011.

Today I am hosting the blog with this design….


These are a few close-up pictures of the elements on the card that can be used for visual reference with the detailed instructions given at the end of this post.

Water coloring done with Staedtler-Mars watercolor crayons.  Berries accented with a red Glaze pen.


A hand-cut window is elevated and reveals a distressed holiday sentiment.


Create a unique embellishment by altering an ordinary white button.

Instructions:
  • Create a 3 ½ x 4 ½-inch card and round the corners in the upper left and lower right.  Set aside.
  • Cut a 3 ½ x 4 ½-inch piece of fall festival cardstock and round the upper left and lower right corners.  Stamp Warm Wishes background on the front with Crimson Red VersaFine and distress the piece with the same color ink.
  • Cut a 1 ¾ x 2 ½-inch window in the cardstock.  This sample was done by hand, but a die-cutting machine is an alternate method.
  • Lay the cardstock with the window on top of the prepared card base.  Lightly trace the window with a pencil and remove the cardstock.
  • Stamp the sentiment inside the traced window with black ink and heat emboss with clear powder.   Erase all pencil lines and then add a bit of Toffee VersaFine ink around the verse for highlight.
  • Color a white button with a Copic marker.  Stamp the postage design on top of the button with Jet Black StazOn.  Distress the twine with Toffee VersaFine ink.  Thread the twine through the button and secure the ends on the right to the back of the cardstock with tape.  Secure the button in position with dimensional foam and leave the ends of the twine on the left loose.
  • Attach the cardstock to the front of the card with dimensional foam.
  • Stamp Nature’s Best on watercolor paper with black ink and heat emboss with clear powder.  Color the images using watercolor crayons, trim and layer on the card with dimensional foam.
  • Accent the berries with a Red Glaze Pen.

All these stamps will be available at the end of August from Penny Black’s on-line store or can be pre-ordered from a retailer near you.

Don’t forget to use all these wonderful designs throughout the year.  Today’s little bird would be fantastic on any type of card and the background stamp is so versatile.

Have a great weekend,
Elizabeth

Supplies:
Penny Black Stamps: Nature's Best 40-076, Warm Wishes 40-074World Peace 3532H, Flowers & Wishes 30-047
Penny Black Mix & Match Cardstock:  Fall Festival 16-003
Canson:  Watercolor Paper
Tsukineko: Onyx Black VersaFine, Crimson Red VersaFine, Toffee VersaFine, Jet Black StazOn
Sakura: Red Glaze Pen
Staedtler-Mars Ltd.:  Watercolor Crayons
White Button, Twine


August 10, 2011

Christmas Everyday!

With all the excitement about the new holiday stamps, I am still enjoying the summer days of August.  In Michigan the winters can be long so I savor all the warm temperatures I can.

However, that doesn’t mean it can’t be Christmas everyday!  I’m tucking in a few of those new gorgeous holiday designs into an all occasion greeting.


I used three stamps.  Can you tell which ones are in the new Penny Black Christmas Collection 2011?


The holiday stamps are Warm Wishes (line background) and Floral Story (flower).  If you clicked on the link for the flower you will notice that I made an adjustment to the leaves and eliminated the background design.


The sentiment and floral design on the handmade paper are from the transparent set called Illuminations.  Making an abstract paper design is quick and easy.  By blending different inks on a piece of white cardstock and then overstamping a given design in the same colors, depth and contrast can be achieved.

Don't let theme specific stamps limit your creativity.  Enjoy using your Christmas designs throughout the year.

Have a wonderful day,
Elizabeth

Supplies:
Penny Black Mix & Match Cardstock:  Sticks & Stones 02-002, Forest Glen 07-003 
Canson:  Watercolor Paper
Tsukineko: Onyx Black, Olympia Green VersaFine; Thatched Straw, Aloe Vera, Pink Grapefruit, Gingerbread, Red Magic VersaMagic; Clear Embossing Powder, Sponge Daubers
3M Scotch:  Dimensional Foam Tape
Staedtler-Mars:  Marsgraphic Watercolor Markers

August 8, 2011

Holiday Color Toss Up

When making your holiday greeting cards do you use traditional colors or do you tend to go outside the box and mix things up with contemporary hues? 

With this question in mind, I decided to create two cards using the same design, but in different color themes with stamps from Penny Black's new Christmas Collection 2011.  I thought it would be fun to show how one layout could be used either way.


The first card uses the more traditionally recognized colors of the season – red and green.  


The second card is what I am affectionately calling my “Dr. Seuss” theme.


Both cards have backgrounds stamped with Circles & Lines in VersaMark Watermark ink and heat embossed with white powder.  The dots were then accented with Crystal Stickles.  The decorative bands behind the wreaths were stamped with Retro Pattern.

Each wreath was stamped in Olympia Green VersaFine and heat embossed with clear powder.  Color was added with Copic markers and X-mas Red Stickles was used to embellish the dots. 

The ink/cardstock combinations for each card have been listed in the supply list below for easy reference.

After seeing the two versions side-by-side, which category are you drawn to?

Have a happy day full of color,
Elizabeth

Supplies:
Penny Black Mix & Match Cardstock:
Tsukineko:
VersaMark Watermark Ink (Backgrounds – both cards)
White Embossing Powder (Both Cards)
Olympia Green VersaFine (Wreath heat embossed with clear powder – both cards)
Onyx Black VersaFine (Sentiment heat embossed with clear powder - both cards)
Card 1: Distressed with Crimson Red VersaFine / Retro Pattern stamped in Olympia Green VersaFine
Card 2: Distressed with Spring Pansy VersaMagic / Retro Pattern stamped in Bahama Blue Memento
Copic Markers
Offray Ribbons
Ranger: Crystal, X-Mas Red Stickles
3M Scotch:  Dimensional Foam (between the wreath and band & the band and card base)