June 22, 2011

Happy "Triangle" Banner (Day 2 of 3)

Welcome back for my second day of “triangle” themed cards for Penny Black.  While yesterday’s post focused on the card shape, today’s card demonstrates how this geometric form can be used to create a little banner.


Thread tubes made from paper were attached to the back of each letter.  This made it easier to string the flags and space them evenly.    


A heavy-weight carpet thread distressed with ink
was used for the string.


A wrapped platform was made for the party goers.  This application hides the dimensional foam and gives the elevated artwork a finished edge.  You can see how this is done "here".

The last little touch was a small bit of yellow Stickles to the candle flame.

Here are a few quick measurements for this card:
Brown Card Base: 3 3/8 x 4 3/8
Yellow Mat: 3 ¼ x 4 ¼
Blue Mat: 3 1/8 x 4 1/8
White Mat:  3 x 4 (Distressed with Faded Jeans)
Banner Flags:  ¾ x ¾ (Distressed with Spiced Marmalade)
Dimensional Foam Under: Banner, Platform and Cute Critters

Tomorrow’s card takes a turn toward a contemporary design for my last triangular feature.   

Have a great day,

Elizabeth

Supplies:
Penny Black “Mix & Match” Cardstock:  Sticks & Stones 02-003, Clear Skies 10-003, Summer Sun 17-002
Canson: 120 lb. Watercolor Paper
Tsukineko:  Onyx Black VersaFine
Tombow: Dual Brush Pens, Stamp Runner Permanent Adhesive
Ranger: Faded Jeans Distress Ink, Spiced Marmalade Distress Ink, Yellow Stickles
3M Scotch:  Dimensional Foam Tape
J & P Coats Dual Duty Plus Thread (Cream)

June 21, 2011

Trio of Triangles (Day 1 of 3)

This week I am designing for Penny Black and the theme is “triangles”.  Whether it is the shape of the card or a design element - anything goes!

Today I am focusing on one stamp image, Rock and Roll, to create three triangular cards.


The triangular card bases (2 ¾ b x 3 ¼ h) were created from Penny Black’s Mix & Match Cardstock.  White mats (2 ½ b x 3 h) were lighted distressed with Faded Jeans Ink and elevated with dimensional foam on the card bases.

“Rock and Roll” was stamped on watercolor paper with black ink and heat set with clear embossing powder.  The images were then water colored and trimmed.

The “Cute as A Button” set is wonderful for embellishments.  One stamped impression gives you lots of buttons to work with.  I set the extras aside and just grab a few whenever I need them.

More details on how to enter your art in this week’s Penny Black “triangle” challenge can be seen here.

I look forward to having you visit and see the 5 triangles used in tomorrow's card!

 
Elizabeth

Supplies:
Penny Black “Mix & Match” Cardstock: Clear Skies 10-002, Coral Reef 15-003
Canson:  140 lb Watercolor Paper
Tombow: Dual Brush Pens, Stamp Runner Permanent Adhesive
Tsukineko: Onyx Black VersaFine
Ranger: Super Fine Detail Clear Embossing Powder, Faded Jeans Distress Ink
3M Scotch:  Dimensional Foam Tape

June 16, 2011

Recipe Card Easel

This card is also an easel that can be used to display a recipe while cooking or baking.


The recipe card was created with a computer font and then I added the small house from the transparent Airmail set.


This bracket was inserted between the front and back panels to keep the easel sturdy, but it is still collapsible for mailing purposes.


Easel Card Instructions:
  • Place a 6 ¼ x 8 ½-inch piece of light forest glen cardstock horizontally and score vertical lines at ¾, 7/8 and 4 3/8.
  • Before folding, stamp Zen with VersaMark ink across the front panel (between the 7/8 and 4 3/8 scored lines) and heat emboss with white powder.
  • Fold on the scored lines to create the card with a small ledge.
  • Stamp Sweet Home on a ¾ x 6 ¼-inch piece of dark forest glen cardstock with black ink.  Attach across the small front panel of the easel.
  • Cut a 3/8 x 3 ½-inch piece of white cardstock and adhere to the right side of the easel as shown.
  • Edge the top and sides of the easel with Antique Linen Distress ink.
  • Stamp Flower Girl on white cardstock with black ink and heat emboss with clear powder.  Color and trim.  (Note:  In this sample the girl was colored with Copics.  To create soft, warm colors W0 and W1 markers were applied over portions of the colored image.)
  • Attach the girl with dimensional foam.  (Hint:  If mailing the card, omit the adhesive under the girl’s shoes so when the card is flattened it will not “buckle” the artwork since the small ledge needs to open and close.)
  • For the support bracket, cut a 2 x 4-inch piece of white cardstock and score at ½, 2 and 3 ½.  Place adhesive on the small tabs and secure between the panels toward the bottom edge.

This is also a fun design to hold a photograph or place on a writing desk for small notes.

For more inspiration using Slapstick stamps, visit the Penny Black Blog this week for great design team projects!

Next week I am the featured Penny Black design team artist and will be back on Tuesday with THREE cards for my first post.

Smiles,  
Elizabeth

Supplies:
Penny Black "Mix & Match" Cardstock:  Forest Glen 07-001 & 07-003
Tsukineko:  Onyx Black VersaFine, VersaMark Watermark Ink, White Embossing Powder
Ranger:  Antique Linen Distress Ink, Super Fine Detail Clear Embossing Powder
Copic Markers

June 13, 2011

Smile

When working on last Friday’s card, my eye caught an interesting image.  In the middle of the Sundial stamp is a wonderful little flower.


The shape and design were perfect for framing with a Reverse Wonky Rectangle.


Two additional hidden finds were from the transparents sets Touch of Whimsy (flower stems used for border stamping) and Xmas Snapshots (sentiment).


To be savvy with supplies and make the most out of paper scraps, I stamped the parts of the flower I needed using a homemade mini stamp press.

I attached a scrap of white paper to an acrylic block with temporary adhesive and pressed it into the inked stamp.  This made it very easy to lift the stamped image away from the stamp and the block provided a sturdy surface to press on while making the impression.  After removing the stamped image, I cleaned the over stamped design on the acrylic block with a damp paper towel.


For quick distressing, I started with a colored piece of cardstock and added highlights to match the card.

Detailed Card Instructions:
  • Die-cut three large Reverse Wonky Rectangles – two from white cardstock and one from light blue cardstock. (Note: For this sample, the 5th largest die was traced and then cut to provide the desired size.) 
  • Stamp flower stems around the perimeter of the light blue die cut with VersaMark Watermark ink and heat emboss with white powder.
  • Lightly add touches of Faded Jeans and Mustard Seed Distress inks.  Adhere to one of the white rectangles.  This will conceal any ink that may be on the back of the distressed piece.
  • Score a line 1 inch from the top of the second white rectangle and apply adhesive to the scored tab.  Adhere the decorative light blue cardstock to create the card base.  Add star dust stickles to the embossed design and set aside to dry.
  • Using the 4th largest rectangle, die cut one white and one light blue rectangle.  Using the same die, trace the outer edge on black cardstock and trim to create a slightly larger mat.
  • Die cut the center of the light blue rectangle with the 3rd largest die to create a frame and distress with Faded Jeans and Mustard Seed Distress Inks.  Add black dots with a Micron pen for embellishment.
  • Using the window as a guide for placement, stamp the sentiment on the white rectangle with black ink and heat emboss with clear powder.
  • Wrap a piece of ribbon around the card base and tie in a knot on the left side.
  • Mat the white rectangle with the black rectangle and adhere to the front of the card over the ribbon with dimensional foam.
  • Add dimensional foam to the back of the colored frame and place into position.
  • Stamp the flower and flower center with black ink and heat emboss with clear powder.  Color with Copics and trim.
  • Layer the center of the flower with dimensional foam.  Add additional foam to the entire flower and insert into the frame.

I hoped you enjoyed this smile from me to you - as you always share so many with me!

Have a great day,
Elizabeth


Supplies:
Penny Black “Mix & Match” Cardstock:  Storm 01-003, Clear Skies 10-001
Ranger: Faded Jeans Distress Ink, Mustard Seed Distress Ink, Star Dust Stickles
Spellbinders: Reverse Wonky Rectangles S4-307
Tsukineko: Onyx Black VersaFine, VersaMark Watermark Ink, White Embossing Powder, Clear Embossing Powder
Copic Markers
Sakura:  Black Micron Pen
3M Scotch:  Dimensional Foam Tape
Ribbon:  ½” wide Sheer Organdy

June 10, 2011

An Inside-Out Thank You

Happy Friday!

Today’s card is an “inside-out” design.  Instead of folding the cardstock with the color on the outside, I reversed the fold so the inside would provide a splash of color for the small front flap.


The decorative flap was created by stamping the flower off the edge of the fold and trimming around the petals. 


To keep the design clean and contemporary, the flower was left uncolored and two additional layers were added for embellishment.  The cardstock that was cut away from the front of the card was large enough stamp these center pieces.  Plus, the teal on the backside of the cardstock gives a reflective glow.

The background is the Paisley Outline stamped in turquoise ink.  I ran a black marker around the card to define the edges and frame the flower.  For added accents, white gel pen dots were added.  After the ink was dry, small black dots were placed in the centers of the dots.

This is one of those card designs which I like to make a few at a time without sentiments to tuck away.  It is so easy to add a greeting when you happen to need a card at the spur of the moment.  

Have a wonderful weekend….
Elizabeth

Supplies:
Penny Black “Mix & Match” Cardstock:  Sea Breeze 08-001
Tsukineko: Onyx Black VersaFine, Turquoise Gem VersaMagic
3M Scotch:  Dimensional Foam Tape
Sakura: White Gel Pen, Black Micron Pen

June 8, 2011

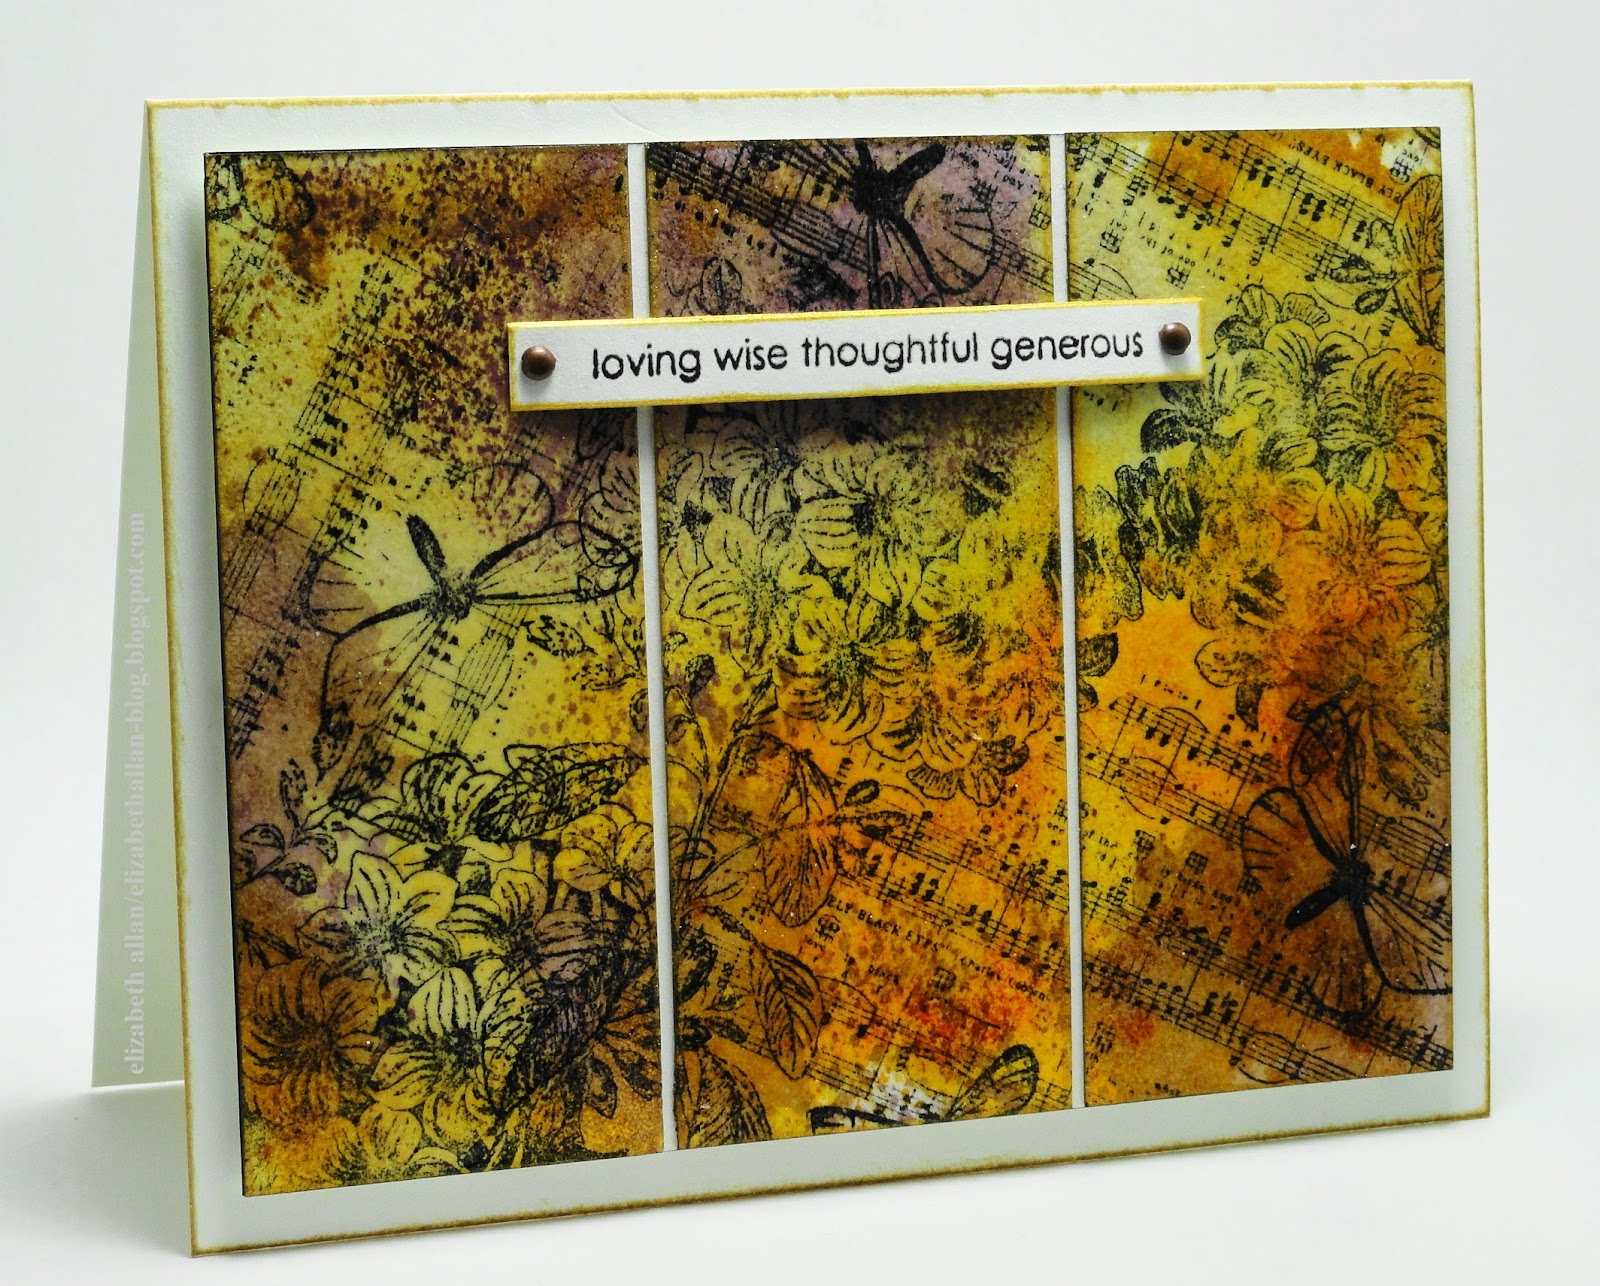
Inked Collage

Sometimes the random application of inks and stamping can yield a quick yet deceptively intricate card.


A few Distress Inks applied to a non-stick craft sheet and misted with water provided an instant palette of color to cover the stamped cardstock. 


To give the panels an elegant finish, they were pounced with VersaMark Watermark ink and heat embossed with clear powder.

Add an elevated sentiment with brads and you have a finished card!


Detailed Instructions
  • Randomly stamp Butterfly Suite on a 3 ½ x 4 ½-inch piece of watercolor paper with Jet Black StazOn ink.
  • Rub three colors of Distress Ink (Dusty Concord, Peeled Paint, Spicy Marmalade) next to each other on a non-stick craft sheet and mist with water.
  • Press the stamped artwork into the inks rotating after each impression to cover the surface.  A heat tool can be used to speed the drying time and also move puddles of ink into interesting patterns.
  • Cut into three panels.  Cover each panel with VersaMark Watermark Ink.   Sprinkle with clear embossing powder and heat set.  Edge each panel with Gold Metallic StazOn.
  • Mounting the panels to a 3 ½ x 4 5/8-inch piece of watercolor paper helps space the panels evenly and provides a single surface to apply the sentiment banner.
  • Stamp the sentiment with black pigment ink and heat emboss with clear powder.  Edge with gold ink.  Apply dimensional foam to the center of the sentiment and adhere to the panel.  Add a brad at each end through all the cardstock layers and secure.
  • Attach the artwork with dimensional foam to a 3 7/8 x 5-inch card base that has been edged in Antique Linen Distress Ink.

I can’t express enough how much I appreciate the time you spend with me!!  I hope you are inspired to “smoosh” some ink today.

Thank you for visiting,
Elizabeth

Supplies:
Canson 140 lb. Watercolor Paper
Tsukineko: Onyx Black VersaFine, VersaMark Watermark Ink, Jet Black StazOn, Gold Metallic StazOn
Ranger: Antique Linen Distress Ink, Dusty Concord Distress Ink, Peeled Paint Distress Ink, Spiced Marmalade Distress Ink, Super Fine Detail Clear Embossing Powder
3M Scotch:  Dimensional Foam Tape
Creative Impressions:  2 Micro Round Fasteners


June 6, 2011

Get Well Soon

Paper piecing and Tsukineko's "GooseBumps" were the perfect combination for this card.  It was so much fun using the clear texture spray on all the “rainy” elements.


Finished Size:  3.75 x 5.5

After coloring and trimming all the pieces, I laid them on a protective surface.  I find using old pages from an AT-A-GLANCE calendar are perfect for spraying projects.  The 22 x 16-inch size allows several items to be spread out at once with enough additional space to protect my work surface.

Here you can see the wonderful textural coating on the slicker and boots.


And some more on the hat and umbrella. 


Many of the pieces were bended before attaching them to the card to add extra dimension.  The hat is created from two layered pieces with a small bit of dimensional foam underneath.  A small slit along the bear’s ear helps to tuck the piece into place.

For the extra raindrops and puddles, I unscrewed the cap and used the wand to dab the areas I wanted extra water.

Have a great day! 
Elizabeth

Supplies:
Penny Black “Mix & Match” Cardstock: Summer Sun 17-003, Blue Lagoon 09-003
Tuskineko: GooseBumps, Onyx Black VersaFine, Clear Embossing Powder
Copic Markers
Blue Chalk (sky/rain)